Showing posts with label bakers twine. Show all posts

Thursday, May 8, 2025

Blast from the past - Biggest Wish

 Welcome to my blog

and  thank you for joining me today!

Happy Birthday Jim


Blast from the past Easy level - glueing on bakers twine, layering, stamping, 

Materials required for this card are:

Card Stock: basic gray, basic black (not seen)
Designer Series Paper: *well suited
Embossing Folders: exposed brick 3D
Ink: basic gray, poppy parade
Stamps: *biggest wish
Accessories: *bakers twine, *rhinestones basics
 * = no longer available

Start with a base card 14.5 x 21 scored at 10.5, black layer 14.1 x 10.1, dsp 3 x 10.1, 11.1 x 10.1, 3.3 x 6.7 (need 2)
  1. adhere the 3 x 10.1 piece down the left hand side of the black layer
  2. stamp the happy birthday and adhere this piece next to the other one
  3. add very small dots of glue down the lines of the dsp and attach the twine
  4. trim the 3.3 x 6.7 pieces to become triangles, then emboss using the folder
  5. attach the triangle's using dimensional pads
  6. add the rhinestones
  7. adhere to the base card using liquid glue
Hope you liked today's card. If you would like more information on how to make it, please don't hesitate to contact me, I'd love to hear from you.

If you wish to buy any of the items used, go to contacting me at the top of the page for details of how to order.
 
Will be back again soon with more cards, in the meantime take care and have a great day.
Annette 😊

Tuesday, July 23, 2024

Softly Sophisticated and more

 Welcome to my blog

and  thank you for joining me today!

Happy Birthday Anne


Bright and cheerful, using the new in colors and Cased from Sharon Berkert ("astheinkdries") - die cutting, dry embossing, layering, two step stamping

Materials required for this card are:

Card Stock: basic white, petunia pop
Dies: perennial postage (5)
Embossing Folders: softly sophisticated 
Ink: memento tuxedo black, mossy meadow, petunia pop, pretty in pink
Stamps: loveliest tree, *softly sophisticated
Accessories: *bakers twine, brushed brass butterflies
 
* = no longer available, when using layering dies (1) is the smallest
  1. Start with a base card 14.5 x 21 scored at 10.5, pp 10 x 14, bw 12.5 x 9.5
  2. dry emboss the background layer and adhere to the base card using liquid glue
  3. stamp the flowers across the white layer starting with the stems, then the lighter colour flowers followed by the darker colour (you should get 5)
  4. stamp the sentiment
  5. die cut this layer, and then add bakers twine using a double bow
  6. attach to the base card using dimensional pads
  7. finish off by adding the butterflies.
Hope you liked today's card. If you would like more information on how to make it, please don't hesitate to contact me, I'd love to hear from you.

If you wish to buy any of the items used, go to contacting me at the top of the page for details of how to order.

Will be back again soon with more cards, in the meantime take care and have a great day.
Annette 😊 

Saturday, June 29, 2024

Sentimental Park Bundle 2

  Welcome to my blog

and  thank you for joining me today!

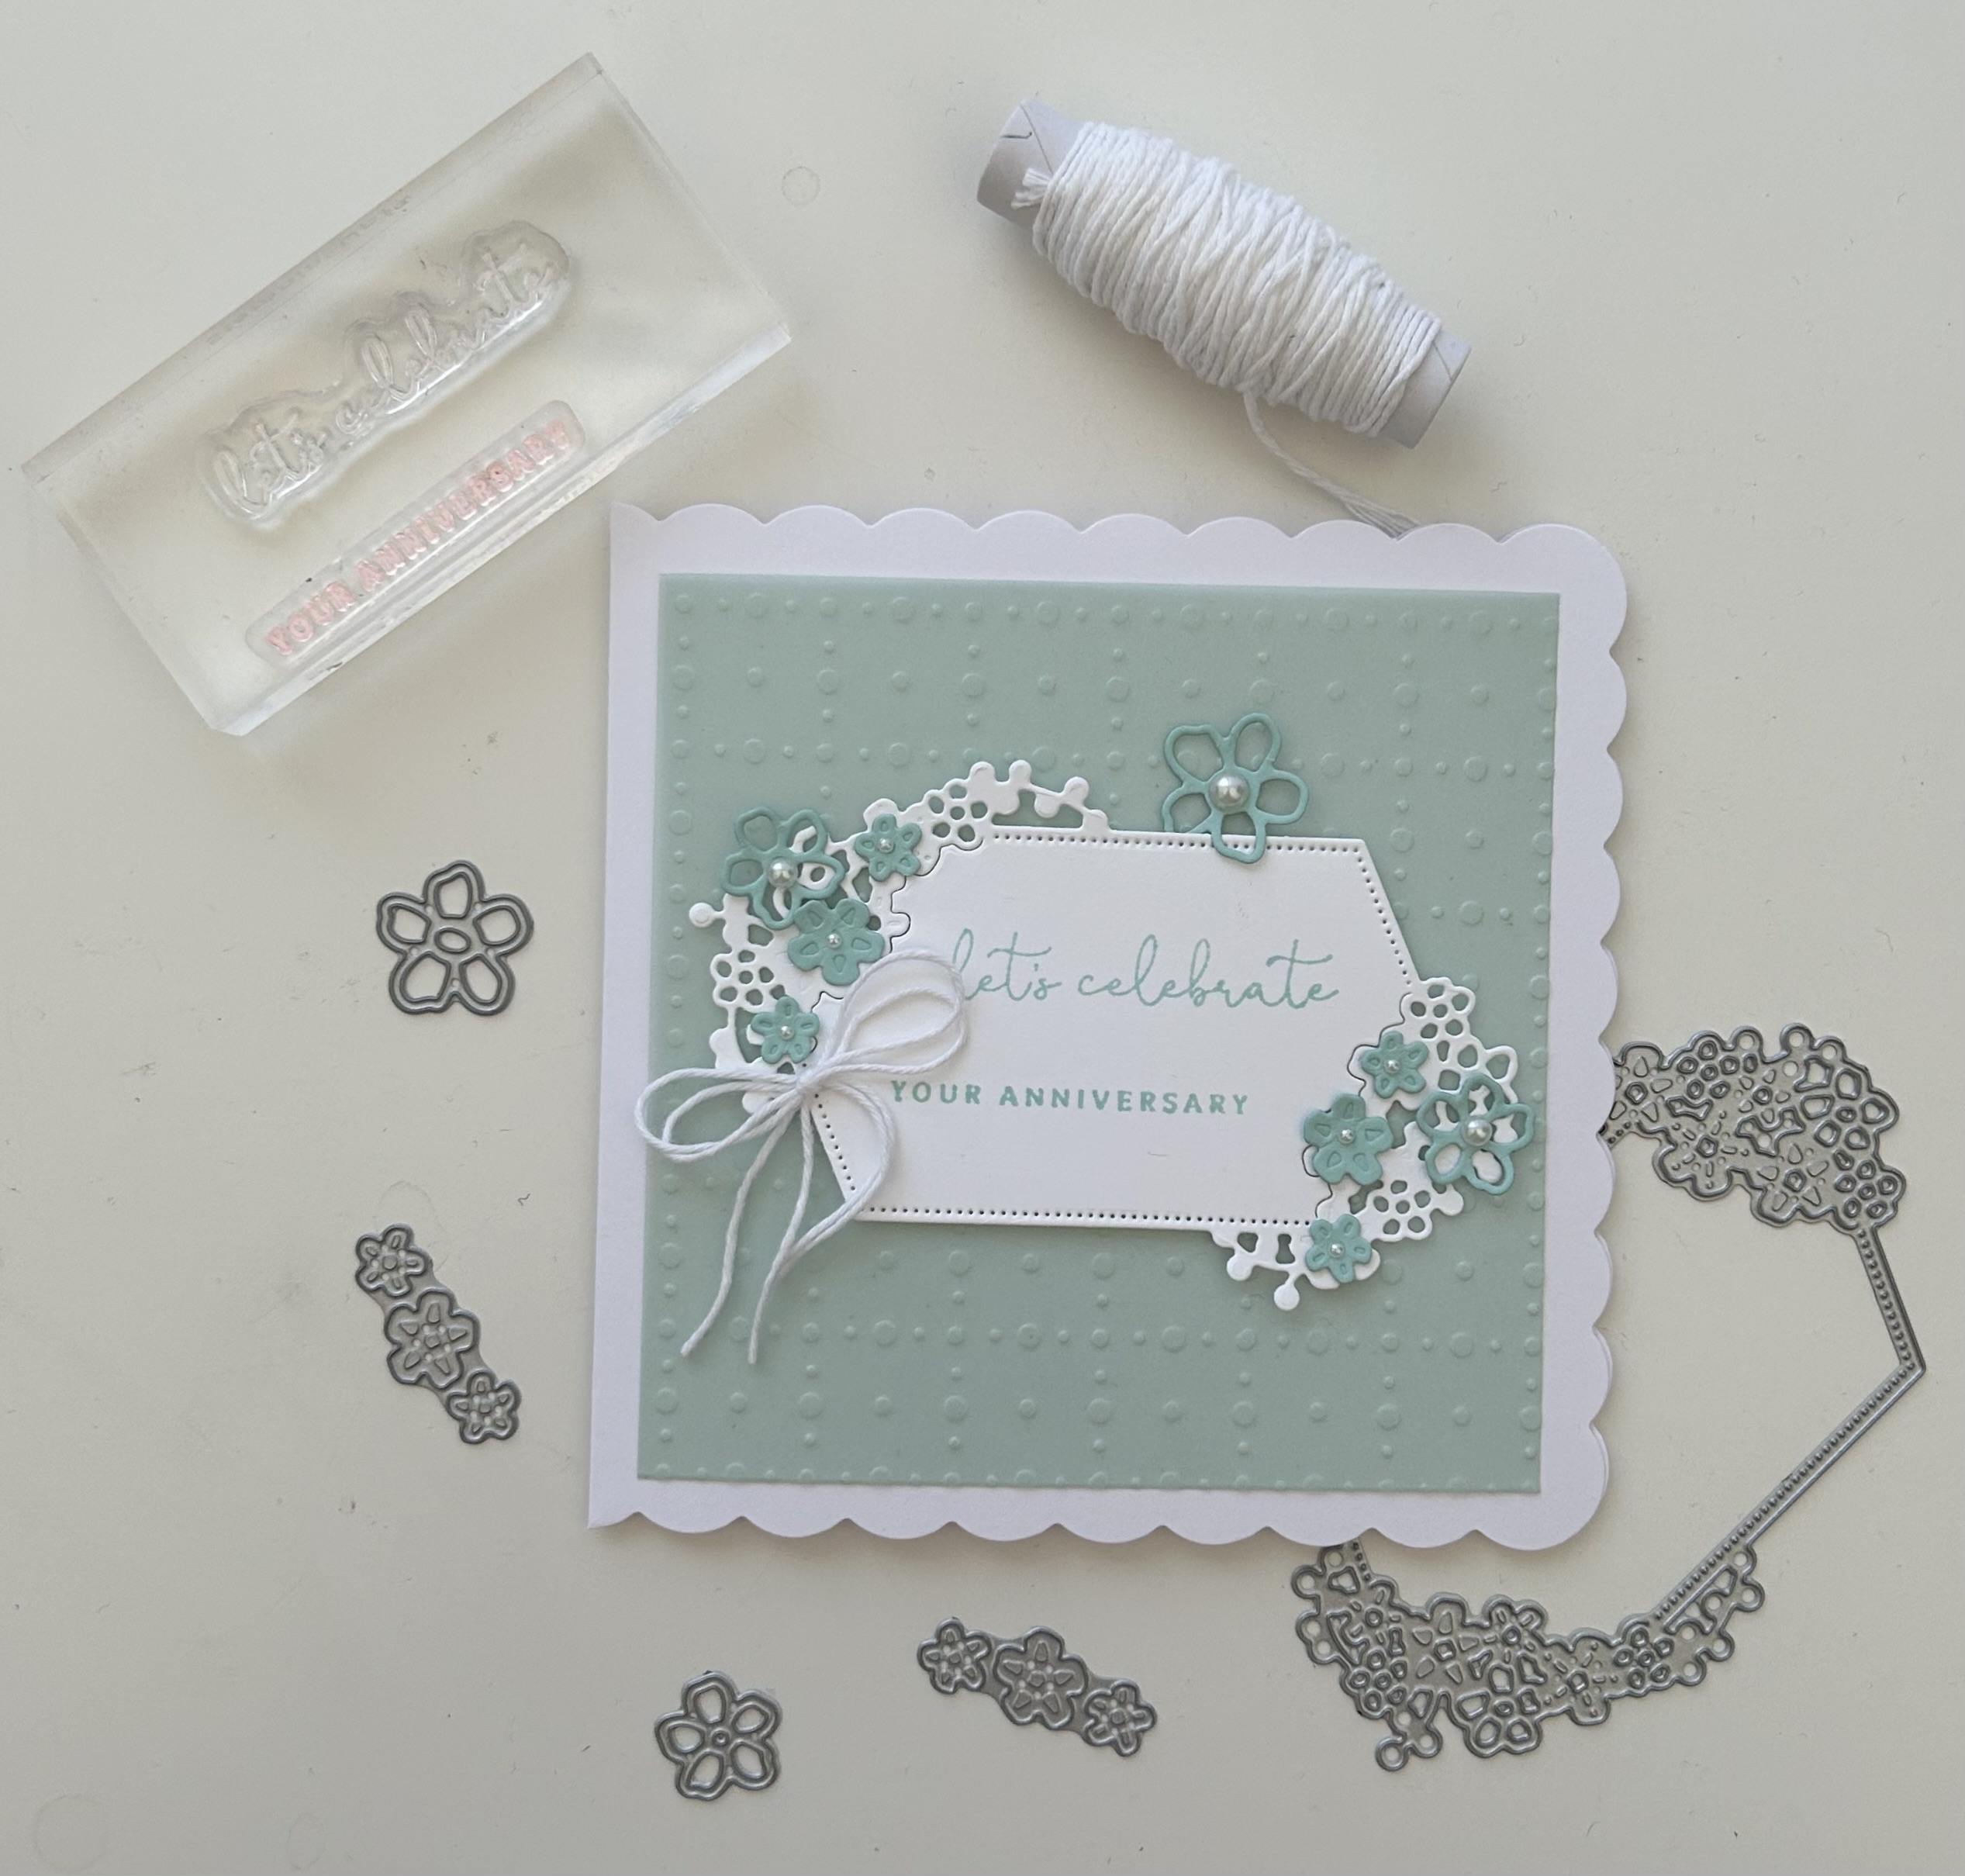
Happy Anniversary Jenny & Leigh


Easy - die cutting, layering, stamping

Materials required for this card are:

Bundles: sentimental park
Card Stock: basic white, pool party
Designer Series Paper: *so very vellum
Ink: purple posy
Accessories: bakers twine, *basic pearls

* = no longer available
  1. Start with a base card 12.5 x 25 scored at 12.5, vellum 11 x 11, white 7 x 11, purple posy 7.5 x 4, bakers twine 30cm
  2. adhere the vellum to the base base using stampin' seal behind where the image will go
  3. die cut the rectangle and flowers
  4. stamp the sentiment 
  5. attach the sentiment using dimensional pads
  6. use a scoring tool to give the flowers a little dimension
  7. attach them to the sentiment using glue dots
  8. add the pearls 
  9. create a double bow and attach using a glue dot
Hope you liked today's card. If you would like more information on how to make it, please don't hesitate to contact me, I'd love to hear from you.

If you wish to buy any of the items used, go to contacting me at the top of the page for details of how to order.

Will be back again soon with more cards, in the meantime take care and have a great day.
Annette 😊 

Thursday, June 27, 2024

Sentimental Park Bundle

 Welcome to my blog

and  thank you for joining me today!

Happy Anniversary Ste & Sere


Easy - die cutting, layering, stamping

Materials required for this card are:

Bundles: sentimental park
Card Stock: basic white, pool party
Designer Series Paper: *so very vellum
Ink: pool party
Accessories: bakers twine, *basic pearls

* = no longer available
  1. Start with a base card 12.5 x 25 scored at 12.5, vellum 11 x 11, white 7 x 11, pool party 7.5 x 4, bakers twine 30cm
  2. adhere the vellum to the base base using stampin' seal behind where the image will go
  3. die cut the rectangle and flowers
  4. stamp the sentiment 
  5. attach the sentiment using dimensional pads
  6. use a scoring tool to give the flowers a little dimension
  7. attach them to the sentiment using glue dots
  8. add the pearls 
  9. create a double bow and attach using a glue dot
Hope you liked today's card. If you would like more information on how to make it, please don't hesitate to contact me, I'd love to hear from you.

If you wish to buy any of the items used, go to contacting me at the top of the page for details of how to order.

Will be back again soon with more cards, in the meantime take care and have a great day.
Annette 😊 
Tuesday, May 21, 2024

Beautiful Balloons meets Patchwork Pieces

Welcome to my blog

and  thank you for joining me today!

Happy Birthday Leigh


Something Different for me -  die cutting, dry embossing, layering, paper piecing, stamping

Materials required for this card are:

Card Stock: basic white, pretty peacock
Designer Series Paper: tartan foil
Dies: deckled circles (3,4), patchwork pieces 
Embossing Folders: timber 3D
Ink: pretty peacock
Stampin' Blends: pretty peacock
Stamps: beautiful balloons
Accessories: bakers twine white, *noble peacock rhinestones
 
* = no longer available, when using layering dies (1) is the smallest
  1. Start with a base card 10.5 x 29 scored at 14.5, dsp 8.5 x 12.1 (you need one of each side), pretty peacock 8.5 x 12.1, white off cut for hb, white rectangle 14.5 x 10.5
  2. dry emboss the white rectangle and adhere it to the base card using liquid glue
  3. colour the bakers twine using the blend pen and put to one side to dry
  4. die cut the two pieces of dsp using the patchwork pieces
  5. cut another piece of white card 11.6 x 8, now adhere the alternate pieces using  liquid glue
  6. die cut the larger circle from the middle of pretty peacock rectangle
  7. adhere the patchwork layer to the pretty peacock rectangle using liquid glue
  8. attach the pretty peacock layer to the base card using dimensional pads
  9. stamp the sentiment and die cut it
  10. attach to the larger circle using dimensional pads, then adhere to the base card using liquid glue
  11. wrap the bakers twine around the spine of the card and tie a bow
  12. add the rhinestone to the sentiment to top the i.
Hope you liked today's card. If you would like more information on how to make it, please don't hesitate to contact me, I'd love to hear from you.

If you wish to buy any of the items used, go to contacting me at the top of the page for details of how to order.

Will be back again soon with more cards, in the meantime take care and have a great day.

Annette 😊  

Thursday, September 1, 2022

Linen Speciality Paper meets Nature's Prints and more

  Welcome to my blog

and  thank you for joining me today!

Happy 4th Anniversary to Alison & Rob


As the 4th anniversary is linen i incorporated it into the background, and used only 3 colours for this card. Also there is both dry and heat embossing used.

Materials required for this card are:

Card Stock: gray granite, very vanilla
Designer Series Paper: linen
Dies: deckled rectangles (6), natural prints
Embossing powder: clear
Embossing Folders: bricks & mortar 3D, fern 3D
Ink: blushing bride, versamark
Punches: lovely labels
Stamp Sets: * express yourself, *love & happiness, nature's prints
Accessories: *bakers twine, *polished dots
  • Emboss the first layer using the bricks & mortar folder, then adhere to base card.
  • Emboss the linen using the fern folder, remove backing and adhere to card.
  • Stamp and die cut the flower elements and attach to card using dimensionals.
  • Make two banners using the punch, one narrow and one not so narrow.
  • Use the banners for the sentiments, double load the stamp with versamark and blushing bride before stamping and adding the embossing powder.
  • Add a polished dot to the centre of the flower, then a bow to the stems.
  • It sounds a lot, but once stamped and die cut it's easy to put together 
* = no longer available, when using layering dies (1) is the smallest.

Hope you liked today's card. If you would like more information on how to make it, please don't hesitate to contact me, I'd love to hear from you.

If you wish to buy any of the items used, go to contacting me at the top of the page for details on how to order.

Will be back again soon with more cards, in the meantime take care and have a great day.
Annette 😘

Monday, October 25, 2021

Biggest Wish & In Good Taste

 Thank you for joining me today!

Happy Birthday Jack


Another one for the boys in your life, it's a quick and simple card to do, but with a little bit of fussy cutting (not my favourite thing to do).

Materials required for this card are:

Card Stock: basic white thick (card base), basic white
Designer Series Paper: in good taste
Ink: balmy blue, night of navy, pacific point, smoky slate 
Stamp Sets: biggest wish, *goal, *make a difference  
Accessories: *bakers twine, stamparatus
* = no longer available

Hope you liked today's card. If you would like more information on how to make it, please don't hesitate to contact me, I'd love to hear from you.

If you wish to buy any of the items used, go to contacting me at the top of the page for details on how to order.

Will be back again soon with more cards, in the meantime take care and have a great day.
Annette 😘

Friday, September 3, 2021

Card With No Stamping

 Thank you for joining me today!

Happy Birthday Stuart!


As the title say's no stamping, with just die cutting, this is what you can achieve. 
I blended a piece of basic white card stock with the two colours making a marble type effect before die cutting the stars & letters. The simply scored scoring tool was used to make the grooves down the front of the card, then used stampin' blends to darken every other groove.

Materials required for this card are:

Card Stock: basic white, misty moonlight, soft sea foam
Dies: playful alphabet, stitched stars (2,4,5) , well written
Ink: misty moonlight, soft sea foam
Stampin' Blends: soft sea foam 
Accessories: *bakers twine, blending brushes, holiday rhinestones, simply scored scoring tool
* = no longer available, when using layering dies (1) is the smallest

Hope you liked today's card. If you would like more information on how to make it, please don't hesitate to contact me, I'd love to hear from you.

If you wish to buy any of the items used, go to contacting me at the top of the page for details on how to order.

Will be back again soon with more cards, in the meantime take care and have a great day.
Annette 😘

Saturday, August 21, 2021

Sweet Ice Cream

 Thank you for joining me today!

Happy birthday Lily-Mae


I wasn't quite sure where I was going with this card, but very pleased with the result. I love blackberry bliss but realised while making this I very rarely use it!

Materials required for this card are:

Card Stock: basic white, cinnamon cider, coastal cabana, petal pink
Designer Series Paper: *it's my party
Dies: playful alphabet, stitched so sweetly (6), stitched with whimsy
Embossing Folders: tasteful textile 3D
Ink: blackberry bliss, cinnamon cider, coastal cabana, petal pink
Punches: detailed duo, ice cream cone builder
Stamp Sets: sweet ice cream   
Accessories: basic pearls, foam adhesive sheets, white bakers twine
* = no longer available, when using layering dies (1) is the smallest

Hope you liked today's card. If you would like more information on how to make it, please don't hesitate to contact me, I'd love to hear from you.

If you wish to buy any of the items used, go to contacting me at the top of the page for details on how to order.

Will be back again soon with more cards, in the meantime take care and have a great day.
Annette 😘

Thursday, August 5, 2021

Biggest Wish, Birch & Hats Off

 Thank you for joining me today!

Happy Birthday Rob!


My inspiration came from a card I'd seen in the Pinkies Group. Mine is quite different though, the happy & birthday are in  the same position.

Materials required for this card are:

Card Stock: basic white, cinnamon cider, soft succulent
Dies: hat builder
Embossing Folders: painted texture 3D
Ink: cinnamon cider, misty moonlight, sahara sand, soft succulent
Stampin' Blends: cinnamon cider (for the bakers twine)
Stamp Sets: biggest wish, birch, hats off  
Accessories: white bakers twine

Hope you liked today's card. If you would like more information on how to make it, please don't hesitate to contact me, I'd love to hear from you.

If you wish to buy any of the items used, go to contacting me at the top of the page for details on how to order.

Will be back again soon with more cards, in the meantime take care and have a great day.
Annette 😘

Sunday, June 13, 2021

Dragonfly Garden

 Thank you for joining me today!

When I went to get Sue's card for day I was horrified as there wasn't one, so quick smart I went to my stash of ready made cards and found this one!


It's a blast from the past as I made this card some time ago when visiting my friend. As we were using her products, I don't know at this time what the name of the stamp set is, sorry (will try to find out).

Thank you  to Michelle McMahon who gave me the name of the stampset!

Materials required for this card are:

Card Stock: basic white, *soft sky
Designer Series Paper: *subtles
Ink: memento tuxedo black
Stampin' markers: daffodil delight, cherry cobbler, soft suede, pear pizzazz, garden green, *marina mist, *elegant eggplant
Stamp Sets:  dragonfly garden, *moon Lake, will add the other stamp set if I can find out what it is! 
Accessories: *bakers twine, *button
* = no longer available

Hope you liked today's card. If you would like more information on how to make it, please don't hesitate to contact me, I'd love to hear from you.

If you wish to buy any of the items used, go to contacting me at the top of the page for details on how to order.

Will be back again soon with more cards, in the meantime take care and have a great day.
Annette 😘

Tuesday, June 8, 2021

Happiest of Birthdays

 Thank you for joining me today!

Happy birthday Kevin

This is one of the best birthday stamp sets I've had, I love this big stamp.


I've created a monochromatic card, I just love black and white cards, don't you?
It's a quick and simple card to put together and is aimed at a beginner who want's to try the next level of card making as heat embossing is used.

Materials required for this card are:

Card Stock: basic black, basic white
Designer Series Paper: *true love
Dies: stitched with whimsy (rectangle 1)
Embossing Powder: black
Ink: versamark
Punches: detailed trio
Ribbon: glittered organdy
Stamp Sets: happiest of birthdays
Accessories: *black rhinestones
when using layering dies (1) is the smallest

Hope you liked today's card. If you would like more information on how to make it, please don't hesitate to contact me, I'd love to hear from you.

If you wish to buy any of the items used, go to contacting me at the top of the page for details on how to order.

Will be back again soon with more cards, in the meantime take care and have a great day.
Annette 😘

Sunday, April 4, 2021

Welcome to Easter and more

Thank you for joining me today!

My first Easter card for this year 


This is a mixture of both past and current products, I only make a couple of Easter cards each year, one for my aunt and one to send to Plymouth with a cheque instead of an egg for my grandson.

Materials required for this card are:

Card Stock: basic white, soft sea foam
Designer Series Paper: twinkle twinkle
Dies: dockside, nature's thoughts, ornate frames, stitched shapes (c3)
Embossing Folders: tasteful textile 3D
Ink: memento black
Punches: medium daisy (makes the groove for the twine)
Ribbon: snail mail twine
Stampin' Blends: petal pink, smoky slate
Stamp Sets: timeless tulips, *welcome to easter  

* = retired, when using layering dies (1) is the smallest

Hope you liked today's card. If you would like more information on how to make it, please don't hesitate to contact me, I'd love to hear from you.

If you wish to buy any of the items used, go to contacting me at the top of the page for details on how to order.

Will be back again soon with more cards, in the meantime take care and have a great day.

Annette 😘 

Friday, February 26, 2021

Bridge Panel Fun Fold - UK sizes

Hello and welcome to my haven in a hectic world!
Thanks for joining me today!

Simple stamping today, but a beautiful effect!


Converted this card from imperial measurements to uk metric.

Materials required for this card are:

Card Stock: basic white, bermuda bay 
Designer Series Paper: oh so ombre
Dies: stitched nested labels ((5)
Embossing Folders: subtle 3D
Ink: bermuda bay
Punches: butterfly duet
Ribbon: bakers twine
Stamp Sets: butterfly wishes, lovely you, peaceful moments
Accessories: frost white shimmer spritz
when using layering dies (1) is the smallest

base card: 21 x 14.8 scored @ 10.5 then cut up to centre score line @ 3.5 on both sides.
background layer: 4 measuring 10.1 x 3.1, 1 measuring 7.4 x 10.1 (front middle section)
across band: 1 measuring 2.5 x 14.8, 1 measuring .7 x 14.8
DSP layer: 4 measuring 9.8 x 2.8, 1 measuring 7.1 x 9.8 (front middle section)
The 4 smaller panels go on either side, 2 on the front and 2 on the back inside with a sentiment in the middle section. ( I split the 'life is better with a friend like you') from the peaceful moments over 2 lines. 

Hope you liked today's card. If you would like more information on how to make it, please don't hesitate to contact me, I'd love to hear from you.

If you wish to buy any of the items used, go to contacting me at the top of the page for details on how to order.

Will be back again soon with more cards, in the meantime take care and have a great day.

Annette 😘 

Thursday, February 25, 2021

My Meadow meets Posted for you & more

 Hello and welcome to my haven in a hectic world!

Thanks for joining me today!

Happy Birthday Ruth


This is my take on a card from Pinterest by craftykilieb I just altered the ribbon position.

Materials required for this card are:

Card stock: basic black, whisper white
DSP: *best dressed
Dies: layering circles (s4), stitched shapes (c2)
Embossing folders: subtles 3D
Embossing Powder: white
Ink: memento black, old olive, versamark
Ribbon: striped
Stampin' blends: crumb cake, old olive
Stamp sets: my meadow, posted for you, wildly happy
Accessories: *bakers twine
* = retired, when using layering dies (1) is the smallest

Hope you liked today's card. If you would like more information on how to make it, please don't hesitate to contact me, I'd love to hear from you.

If you wish to buy any of the items used, go to contacting me at the top of the page for details on how to order.

Will be back again soon with more cards, in the meantime take care and have a great day.
Annette 😘

Tuesday, October 6, 2020

Painted Poppies meets Positive Thoughts

 Hello and welcome to my haven in a hectic world!

Thanks for joining me today!

Sorry for your loss Aunty Sheilah, Aunty Val will be sadly missed


The inspiration for this card came from Pinterest

Materials required for this card are:

Card Stock: basic black, whisper white
Dies: ornate layers, stitched rectangles (4) wide
Embossing Folders: subtle 3d
Ink: memento tuxedo black
Stampin' Blends: old olive, poppy parade
Stamp Sets: positive thoughts, painted poppies, positive thoughts
Accessories: bakers twine, note cards
* = retired, when using layering dies (1) is the smallest

Hope you liked today's card. If you would like more information on how to make it, please don't hesitate to contact me, I'd love to hear from you.

If you wish to buy any of the items used, go to contacting me at the top of the page for details on how to order.

Will be back again soon with more cards, in the meantime take care and have a great day.
Annette 😘

Wednesday, September 2, 2020

A Grand Kid meets Bonanza Buddies

Hello and welcome to my haven in a hectic world!

Happy 9th Birthday Evie

Wasn't sure what I was going to do for this card, but I was pleased with the finished result.


Materials required for this card are:

Card stock: bermuda bay, whisper white
DSP: birthday bonanza
Dies: bonanza
Inks: bermuda bay, calypso coral, crushed curry, daffodil delight, memento black, smoky slate
Embossing folders: ornate floral 3D
Punches: detailed trio, lovely labels, rectangle postage stamp
Stamp sets: a grand kid, bonanza buddies
Accessories: *bakers twine
* = retired

Hope you liked today's card. If you would like more information on how to make it, please don't hesitate to contact me, I'd love to hear from you.

If you wish to buy any of the items used, go to contact me at the top of the page for details on how to order.

Will be back again soon with more cards, in the meantime have a great day.
Annette 😘

Sunday, August 23, 2020

Jar of Flowers

 Hello and welcome to my haven in a hectic world!

Thanks for joining me today!

Another week over, where do they go!!

It's week 23 for Sue, and this is the first time, using this new bundle and I just love it.


Materials required for this card are:

Card stock: flirty flamingo, thick whisper white
DSP: in good taste
Ink: flirty flamingo, memento tuxedo black
Punches: jar
Stampin' blends: flirty flamingo, granny apple green, mango melody, purple posy, seaside spray, shaded spruce
Stamp sets: jar of flowers
Accessories: * bakers twine, note cards, wink of stella (for flowers)
* = retired 

Hope you liked today's card. If you would like more information on how to make it, please don't hesitate to contact me, I'd love to hear from you.

If you wish to buy any of the items used, go to contact me at the top of the page for details on how to order.

Will be back again soon with more cards, in the meantime take care and have a great day.
Annette 😘

Friday, July 17, 2020

A Grand Kid meets Family Party

Hello and welcome to my haven in a hectic world!

Happy 7th birthday Kayden πŸ’›

A Bright and happy card, for a bright and happy boy!


Materials required for this card are:

Card stock: calypso coral, whisper white
DSP:playing with patterns
Dies: nature's thoughts, playful alphabet, stitched rectangles (4) wide
Ink: night of navy
Punches: balloon bouquet
Stamp sets: A grand kid, family party
Accessories: *bakers twine, pwp resin dots

* = retired and when using layering dies (1) is the smallest

I used both the stitched rectangle and nature's thoughts dies to create the frame. Cut the nature's thoughts frame, then gut the middle from just under the top left corner, then replace the nature's thoughts frame at the bottom right corner of the stitched rectangle and cut again.

Hope you liked today's card. If you would like more information on how to make it please don't hesitate to contact me, I'd love to hear from you.

If you wish to buy any of the items used, go to contact me at the top of the page for details on how to order.

Will be back again soon with more cards, in the meantime have a great day.
Annette 😘

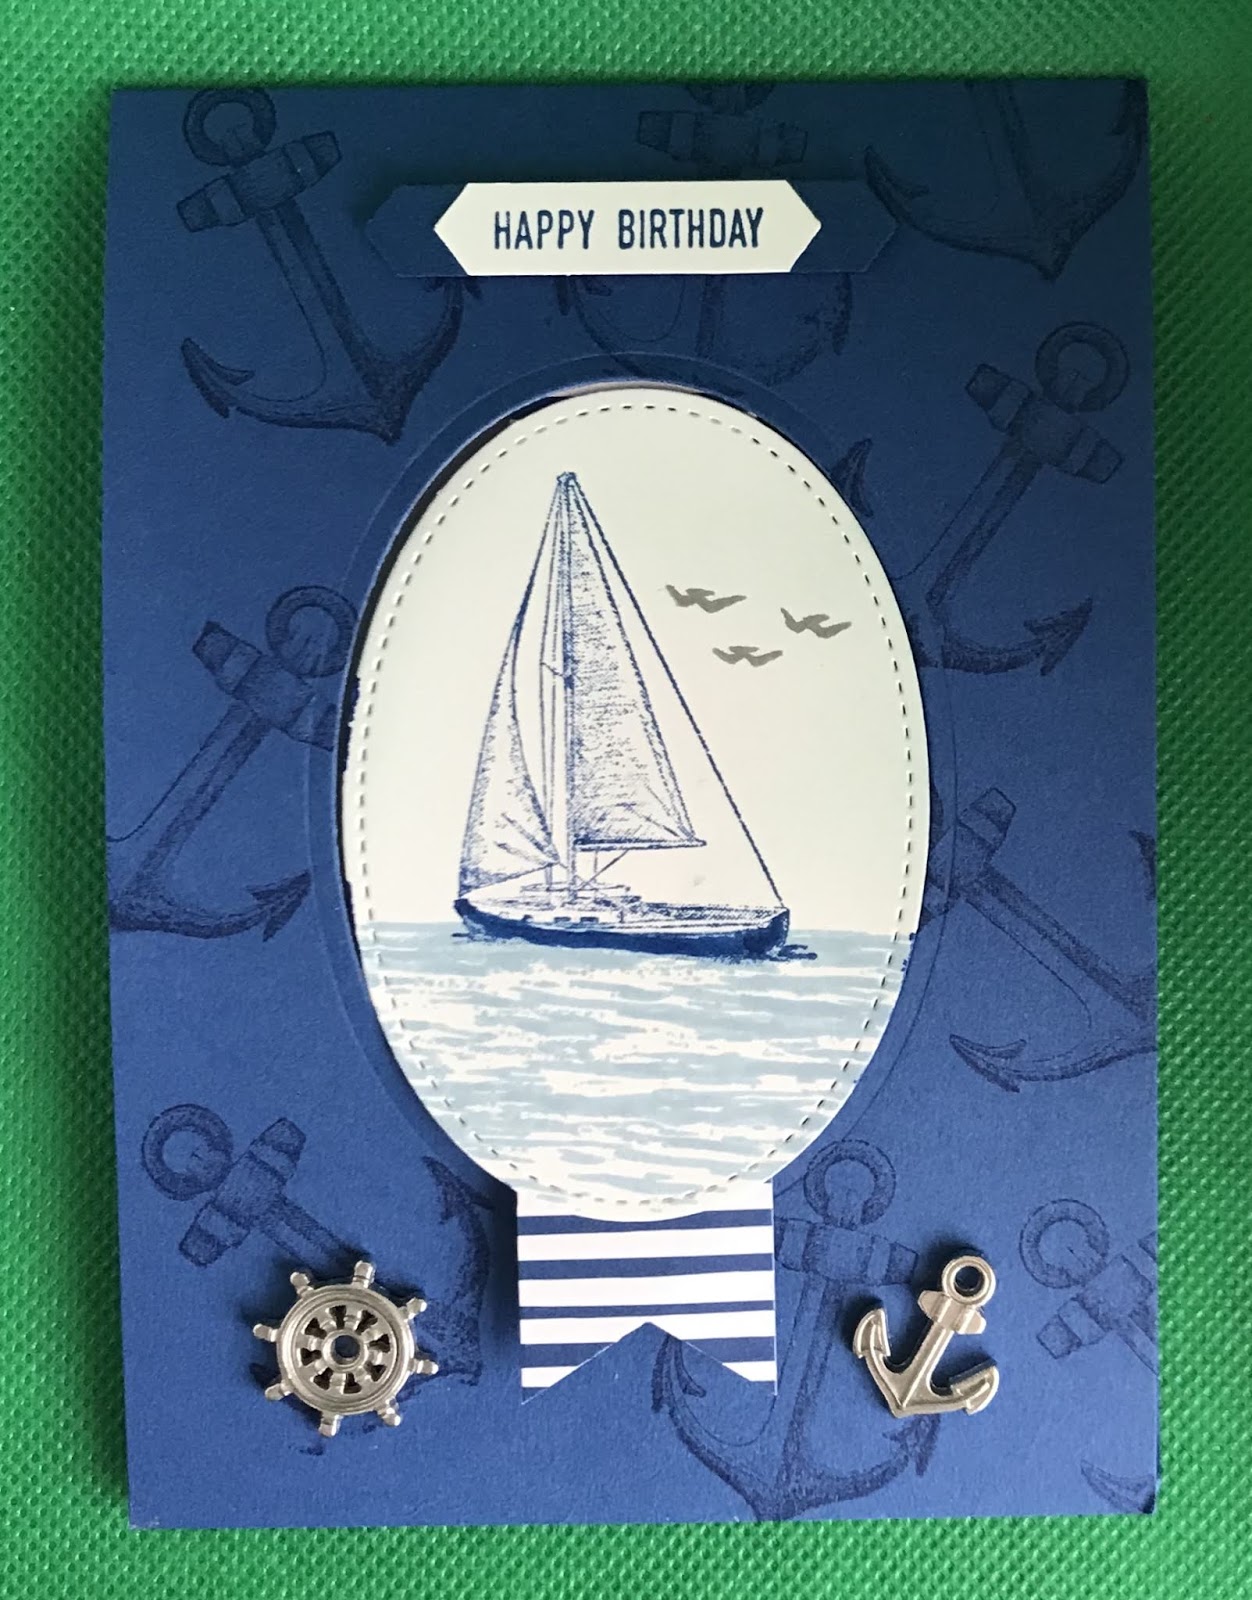
Wednesday, June 3, 2020

Sailing Home meets High Tide and more

Hello and welcome to my haven in a hectic world, thank you for dropping by.

Happy Birthday Mike!

This is my take, on card from Kelly Acheson's blog "a stamp above"  on 5 May 2020, I changed the orientation and turned it into  swing card.
closed
open

Measurements are in centimetres.

(cs) = card stock, (dsp) = designer series paper, (ss) = stamp set, when using layering dies (1) is the smallest.
Colours: Basic Gray, Blueberry Bushel, Pool Party, Seaside Spray.
  • Card base is blueberry bushel (cs) 10.5 x 29.7 scored at 14.8.
  • Die cut the opening for the front using the layering ovals dies  (7), then randomly stamp the anchor from the sailing home (ss) in blueberry bushel.
  • On a piece of whisper white (cs) 7 x 9.5 stamp the scene, water is from the high tide (ss) in seaside spray, boat is from the sailing home (ss) in blueberry bushel and the birds are from the my meadow (ss) in basic gray. Lightly sponge above the water in pool party to form a sky line.
  • Die cut the scene using the stitched shape dies oval (4), now die cut another oval the same size in blueberry bushel.
  • Cut a piece of whisper white (cs) 10 x 14.3 (card insert), do a dry placement, and through the aperture stamp the greeting from the sailing home (ss) using blueberry bushel in the middle.
  • Cut a 2.5 stripe from the 6" x 6"  18/20 in color (dsp) stack, then use the triple banner punch to make the tail at one end and a 1cm score mark at the other.
  • Adhere the dsp to the back of the card insert making sure it's in the middle.  Then using 2 pieces of bakers twine measuring 14cm each create a reef knot and attach both ends to the back of the card insert towards the bottom using sellotape, making sure the knot on the front is roughly in the middle.
  • Attach the card insert to the card base using dimensional pads.
  • Close the card, add some liquid glue down the centre of the dsp showing through the oval aperture then place the scene oval over the top, making sure it's in the right place and adhere down.
  • Open the card and adhere the blueberry bushel oval over the top of the white one.
  • On a scrap piece of whisper white (cs) stamp the happy birthday from the itty bitty greetings (ss) in blueberry bushel and punch out using the classic label punch. I re-inserted the ends to make the label smaller then punched a second label in blueberry bushel and adhered the two together and attached to the front of the card using dimensional pads.
  • Lastly I added a couple of the (r) sail away trinkets.
Will be back again soon with more cards, enjoy the rest of your day.
Annette X

Delicate Whispers and more

Welcome to my blog and    t hank you for joining me today! Happy Anniversary to Sylvia & Bill Intermediate level - blending with a brush...