Showing posts with label my meadow. Show all posts

Thursday, February 25, 2021

My Meadow meets Posted for you & more

 Hello and welcome to my haven in a hectic world!

Thanks for joining me today!

Happy Birthday Ruth


This is my take on a card from Pinterest by craftykilieb I just altered the ribbon position.

Materials required for this card are:

Card stock: basic black, whisper white
DSP: *best dressed
Dies: layering circles (s4), stitched shapes (c2)
Embossing folders: subtles 3D
Embossing Powder: white
Ink: memento black, old olive, versamark
Ribbon: striped
Stampin' blends: crumb cake, old olive
Stamp sets: my meadow, posted for you, wildly happy
Accessories: *bakers twine
* = retired, when using layering dies (1) is the smallest

Hope you liked today's card. If you would like more information on how to make it, please don't hesitate to contact me, I'd love to hear from you.

If you wish to buy any of the items used, go to contacting me at the top of the page for details on how to order.

Will be back again soon with more cards, in the meantime take care and have a great day.
Annette 😘

Sunday, August 9, 2020

My Meadow meets Timeless Tropical

Hello and welcome to my haven in a hectic world!
Thanks for joining me today!

For Sue and it's week 21

I CASEd this card from Pinterest, just changing a couple of things!
(copy and selected everything)
It's the first time I've used the timeless tropical stamp set and it's really nice to use.


Materials required for this card are:

Card stock: whisper white
DSP: *color theory
Dies: in the tropics, stitched rectangles (6) wide
Embossing folders: *simple stripes 
Ink: just jade, old olive, mango melody, terracotta tile
Ribbon: 
Stamp sets: my meadow, timeless tropical
Accessories: basic rhinestones
* = retired and, when using layering dies (1) is the smallest

Hope you liked today's card. If you would like more information on how to make it, please don't hesitate to contact me, I'd love to hear from you.

If you wish to buy any of the items used, go to contact me at the top of the page for details on how to order.

Will be back again soon with more cards, in the meantime have a great day.
Annette 😘

Wednesday, June 3, 2020

Sailing Home meets High Tide and more

Hello and welcome to my haven in a hectic world, thank you for dropping by.

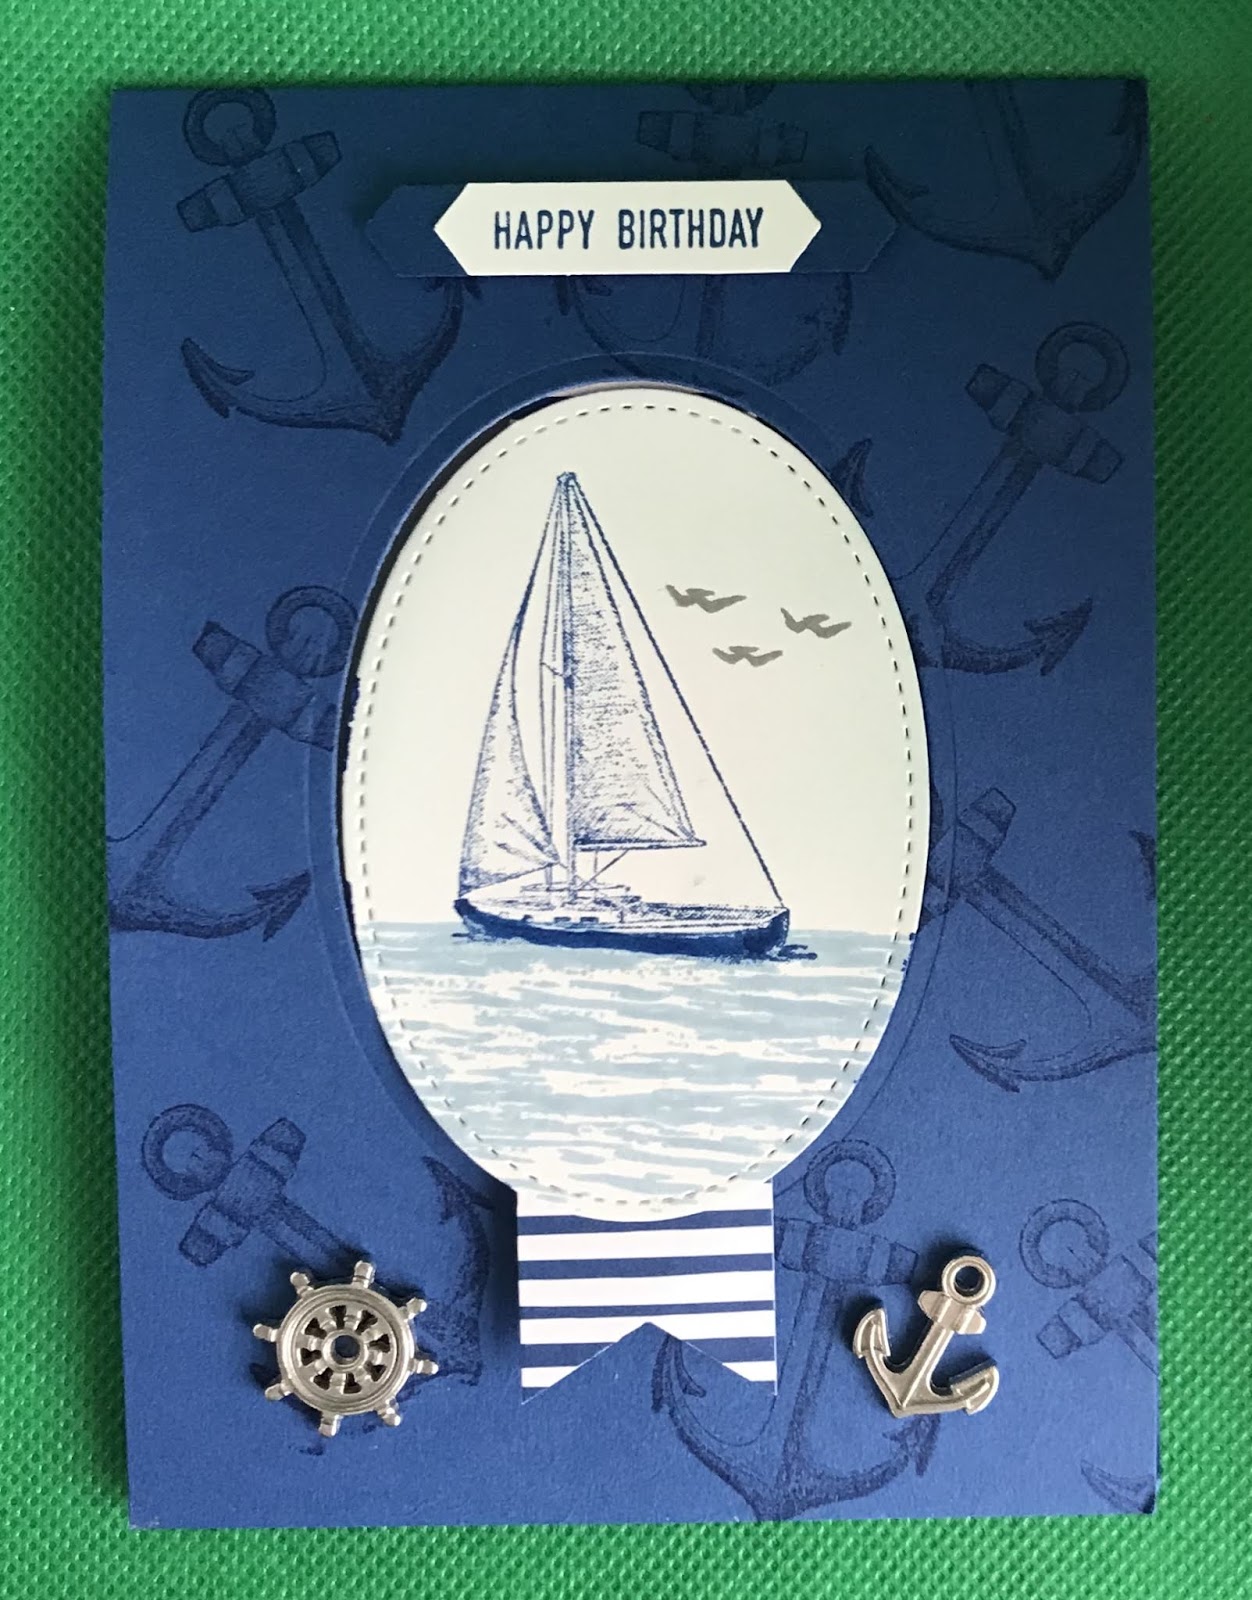
Happy Birthday Mike!

This is my take, on card from Kelly Acheson's blog "a stamp above"  on 5 May 2020, I changed the orientation and turned it into  swing card.
closed
open

Measurements are in centimetres.

(cs) = card stock, (dsp) = designer series paper, (ss) = stamp set, when using layering dies (1) is the smallest.
Colours: Basic Gray, Blueberry Bushel, Pool Party, Seaside Spray.
  • Card base is blueberry bushel (cs) 10.5 x 29.7 scored at 14.8.
  • Die cut the opening for the front using the layering ovals dies  (7), then randomly stamp the anchor from the sailing home (ss) in blueberry bushel.
  • On a piece of whisper white (cs) 7 x 9.5 stamp the scene, water is from the high tide (ss) in seaside spray, boat is from the sailing home (ss) in blueberry bushel and the birds are from the my meadow (ss) in basic gray. Lightly sponge above the water in pool party to form a sky line.
  • Die cut the scene using the stitched shape dies oval (4), now die cut another oval the same size in blueberry bushel.
  • Cut a piece of whisper white (cs) 10 x 14.3 (card insert), do a dry placement, and through the aperture stamp the greeting from the sailing home (ss) using blueberry bushel in the middle.
  • Cut a 2.5 stripe from the 6" x 6"  18/20 in color (dsp) stack, then use the triple banner punch to make the tail at one end and a 1cm score mark at the other.
  • Adhere the dsp to the back of the card insert making sure it's in the middle.  Then using 2 pieces of bakers twine measuring 14cm each create a reef knot and attach both ends to the back of the card insert towards the bottom using sellotape, making sure the knot on the front is roughly in the middle.
  • Attach the card insert to the card base using dimensional pads.
  • Close the card, add some liquid glue down the centre of the dsp showing through the oval aperture then place the scene oval over the top, making sure it's in the right place and adhere down.
  • Open the card and adhere the blueberry bushel oval over the top of the white one.
  • On a scrap piece of whisper white (cs) stamp the happy birthday from the itty bitty greetings (ss) in blueberry bushel and punch out using the classic label punch. I re-inserted the ends to make the label smaller then punched a second label in blueberry bushel and adhered the two together and attached to the front of the card using dimensional pads.
  • Lastly I added a couple of the (r) sail away trinkets.
Will be back again soon with more cards, enjoy the rest of your day.
Annette X

Thursday, May 7, 2020

My Meadow meets Pressed Petals

Hi folks, hope you're having a great day, and welcome to my haven in a hectic world.

Happy Birthday Idwin!
After creating this card, I looked to see what type of stamps were used and was surprised to read that I should have loaded the ink then spritzed with water before stamping, I liked the finish I got but will try the spritzing next time and let you know if I like it better.

All measurements are in centimetres.

(cs) = card stock, (dsp) = designer series paper, (ss) = stamp set, layered dies start with (1) being the smallest.

Whisper White 21 x 14.8 scored at 10.5 (card base), 7.5 x 2.5 (sentiment), 11 x 8 (scene).
DSP 14.8 x 8.
Ink colours are balmy blue, early espresso, gray granite, mossy meadow, old olive, pool party, rococo rose, seaside spray, soft suede.

  • With the scene whisper white (cs) stamp the images from the my meadow (ss) using colours similar to above.
  • Die cut the scene using the (6) scalloped die from the stitched so sweetly dies.
  • With the sentiment whisper white (cs) stamp the sentiment using early espresso ink, then trim around the sentiment to make it a close fit.
  • Place the scene on the pressed petals (dsp) and mark where you want the linen thread to be wound round, Now remove the scene and wind the linen thread securing it at the back. I used sellotape for this, then tied a knot around the pieces at the front with a smaller piece of linen thread.
  • Emboss 2.5 cm of the bottom edge of the card base using the subtle (ef).
  • Adhere the pressed petals (dsp) to the top of the card base using liquid glue.
  • Add a strip of braided linen thread across the bottom edge of the pressed petals (dsp) I used narrow tear & tape for this.
  • Attach both the sentiment and the scene using dimensional pads.
Will be back again soon with more cards for you.
Thanks for stopping by
Annette X


Blast from the past - You are amazing meets Alphabet a la mode

  Welcome to my blog and    t hank you for joining me today! Happy Birthday Stuart  Quick Intermediate  level - die cutting, layering, punch...