Showing posts with label detailed trio puch. Show all posts

Wednesday, September 2, 2020

A Grand Kid meets Bonanza Buddies

Hello and welcome to my haven in a hectic world!

Happy 9th Birthday Evie

Wasn't sure what I was going to do for this card, but I was pleased with the finished result.


Materials required for this card are:

Card stock: bermuda bay, whisper white
DSP: birthday bonanza
Dies: bonanza
Inks: bermuda bay, calypso coral, crushed curry, daffodil delight, memento black, smoky slate
Embossing folders: ornate floral 3D
Punches: detailed trio, lovely labels, rectangle postage stamp
Stamp sets: a grand kid, bonanza buddies
Accessories: *bakers twine
* = retired

Hope you liked today's card. If you would like more information on how to make it, please don't hesitate to contact me, I'd love to hear from you.

If you wish to buy any of the items used, go to contact me at the top of the page for details on how to order.

Will be back again soon with more cards, in the meantime have a great day.
Annette ๐Ÿ˜˜

Friday, August 21, 2020

A Grand Kid meets Family Party & more

Hello and welcome to my haven in a hectic world!

This is for my gorgeous little Granddaughter
Happy 10th birthday Lily-Mae

My inspiration for this card was taken from Pinterest


Materials required for this card are:

Card stock: whisper white
DSP: playing with patterns
Dies:playful alphabet
Embossing Powder: silver
Ink: gorgeous grape, versamark
Stampin' blends: highland heather, *pineapple punch, purple posy
Stamp sets: a grand kid, family party, *piece of cake, posted for you, 
* = retired

Hope you liked today's card. If you would like more information on how to make it, please don't hesitate to contact me, I'd love to hear from you.

If you wish to buy any of the items used, go to contact me at the top of the page for details on how to order.

Will be back again soon with more cards, in the meantime have a great day.
Annette ๐Ÿ˜˜

Tuesday, August 4, 2020

Celebrate Sunflowers meets Free As A Bird

Hello and welcome to my haven in a hectic world!

Hi Sue, yes it's week 20

Playing with my new stash of goodies!!


Materials required for this card are:

Card stock: thick whisper white, whisper white
DSP: flowers for every season
Dies: ornate frames, sunflowers
Embossing folders: tasteful textile 3D
Embossing Powder: *black
Ink: memento tuxedo black, petal pink, versamark
Punches: detailed trio 
Ribbon: scalloped linen
Stampin' blends: cinnamon cider, just jade, petal pink
Stamp sets: celebrate sunflowers, free as a bird
Accessories: *glitter enamel dots, *silver metallic thread
* = retired

Hope you liked today's card. If you would like more information on how to make it, please don't hesitate to contact me, I'd love to hear from you.

If you wish to buy any of the items used, go to contact me at the top of the page for details on how to order.

Will be back again soon with more cards, in the meantime have a great day.
Annette ๐Ÿ˜˜

Saturday, April 11, 2020

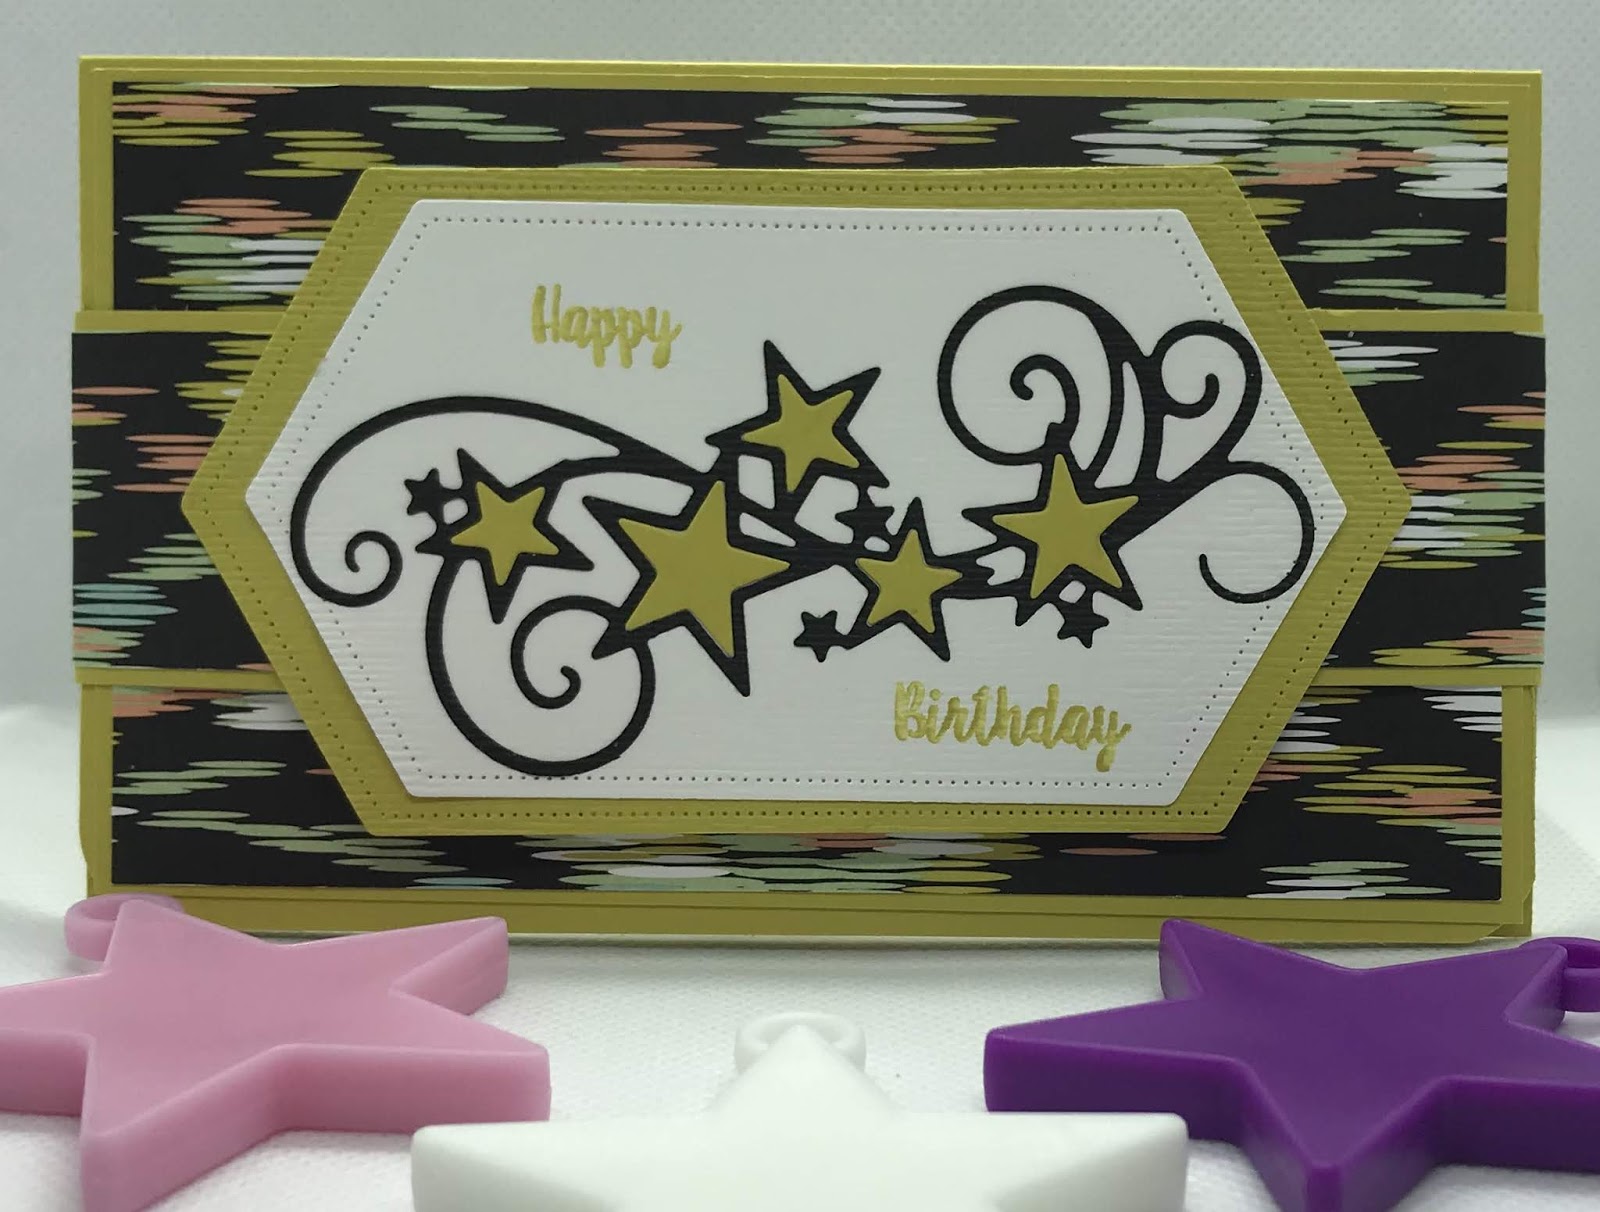
Stitched Nested Labels meets Stitched Stars & Piece of Cake

Hello and welcome to my haven in a hectic world!

I made this card quite some time ago, in fact it was last years but I lost it, just hope he likes it as much as the money inside!

Happy Birthday Tom x

The instructions for this wallet came from Terri Pocock, a fellow demonstrator with Stampin' Up!
Measurements are in centimetres, (cs) = card stock, (dsp) = designer series paper, (r) = retired, (ss) = stamp set, when using nesting dies (1) = the smallest.

Colours are: basic black 10.5 x 5 (stars), (r) summer starfruit 6 pieces 21 x 14.8 (wallet base), 14.5 x 8.5 (front layer), 14.5 x 2.8 (pocket layer), 21 x3.8 (belly band), 13 x 7 (larger label), 10.5 x 5 (stars), whisper white 11.5 x 6.5 (smaller label).

(r) sweet sorbet (dsp) 3 pieces 14.1 x 8.1 (front layer), 14.1 x 2.4 (pocket layer), 21 x 3.4 (belly band)
  • With the long edge across the top of your score board score at 3.3 & 12.3.
  • Using liquid glue along the shorter score line, adhere each side of the pocket down.
  • Round the bottom corners of both the (cs) and (dsp) for the front of the wallet using the detailed trio punch.
  • Adhere the 2 pocket layers together and then adhere to the pocket using liquid glue.
  • Adhere the 2 front layers together and then adhere to the front of the wallet using liquid glue.
  • Die cut the 2 labels using the stitched nested labels dies (7 & 8).
  • Die cut the swirls and stars twice, once in basic black and once in summer starfruit using the stitched stars dies.
  • Adhere the black swirls across the whisper white label using liquid glue.
  • Then stamp the happy birthday from the piece of cake (ss) above and below the swirls.
  • Emboss both labels using the subtle folder and adhere together using liquid glue.
  • Now insert the summer starfruit stars inside the empty stars, using liquid glue.
  • Adhere the belly band layers together using liquid glue.
  • Wrap the belly band around the wallet and attach to either side of the labels using tear and tape.
Thanks for dropping by.

Will be back again soon with more cards, thanks for dropping by
Annette X

Delicate Whispers and more

Welcome to my blog and    t hank you for joining me today! Happy Anniversary to Sylvia & Bill Intermediate level - blending with a brush...