Showing posts with label happy labels. Show all posts

Tuesday, September 3, 2024

Cheerful Daisies meets Magnolia Mood

Welcome to my blog

and  thank you for joining me today!

Happy Birthday Lesley


Intermediate: die cutting, dry embossing, dying ribbon, layering, masking, stamping, 

Materials required for this card are:

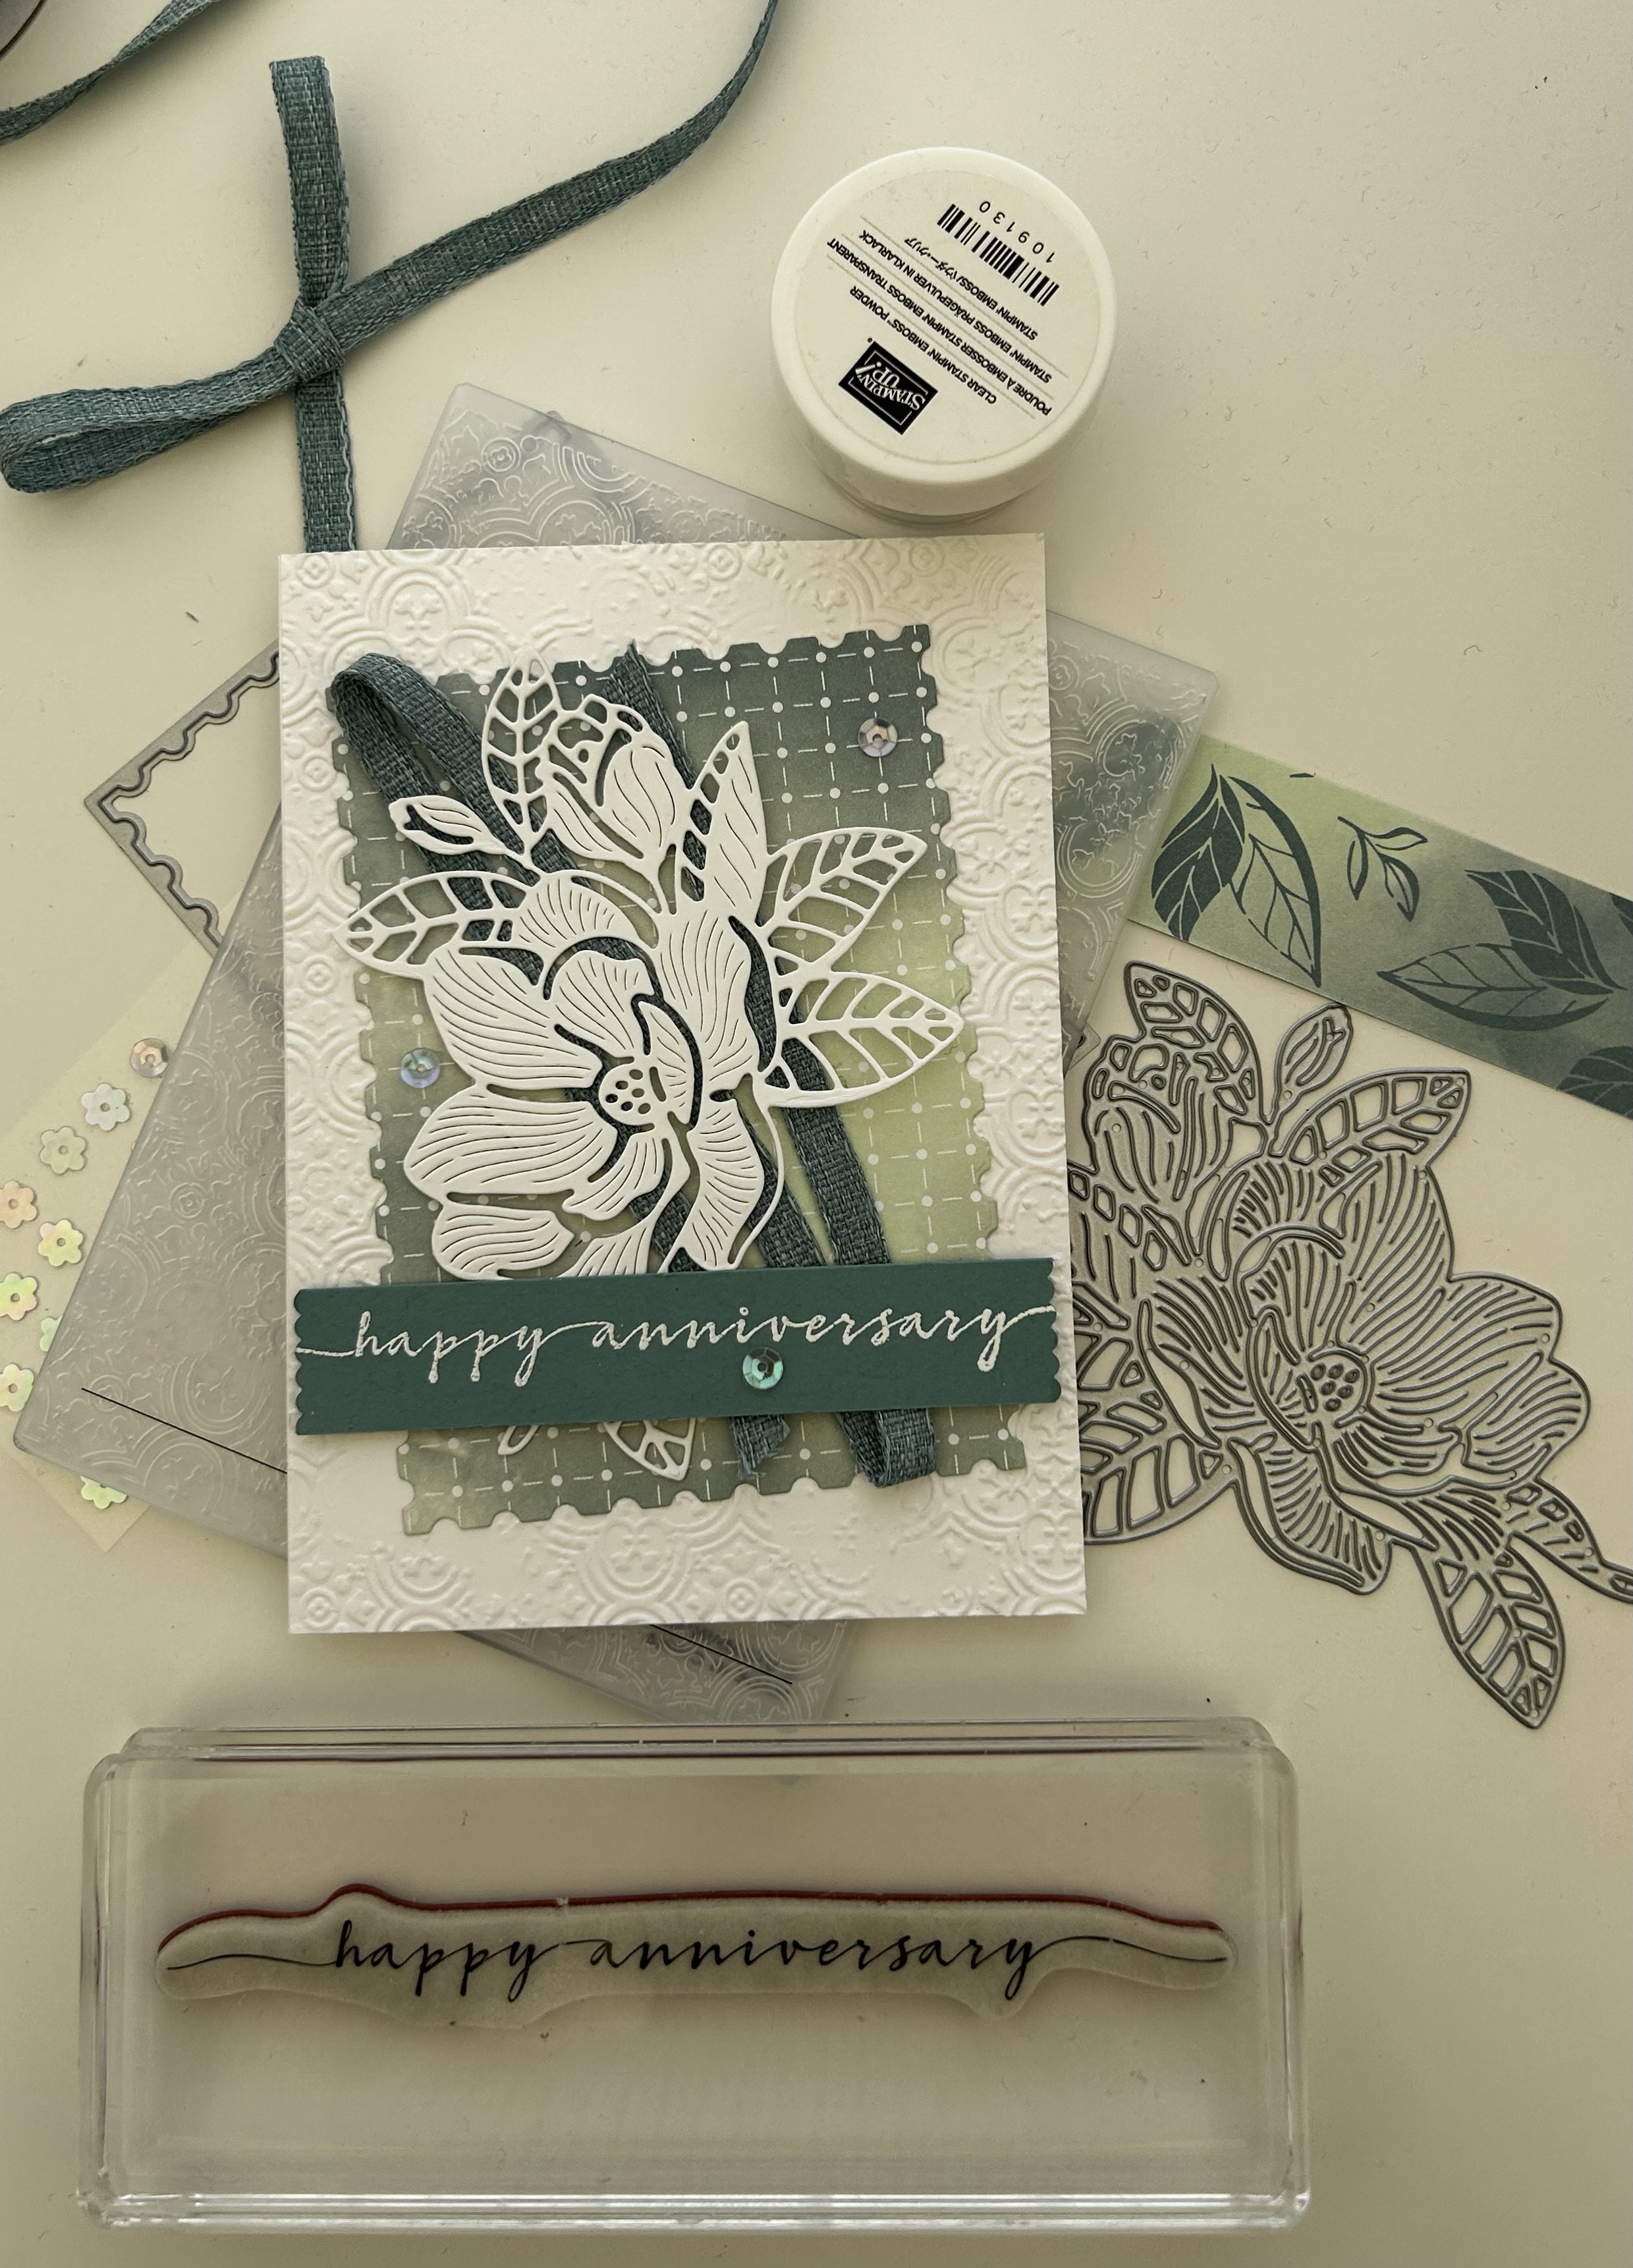
Card Stock: basic white, peach pie, soft sea foam
Dies: cheerful daisies
Embossing Folders: *timeworn type 3D
Ink: peach pie
Punches: happy labels
Stampin' Blends: peach pie
Stamps: magnolia mood
Accessories: *artistic mix decorative masks, blending brush, *flowers for every season combo, iridescent pearls
 
* = no longer available
  1. Start with a base card 14.5 x 21 scored at 10.5, first layer 10.1 x 14.1, flower layers 7 x 6, 6 x 5.5, 6 x 5, sentiment layer 2 x 9.5, fern layer 6 x 5
  2. colour layer one using the 2 decorative masks and a blending brush
  3. dry emboss layer one
  4. dye the ribbon using the stampin' blend and attach to the back of layer one using tape 
  5. adhere this layer to the base card using liquid glue
  6. stamp the sentiment and crimp the ends using the punch
  7. attach to the card using dimensional pads
  8. die cut the pieces for the flower and fern
  9. lightly colour the centre of the middle piece, adhere the 3 pieces of the flower together using liquid glue
  10. lightly adhere the fern onto the base card using liquid glue
  11. attach the flower using dimensional pads
  12. add the pearls to the centre of the flower
Hope you liked today's card. If you would like more information on how to make it, please don't hesitate to contact me, I'd love to hear from you.

If you wish to buy any of the items used, go to contacting me at the top of the page for details of how to order.

Will be back again soon with more cards, in the meantime take care and have a great day.

Annette 😊  

Thursday, August 22, 2024

Magnolia Mood meets Perennial Postage

 Welcome to my blog

and  thank you for joining me today!

Happy Anniversary Margaret & Simon


Intermediate, die cutting, dry embossing, heat embossing, punching

Materials required for this card are:

Card Stock: basic white, lost lagoon
Designer Series Paper: hello irresistible 
Dies: magnolia mood, perennial postage (5)
Embossing Folders: distressed tile 3D
Ink: versamark 
Punches: happy labels
Stamps: sweetly scripted
Accessories: *bordered ribbon, *gingham gala sequins, white embossing powder
 
* = no longer available, when using layering dies (1) is the smallest

  1. Start with a base card 14.5 x 21 scored at 10.5, white layer 10.5 x 14.5 die cutting layer 9 x 12, dsp 9 x 12, lost lagoon 1.9 x 10.5
  2. dry emboss the white layer and adhere to the base card using liquid glue
  3. die cut the rectangle of dsp using the postage die and adhere to the base card at a slight angle using liquid glue.
  4. run a small strip of stampin' seal in the middle of the dsp and attach the ribbon
  5. die cut the flower and attach to the card using dimensional pads
  6. stamp the sentiment in versamark, add the embossing powder and heat
  7. trim the edges of the sentiment with the punch and attach to the card using dimensional pads 
  8. add the sequins
Hope you liked today's card. If you would like more information on how to make it, please don't hesitate to contact me, I'd love to hear from you.

If you wish to buy any of the items used, go to contacting me at the top of the page for details of how to order.

Will be back again soon with more cards, in the meantime take care and have a great day.
Annette 😊 

Friday, April 12, 2024

Inspirational Sketches meets Go To Greetings

 Welcome to my blog

and  thank you for joining me today!

Happy Birthday Duncan


Intermediate card for men -  brush blending, die cutting, dry embossing, layering, punching, stamping. CASEd from 'Mandy VanHavermaet'

Materials required for this card are:

Card Stock: early espresso, pecan pie
Designer Series Paper: nature's sweetness
Dies: deckled rectangles (4)
Embossing Folders: basics 3D
Ink: early espresso, pecan pie
Punches: happy labels
Stamps: inspirational sketches, go to greetings
Accessories: blending brushes, *faux suede trim, rustic metallic dots
 
* = no longer available, when using layering dies (1) is the smallest
  1. Start with a base card 14.5 x 21 scored at 10.5, pecan pie layer 10 x 14, dsp layer 10 x 6, deckled rectangle 6.5 x 9.5, basic white 10 x 2.5, basic white 5.3 x 8.5
  2. With the hay type stamp, stamp around the pecan pie layer on the left, top and right sides, using the stamping off method, then emboss this layer
  3. using pecan pie and a blending brush, lightly colour the dsp, white rectangle and sentiment strip, then finish off each end of the sentiment using the punch
  4. adhere the dsp to the bottom of the pecan pie layer using liquid glue
  5. wrap the suede trim around the top of the dsp and attach to the back using tape
  6. attach these layers to the base card using dimensional pads
  7. stamp the bird and sentiment
  8. adhere the bird to the deckled rectangle using liquid glue
  9. attach the sentiment and bird to the base card using dimensional pads
  10. add the metallic dots
Hope you liked today's card. If you would like more information on how to make it, please don't hesitate to contact me, I'd love to hear from you.

If you wish to buy any of the items used, go to contacting me at the top of the page for details of how to order.

Will be back again soon with more cards, in the meantime take care and have a great day.
Annette 😊 

Saturday, September 2, 2023

Best Family Ever meets Wanted to say

   Welcome to my blog

and  thank you for joining me today!

Happy Birthday Evie


die cut layering, dry embossing, stamping and punching

Materials required for this card are:

Card Stock: basic white, crushed curry
Designer Series Paper: *it's my party
Dies: wanted to say
Embossing Folders: basic 3D
Punches: happy labels
Ink: crushed curry
Stamp Sets: best family ever
Accessories: bakers twine essentials, *genial gems, adhesive sheets
 * = no longer available
  1. Start with a base card 14.8 x 21 scored at 10.5, basic white 10.1 x 14.4, dsp 9.7 x 14, 2 white rectangles 8 x 4.5 and backed with adhesive sheets
  2. emboss the white panel and adhere to the base card using liquid glue
  3. add a panel of adhesive sheeting to the back of the dsp and die cut all 3 happy birthday's
  4. layer these to give the HB depth
  5. die cut the outline for the HB and adhere the sentiment
  6. adhere the finished HB to the dsp layer using liquid glue, add the bakers twine at the top and tie with a bow.
  7. attach this layer to the base card using dimensional pads
  8. stamp the bottom sentiment on a strip of white finishing off each end using the punch
  9. Attach the bottom sentiment using dimensional pads, then add the gems
Hope you liked today's card. If you would like more information on how to make it, please don't hesitate to contact me, I'd love to hear from you.

If you wish to buy any of the items used, go to contacting me at the top of the page for details on how to order.

Will be back again soon with more cards, in the meantime take care and have a great day.
Annette 😘

Friday, September 1, 2023

Dainty Delight meets Celebrating You

   Welcome to my blog

and  thank you for joining me today!

Happy Anniversary to Alison & Rob


Die cutting, stamping, layering, dry & heat embossing

Materials required for this card are:

Card Stock: basic white, boho blue, vellum
Designer Series Paper: in color 23/5
Dies: dainty delight
Embossing Folders: timeworn type 3D
Ink: boho blue, versaMark
Stamp Sets: *celebration you, dainty delight
Accessories: in color dots, white embossing powder
  1. Start with a base card 14.8 x 21 scored at 10.5, basic white 10.1 x 14.4, dsp 8 x 12.5, vellum 8 x 12.5
  2. dry emboss the white layer
  3. stamp the flowers, stamp the sentiment using versaMark, embossing powder and heat gun
  4. die cut the flowers & leaves
  5. attach the flowers & leaves to the vellum using dimensional pads
  6. adhere the vellum & dsp together using liquid glue (where it won't show)
  7. adhere these to the base card using liquid glue
  8. attach the sentiment using dimensional pads
  9. add the coloured dots
Hope you liked today's card. If you would like more information on how to make it, please don't hesitate to contact me, I'd love to hear from you.

If you wish to buy any of the items used, go to contacting me at the top of the page for details on how to order.

Will be back again soon with more cards, in the meantime take care and have a great day.
Annette 😘

Sunday, April 30, 2023

Art Gallery meets In The Country

 Welcome to my blog

and  thank you for joining me today!

Happy Birthday Nigel

This is the second card today as there are 2 birthdays 


Combination of blending with stampin' blends and brushes together, the darker parts are the blends and the lighter parts are the brushes

Materials required for this card are:

Card Stock: basic white, crumb cake, soft suede
Dies: layering diorama (3,4)
Embossing Folders: timber 3D
Ink: balmy blue, crumb cake, granny apple green, memento tuxedo black, soft suede
Punches: happy labels
Stampin' Up Blends: bronze, evening evergreen, granny apple green, old olive, soft succulent
Stamp Sets: art gallery, in the country
Accessories: blending brushes, *designer elements
 * = no longer available, when using layering dies (1) is the smallest
  1. Start with a base card 10.5 x29  scored at 14.5
  2. layer 1 = 14.1 x 10.1, emboss this layer
  3. die cut layer 1 using the larger die towards the left side
  4. line up die 3 and 4 and die cut the frame in soft suede
  5. adhere the frame to layer 1 using wet glue
  6. stamp the image onto basic white using memento black
  7. colour the image using a combination of stampin' blends and blending brushes 
  8. adhere the finished picture behind the aperture and adhere using wet glue
  9. attach layer 1 to the base card using dimensional's
  10. stamp the sentiment and trim the sides using the happy labels punch
  11. attach the sentiment using dimensional's
  12. add the designer elements
Hope you liked today's card. If you would like more information on how to make it, please don't hesitate to contact me, I'd love to hear from you.

If you wish to buy any of the items used, go to contacting me at the top of the page for details on how to order.

Will be back again soon with more cards, in the meantime take care and have a great day.

Annette 😘 

Wednesday, April 12, 2023

In The Country meets Artistically Inked

  Welcome to my blog

and  thank you for joining me today!

Happy Birthday Duncan


Sale-a-bration plus more, a mixture of old and new to make a classic kind of card.

Materials required for this card are:

Card Stock: early espresso, very vanilla
Designer Series Paper: *in good taste
Dies: deckled rectangles (5,6)
Ink: early espresso
Punches: happy labels
Stamp Sets: artistically inked, in the country
Accessories: *rustic metallic dots
 * = no longer available, when using layering dies (1)
  1. Start with a base card of 14.5 x 21 scored at 10.5
  2. Cut dsp to 14.1 x 10.1, add a thin strip of the base colour across the bottom and adhere to the base card using liquid glue
  3. stamp and die cut the image
  4. die cut the next size up die in the base colour and adhere behind the image using liquid glue
  5. using a 1.25 strip of very vanilla, stamp the sentiment and clip the ends using the punch.
  6. attach the sentiment and image to the base card using dimensionals
  7. add the metallic dots either side of the sentiment
Hope you liked today's card. If you would like more information on how to make it, please don't hesitate to contact me, I'd love to hear from you.

If you wish to buy any of the items used, go to contacting me at the top of the page for details on how to order.

Will be back again soon with more cards, in the meantime take care and have a great day.
Annette 😘

Daisies meets Nature's Symphony

  Welcome to my blog and    t hank you for joining me today! Happy birthday Serenia Intermediate level - die cutting, dry embossing, layerin...