Showing posts with label stitched shapes. Show all posts

Wednesday, April 3, 2024

Blast from the past 'Sky's The Limit'

 Welcome to my blog

and  thank you for joining me today!

Happy Birthday Mike


For the man who loves flying
Blast from the past, not many current products.
Intermediate level - die cutting, dry embossing, layering, punching, stamping

Materials required for this card are:

Card Stock: basic black & white, pecan pie
Designer Series Paper: *going places
Dies: *layering ovals (8), *stitched shapes (4)
Embossing Folders: *old world paper 3D, subtle 3D
Ink: memento tuxedo black
Punches: banner pick a 
Stamps: seasonal branches, *sky's the limit
Accessories: *glittered organdy ribbon  
* = no longer available, when using layering dies (1) is the smallest
  1. Start with a base card 14.8 x 21 scored at 10.5, dsp 10.1 x 6.1, pecan pie layer 10.1 x 8.1, white layer 10.1 x 14.1 scraps for die cutting and stamping
  2. emboss the pecan pie using the old world paper folder
  3. adhere the dsp at the top of the white layer using liquid glue
  4. adhere the pecan pie layer to the bottom of the white layer
  5. attach the ribbon to join the two areas using tape and adhere to the base card using liquid glue
  6. stamp the plane and sentiment onto a piece of white card 
  7. die cut the plane using the stitched shapes , along with a black oval from the layering ovals
  8. emboss the plane using the subtle's folder and attach to the black oval using dimensional pads, then adhere to the base card using liquid glue
  9. create a banner using the punch, fussy cut the sentiment and adhere to the banner using liquid glue, then adhere this to the base card using liquid glue.
Hope you liked today's card. If you would like more information on how to make it, please don't hesitate to contact me, I'd love to hear from you.

If you wish to buy any of the current items used, go to contacting me at the top of the page for details of how to order.

Will be back again soon with more cards, in the meantime take care and have a great day.
Annette 😊 

Sunday, July 11, 2021

Thoughtful Blooms meets Label Me Bold

 Thank you for joining me today!

Happy Birthday Holly


Thought I  would try the new decorative masks for this one, and loved them! Some of the elements are no longer available but can be easily swapped out for up to date product!

Materials required for this card are:

Card Stock: basic white, petal pink, misty moonlight
Dies: painted labels, *stitched shapes (2), *well written
Embossing Folders: tasteful textile
Ink: misty moonlight, petal pink, soft sea foam
Punches: *small bloom
Ribbon: organdy striped
Stamp Sets: *label me bold, *thoughtful blooms 
Accessories: bakers twine, basic pearls, plenty of patterns decorative masks
* = no longer available, when using layering dies (1) is the smallest

Hope you liked today's card. If you would like more information on how to make it, please don't hesitate to contact me, I'd love to hear from you.

If you wish to buy any of the items used, go to contacting me at the top of the page for details on how to order.

Will be back again soon with more cards, in the meantime take care and have a great day.
Annette 😘

Sunday, May 2, 2021

Zany Zebras waterfall card

 Thank you for joining me today!


Happy 3rd Birthday Freddie, where does the time go!

This is my version of a card created by Lisa Cursio (lisasstampstudio.com) I had to make it a little bit bigger, hence the scalloped base for the card (nsu). Once I worked out the measurements I wanted, it was very straight forward to complete. At the time of making this card only the ribbon and tag punch were retired.

I think this is the best waterfall card I've made so far!  
Sorry it's a bit photo heavy.


There is also a zebra stamped on the pull mechanism, just loved this set and didn't get to use it as much as I'd have liked to.

Materials required for this card are:

Card Stock: basic white, calypso coral, night of navy
Designer Series Paper: *playing with patterns
Dies: playful alphabet *stitched shaped frames (4)
Embossing Folders: hammered metal 3D
Ink: calypso coral, coastal cabana, crushed curry, night of navy
Punches: *classic label, *scallop tag topper
Ribbon: *sycamore street satin
Stampin' Markers: calypso coral, coastal cabana, crushed curry, night of navy
Stamp Sets:  a grand kid, *family party, *zany zebras 
* = retired, when using layering dies (1) is the smallest

Hope you liked today's card. If you would like more information on how to make it, please don't hesitate to contact me, I'd love to hear from you.

If you wish to buy any of the items used, go to contacting me at the top of the page for details on how to order.

Will be back again soon with more cards, in the meantime take care and have a great day.
Annette 😘

Forever Fern meets Itty Bitty Birthdays

 Thank you for joining me today!

Happy Birthday Aunty Joyce


I took inspiration for this card from one I'd seen on Pinterest, the jar is because she likes astronomy. It's easy to do with very little stamping.

Materials required for this card are:

Card Stock: basic white, gold foil, pretty peacock
Designer Series Paper: forever greenery, forever gold specialty
Dies: floral gallery, layering circles (s4), playful alphabet, stitched shapes (c2)
Embossing Folders: tasteful textile 3D
Ink: pretty peacock
Stamp Sets: itty bitty birthdays

when using layering dies (1) is the smallest

Hope you liked today's card. If you would like more information on how to make it, please don't hesitate to contact me, I'd love to hear from you.

If you wish to buy any of the items used, go to contacting me at the top of the page for details on how to order.

Will be back again soon with more cards, in the meantime take care and have a great day.
Annette 😘

Friday, April 30, 2021

Sailing Home meets Posted For YouI

 Thank you for joining me today!

Still trying to use up some of my old designer series paper.
Happy Birthday Nigel


I tend to hoard my DSP even though I know I shouldn't. 
It's coming into spring now but I'm still cold a lot of the time so thought I'd do a nice summery themed card to see if it warmed me up! No luck there.

Materials required for this card are:

Card Stock: basic white, night of navy
Designer Series Paper: *come sail away
Dies: all dressed up, layering circles (s8), stitched shapes (c4)
Embossing Folders: painted texture 3D
Ink: night of navy, real red
Ribbon: boho frayed grosgrain
Stamp Sets:  posted for you, sailing home 
Accessories: blending brushes
* = retired, when using layering dies (1) is the smallest

Hope you liked today's card. If you would like more information on how to make it, please don't hesitate to contact me, I'd love to hear from you.

If you wish to buy any of the items used, go to contacting me at the top of the page for details on how to order.

Will be back again soon with more cards, in the meantime take care and have a great day.
Annette 😘

Wednesday, April 28, 2021

You Are Amazing

 Thank you for joining me today!


It's my eldest son's birthday today so!

Happy Birthday Stephen
I won't tell you how old he is, it makes me feel too old.


Old stash and a free Sale-a-bration stamp set now no longer available. The stamparatus was used to create the repeated sentiment on the left.

Materials required for this card are:

Card Stock: basic white, misty moonlight
Designer Series Paper: in colour 20/22
Dies: layering circles (s6), stitched shapes (c3)
Embossing Folders: subtle 3D
Ink: misty moonlight
Ribbon: *stitched satin
Stamp Sets: *you are amazing  
Accessories: *noble peacock rhinestones
* = retired, when using layering dies (1) is the smallest

Hope you liked today's card. If you would like more information on how to make it, please don't hesitate to contact me, I'd love to hear from you.

If you wish to buy any of the items used, go to contacting me at the top of the page for details on how to order.

Will be back again soon with more cards, in the meantime take care and have a great day.
Annette 😘

Sunday, April 11, 2021

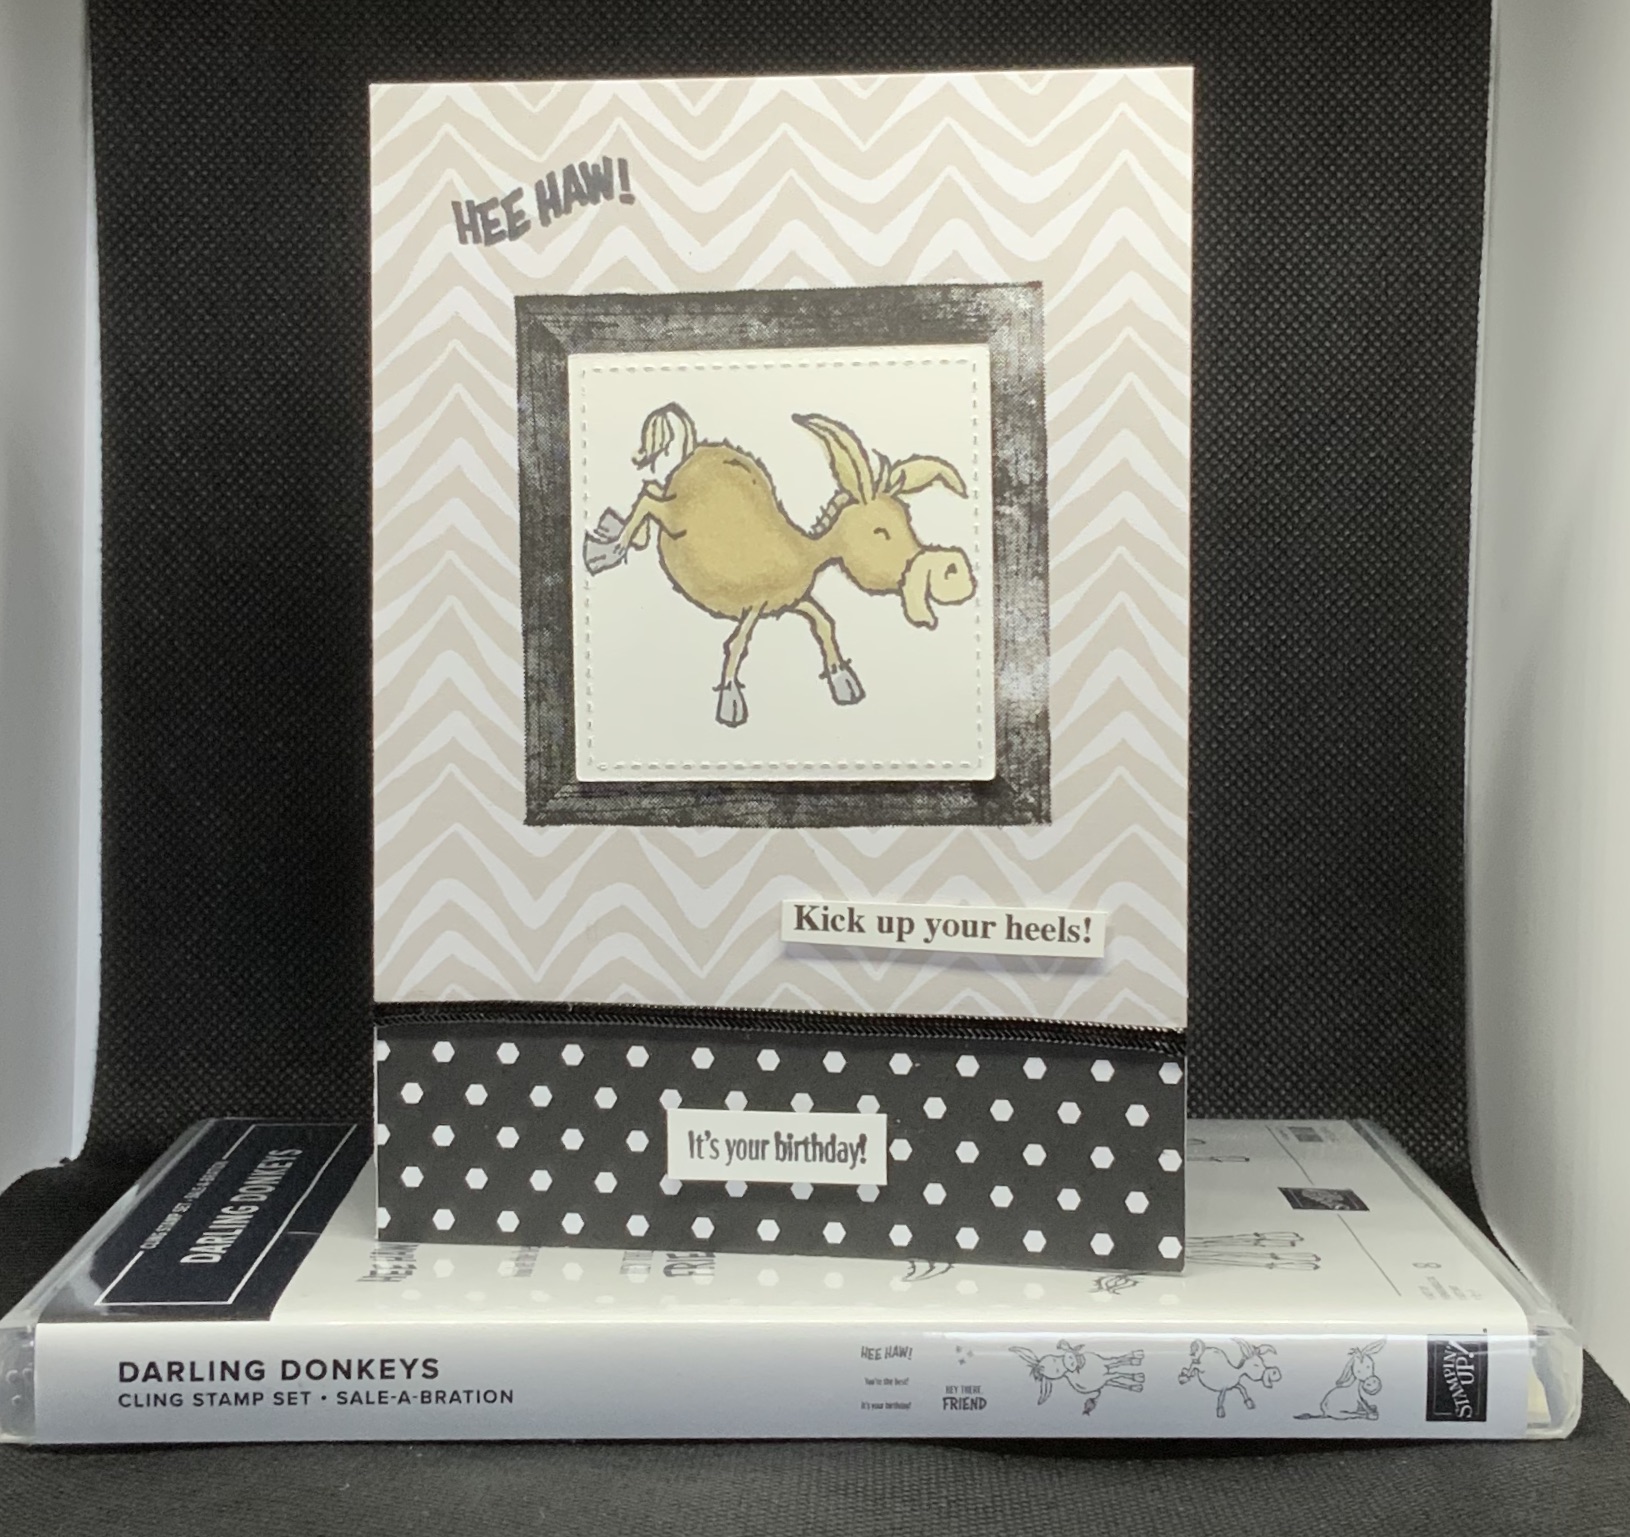
Darling Donkeys meets Zany Zebra's and more!

Thanks for joining me today!

Happy Birthday Tom!

Wasn't sure what to do for Tom this year, he's no longer a little boy but not quite 18 yet. So this is what I came up with and it was a way of using one of the Sale-a-bration stamp sets.


This is a mixture of old and new, ribbon & designer series paper are from my old stash, the donkey is from this season's sale-a-bration, so no longer available and the rest is from the current catalogue.

Materials required for this card are:

Card Stock: basic white
Designer Series Paper: *go wild
Dies: stitched shapes (square 3)
Ink: memento black
Ribbon: *cord
Stampin' Blends: crumb cake, smoky slate
Stamp Sets:  *darling donkeys, framed for you, zany zebras 
* = retired, when using layering dies (1) is the smallest

Hope you liked today's card. If you would like more information on how to make it, please don't hesitate to contact me, I'd love to hear from you.

If you wish to buy any of the items used, go to contacting me at the top of the page for details on how to order.

Will be back again soon with more cards, in the meantime take care and have a great day.
Annette 😘

Sunday, April 4, 2021

Timeless Tulips meets Teeny Tiny Sentiments

 Thank you for joining me today!

It's an Easter card for Sue this week!


It's been a while since this set came out to play and it's quite simple to make.
 
Stamp the tulips and die cut using an oval, stamp an extra tulip & leaf and punch them out, die cut an opening in the 1st layer, die cut a border, emboss the 1st layer, add the dsp and ribbon, attach to base card and insert the tulips, add the sentiment and ribbon.

Materials required for this card are:

Card Stock: basic white, so saffron
Designer Series Paper: butterfly bijou
Dies: layering ovals (s7), floral gallery, stitched shapes (04)
Embossing Folders: brick & mortar
Ink: old olive, memento tuxedo black, so saffron
Punches: tulip builder
Ribbon: ruched
Stamp Sets:  *teeny tiny sentiments, timeless tulips
Accessories: bakers twine, fine tip glue pen
* = retired, when using layering dies (1) is the smallest

Hope you liked today's card. If you would like more information on how to make it, please don't hesitate to contact me, I'd love to hear from you.

If you wish to buy any of the items used, go to contacting me at the top of the page for details on how to order.

Will be back again soon with more cards, in the meantime take care and have a great day.
Annette 😘

Welcome to Easter and more

Thank you for joining me today!

My first Easter card for this year 


This is a mixture of both past and current products, I only make a couple of Easter cards each year, one for my aunt and one to send to Plymouth with a cheque instead of an egg for my grandson.

Materials required for this card are:

Card Stock: basic white, soft sea foam
Designer Series Paper: twinkle twinkle
Dies: dockside, nature's thoughts, ornate frames, stitched shapes (c3)
Embossing Folders: tasteful textile 3D
Ink: memento black
Punches: medium daisy (makes the groove for the twine)
Ribbon: snail mail twine
Stampin' Blends: petal pink, smoky slate
Stamp Sets: timeless tulips, *welcome to easter  

* = retired, when using layering dies (1) is the smallest

Hope you liked today's card. If you would like more information on how to make it, please don't hesitate to contact me, I'd love to hear from you.

If you wish to buy any of the items used, go to contacting me at the top of the page for details on how to order.

Will be back again soon with more cards, in the meantime take care and have a great day.

Annette 😘 

Saturday, March 20, 2021

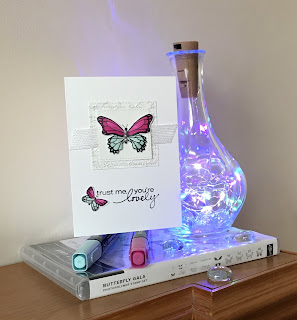
Butterfly Brilliance meets Beauty Abounds

 Thank you for joining me today!


Just loving this new early release bundle

I'm sending this card to some friends of ours who we haven't seen for over a year now. Just to let them know we miss them.


It all goes together so well and it's easy to use too!

Materials required for this card are:

Card Stock: basic white
Designer Series Paper: butterfly bijou
Dies: brilliant wings, stitched frames, well written
Ink: calypso coral, smoky slate
Ribbon: polka dot tulle
Stampin' Blends: calypso coral
Stamp Sets:  beauty abounds, butterfly brilliance 
Accessories: basic pearls

Hope you liked today's card. If you would like more information on how to make it, please don't hesitate to contact me, I'd love to hear from you.

If you wish to buy any of the items used, go to contacting me at the top of the page for details on how to order.

Will be back again soon with more cards, in the meantime take care and have a great day.
Annette 😘

Thursday, February 25, 2021

My Meadow meets Posted for you & more

 Hello and welcome to my haven in a hectic world!

Thanks for joining me today!

Happy Birthday Ruth


This is my take on a card from Pinterest by craftykilieb I just altered the ribbon position.

Materials required for this card are:

Card stock: basic black, whisper white
DSP: *best dressed
Dies: layering circles (s4), stitched shapes (c2)
Embossing folders: subtles 3D
Embossing Powder: white
Ink: memento black, old olive, versamark
Ribbon: striped
Stampin' blends: crumb cake, old olive
Stamp sets: my meadow, posted for you, wildly happy
Accessories: *bakers twine
* = retired, when using layering dies (1) is the smallest

Hope you liked today's card. If you would like more information on how to make it, please don't hesitate to contact me, I'd love to hear from you.

If you wish to buy any of the items used, go to contacting me at the top of the page for details on how to order.

Will be back again soon with more cards, in the meantime take care and have a great day.
Annette 😘

Saturday, January 23, 2021

Pretty Perennials meets Swirly Frames and more

 Hello and welcome to my haven in a hectic world!

Thanks for joining me today!

Another card for Sue, using my new favourite stamp set created by Dena, Rekow


Really liked this card once it was made, I used the pretty perennials stamp set created by one of my favourite demonstrator's, her blog is amazing!

Materials required for this card are:

Card Stock: basic white, misty moonlight
Designer Series Paper: *perfectly artistic
Dies: nature's thoughts, perennial petals, stitched shapes circle (4)
Embossing Folders: *stone
Embossing Powder: white
Ink: calypso coral, coastal cabana, flirty flamingo, gorgeous grape, mango melody, versamark
Ribbon: *stitch satin
Stamp Sets: pretty perennials, swirly frames, waterfront 
Accessories: basic rhinestones
* = retired, when using layering dies (1) is the smallest

Hope you liked today's card. If you would like more information on how to make it, please don't hesitate to contact me, I'd love to hear from you.

If you wish to buy any of the items used, go to contacting me at the top of the page for details on how to order.

Will be back again soon with more cards, in the meantime take care and have a great day.
Annette 😘

Wednesday, November 18, 2020

Piece of Cake meets Power of Hope

Power of Hope meets Piece of Cake

Hello and welcome to my haven in a hectic world.

Made this card some time ago for my niece, so it's my old style of layout!


 I have to be able to tell hubby I've used every stamp set at least once

Colours: Petal Pink 2 pieces 10 x 14 (1st layer), 9.5 x 7 (scallop oval),Whisper White 3 pieces 21 x 14.5 scored at 10.5 (card base), 9 x 6.5 (stitched oval), 2 x 7 (sentiment).
DSP: Parisian Blossoms 4 x 14 (2nd layer).

All measurements are in centimetres.
(cs) = card stock, (dsp) = designer series paper,  (ef ) = embossing folder, (ss) = stamp set, * = retired, when using layering dies (1) is the smallest.

  • Emboss the larger piece of  petal pink (cs) using the parisian flourish (ef).
  • Now adhere the *parisian blossoms (dsp) down the left hand side of the embossed layer using liquid glue.
  • Add some of the petal pink metallic edged ribbon along the join of these two pieces, (I used sellotape at the back to do this), then make a small bow and attach it towards the top using a glue dot.
  • This is then adhered to the base card using liquid glue.
  • Stamp both the sentiment from the *piece of cake (ss) and the lady from the *power of hope (ss) on their respective pieces of whisper white (cs) using memento black ink.
  • Colour the lady using petal pink blends.
  • Die cut the sentiment using the ornate frames dies, the lady with the stitched shapes dies oval (4) and the petal pink (cs) with the layering ovals dies scallop (7) .
  • Adhere the two ovals together using liquid glue.
  • Attach the ovals and the sentiment to the base card using dimensional pads.
  • Arrange some champagne rhinestones around the lady to add some dimension.
Will be back again soon with more cards!
Annette X

Monday, November 16, 2020

Beauty Abounds meets Floral Essence

Hello and welcome to my haven in a hectic world!
Thanks for joining me today!

For a Special friend, just because you're you Cheryl


Tried a  totally different colour combo with this card!!

Materials required for this card are:

Card Stock: sahara sand, whisper white
Designer Series Paper: 19-21 in colors
Dies: butterfly beauty, stitched shapes circle (2)
Embossing Folders: subtle 3D
Ink: crumb cake, seaside spray
Punches: *leaf
Ribbon: scalloped linen
Stamp Sets: beauty abounds, birch, floral essence
* = retired, when using layering dies (1) is the smallest

Hope you liked today's card. If you would like more information on how to make this card, please don't hesitate to contact me, I'd love to hear from you.

If you wish to buy any of the items used, go to contacting me at the top of the page for details on how to order.

Will be back again soon with more cards, in the meantime take care and have a great day.
Annette 😘

Wednesday, October 14, 2020

Beautiful World

 Hello and welcome to my haven in a hectic world!

Thanks for joining me today!

Hello, here's another card for Sue!


Should have been posted on the 11th October.
Used the seabed folder for the first time and think it's gorgeous!!!
And not just for water themed cards.

Materials required for this card are:

Card Stock: seaside spray, whisper white
Designer Series Paper: in color 19/21
Dies: layering squares (6) scallop, stitched shapes (2)
Embossing Folders: seabed 3D
Embossing Powder: clear
Ink: seaside spray, versamark
Ribbon: scalloped linen
Stamp Sets: beautiful world
Accessories: *basic adhesive sequins 
* = retired, when using layering dies (1) is the smallest

Hope you liked today's card. If you would like more information on how to make it, please don't hesitate to contact me, I'd love to hear from you.

If you wish to buy any of the items used, go to contacting me at the top of the page for details on how to order.

Will be back again soon with more cards, in the meantime take care and have a great day.
Annette 😘

Sunday, September 27, 2020

Butterfly Gala meets Waterfront

 Hello and welcome to my haven in a hectic world!

Thanks for joining me today!

Hello Sue, can't believe it's over six months since we started doing this.


This is the second card for today!
Feeling the need to use some dsp just now and thought this looked quite nice.

Materials required for this card are:

Card stock: whisper white
Designer Series Paper: flowers for every season
Dies: layering ovals (5), stitched shapes oval (3)
Embossing folders: tasteful textile 3D
Ink: bumble bee, just jade
Punches: butterfly duet
Ribbon: in colors twill
Stamp sets: butterfly gala, waterfront
Accessories: note cards, shimmer paint, stampin' spritzers
* = retired, when using layering dies (1) is the smallest

Hope you liked today's card. If you would like more information on how to make it, please don't hesitate to contact me, I'd love to hear from you.

If you wish to buy any of the items used, go to contacting me at the top of the page for details on how to order.

Will be back again soon with more cards, in the meantime take care and have a great day.
Annette 😘

Monday, August 24, 2020

Floral Essence and more!!

Hello and welcome to my haven in a hectic world!

Happy Birthday Donna

I made a  fun fold card the other day and thought the layout used might be nice for a basic card with an added flower and I think it is, what do you think?


Materials required for this card are:

Card stock: *perennial essence vellum, petal pink, very vanilla
DSP:perennial essence
Dies: layering circles (2), stitched shapes (1)
Embossing powders: clear
Ink: craft white, blackberry bliss
Ribbon: *ombre calypso coral 
Stamp sets: by the dock, floral essence, peaceful moments
Accessories: *white perfect accents

Once I'd stamped the flower petals and leaf I heat embossed using clear embossing powder, to make sure the ink didn't smudge.
* = retired

Hope you liked today's card. If you would like more information on how to make this card please don't hesitate to contact me, I'd love to hear from you.

If you wish to buy any of the items used, go to contact me at the top of the page for details on how to order.

Will be back again soon with more cards, in the meantime have a great day.
Annette 😘

Sunday, July 12, 2020

Butterfly Gala meets Lovely You

Hello and welcome to my haven in a hectic world!

Well July has got off to a dull and wet start, but today has started with bright sunshine and as my Son's off on a jolly with the family good weather would be appreciated!!!

Happy Sunday Sue

I've copied this card from Jill Chapman's blog Paper Daisy Crafting, she makes lovely quick and simple cards.


Materials required for this card are:

Card stock: whisper white
Dies:stitched shapes (2&3) square
Embossing folders: *fancy fan, subtle
Ink: memento tuxedo black
Punches: butterfly duet
Ribbon: *flax
Stampin' blends: magenta madness, pool party
Stamp sets: butterfly gala, en franÇais, lovely you
Accessories: basic pearls, note cards & envelopes, wink of sella

* = retired and when using layering dies (1) is the smallest

Hope you liked today's card. If you would like more information on how to make it, please don't hesitate to contact me, I'd love to hear from you.

If you wish to buy any of the items used, go to contact me at the top of the page for details on how to order.

Will be back again soon with more cards, in the meantime have a great day.
Annette 😘

Wednesday, June 3, 2020

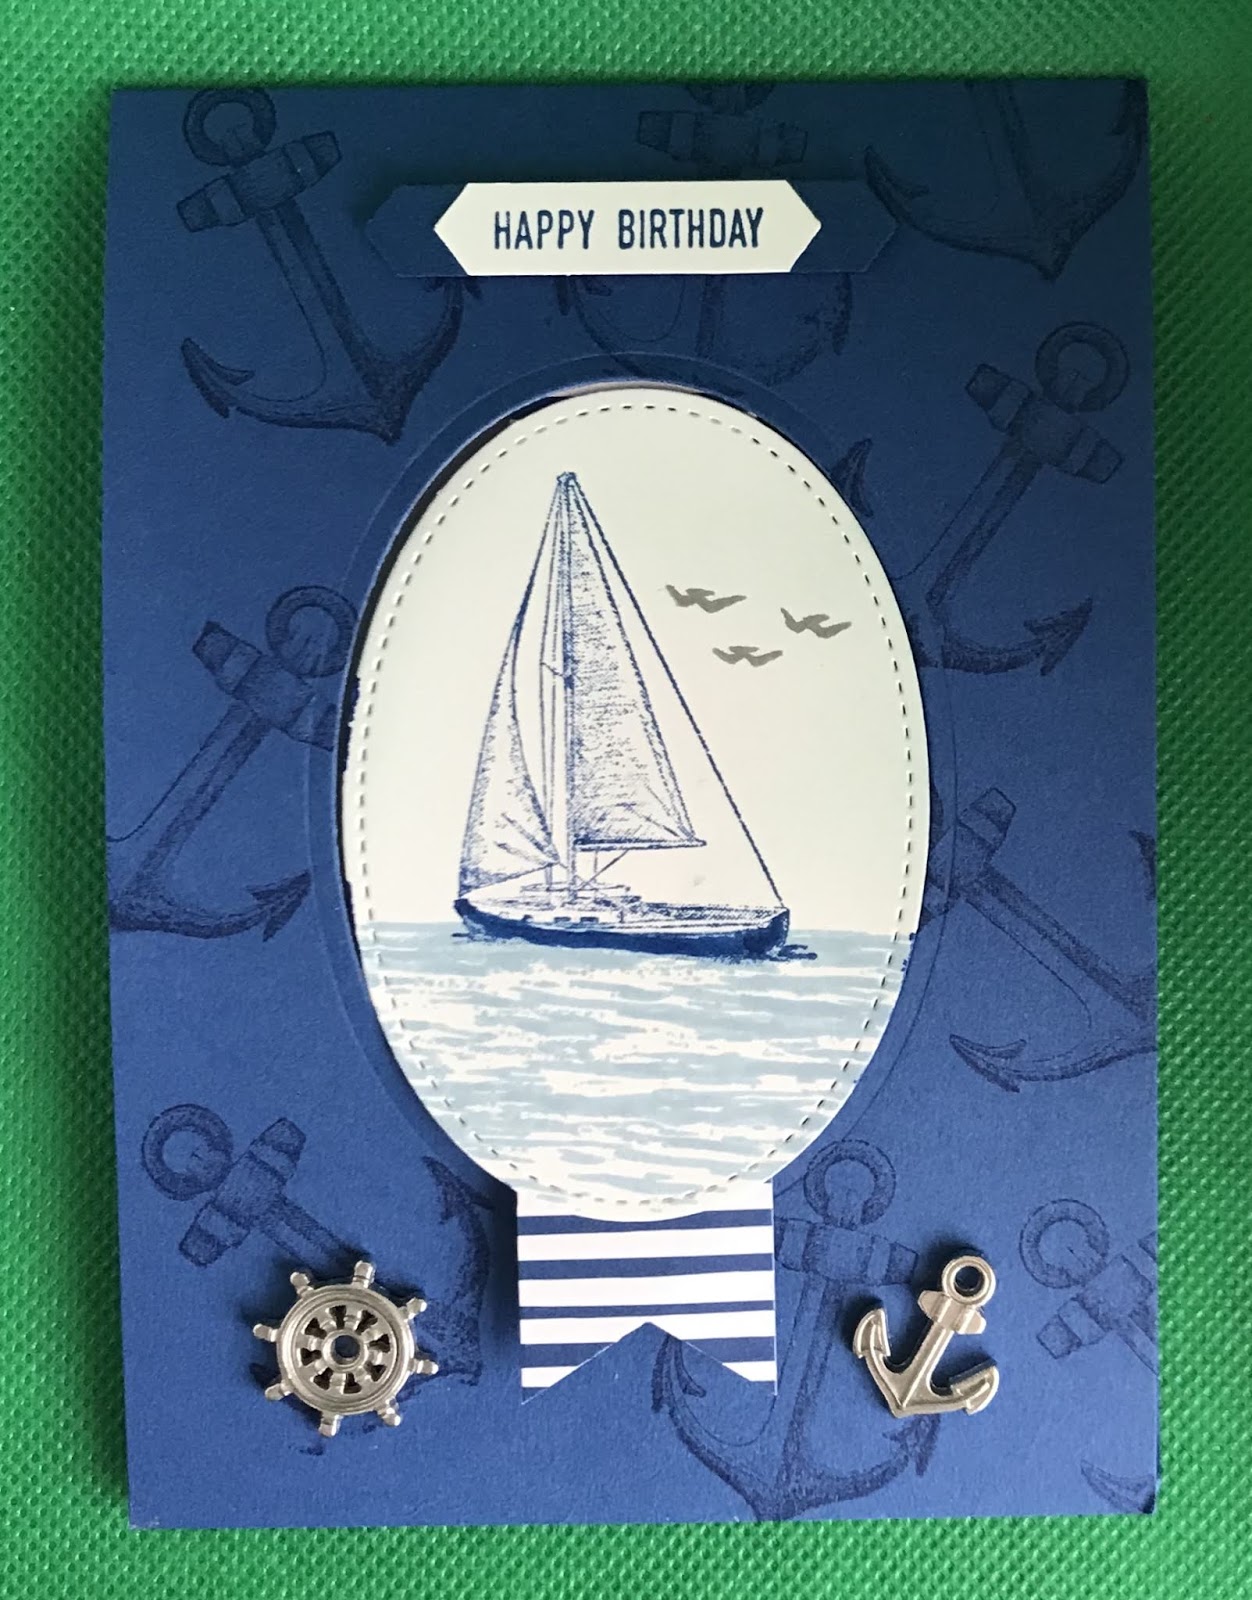
Sailing Home meets High Tide and more

Hello and welcome to my haven in a hectic world, thank you for dropping by.

Happy Birthday Mike!

This is my take, on card from Kelly Acheson's blog "a stamp above"  on 5 May 2020, I changed the orientation and turned it into  swing card.
closed
open

Measurements are in centimetres.

(cs) = card stock, (dsp) = designer series paper, (ss) = stamp set, when using layering dies (1) is the smallest.
Colours: Basic Gray, Blueberry Bushel, Pool Party, Seaside Spray.
  • Card base is blueberry bushel (cs) 10.5 x 29.7 scored at 14.8.
  • Die cut the opening for the front using the layering ovals dies  (7), then randomly stamp the anchor from the sailing home (ss) in blueberry bushel.
  • On a piece of whisper white (cs) 7 x 9.5 stamp the scene, water is from the high tide (ss) in seaside spray, boat is from the sailing home (ss) in blueberry bushel and the birds are from the my meadow (ss) in basic gray. Lightly sponge above the water in pool party to form a sky line.
  • Die cut the scene using the stitched shape dies oval (4), now die cut another oval the same size in blueberry bushel.
  • Cut a piece of whisper white (cs) 10 x 14.3 (card insert), do a dry placement, and through the aperture stamp the greeting from the sailing home (ss) using blueberry bushel in the middle.
  • Cut a 2.5 stripe from the 6" x 6"  18/20 in color (dsp) stack, then use the triple banner punch to make the tail at one end and a 1cm score mark at the other.
  • Adhere the dsp to the back of the card insert making sure it's in the middle.  Then using 2 pieces of bakers twine measuring 14cm each create a reef knot and attach both ends to the back of the card insert towards the bottom using sellotape, making sure the knot on the front is roughly in the middle.
  • Attach the card insert to the card base using dimensional pads.
  • Close the card, add some liquid glue down the centre of the dsp showing through the oval aperture then place the scene oval over the top, making sure it's in the right place and adhere down.
  • Open the card and adhere the blueberry bushel oval over the top of the white one.
  • On a scrap piece of whisper white (cs) stamp the happy birthday from the itty bitty greetings (ss) in blueberry bushel and punch out using the classic label punch. I re-inserted the ends to make the label smaller then punched a second label in blueberry bushel and adhered the two together and attached to the front of the card using dimensional pads.
  • Lastly I added a couple of the (r) sail away trinkets.
Will be back again soon with more cards, enjoy the rest of your day.
Annette X

Tuesday, April 28, 2020

Enjoy Life meets Label Me Bold

Hello and welcome to my haven in a hectic world, hope you're having a great day!

Happy Birthday Ste!

I'm so pleased for him, as he's just started cycling again after breaking a hip back in January! Only shorter and slower rides just now but I'm sure he'll get back to his normal cycling soon.

For this card I've adapted a card layout from one of the blogs I follow, with a card I liked on Pinterest, thus making it my own creation.
All measurements are in centimetres.

Card Stock: Balmy Blue 9 x 9 (scallop circle), 1 x 4.5 (sentiment), Smoky Slate 12.5 x 12.5 (1st layer),  Whisper White 26 x 13 scored at 13 (card base), 8 x 8 (stitched circle) , when using layering dies (1) is the smallest.
DSP: Large piece 5 x 11.5, smaller piece 3 x 8

(cs) = card stock, (ef) = embossing folder, (ep) embossing powder, (ss) = stamp set, when using layered dies (1) is the smallest.

  • Dry emboss the smoky slate 1st layer (cs) using the hammered metal (ef).
  • Adhere a piece of the (r) black cord across the 1st layer just below the middle, I used narrow tear & tape for this, then adhere this layer to the card base using liquid glue.
  • Stamp the whisper white stitched circle (cs) using the enjoy life (ss), garden green for the grass,  versaMark & memento black for the biker, heat embossed with black (ep), memento black for the sentiment, then finally use the above the clouds (ss) and memento black for the birds. 
  • blend some colour lightly onto the white background using balmy blue and either a sponge or blending brush.
  • Now for the die cutting, this can all be completed in one crank through your machine laying out all the pieces on your cutting plate.
    • for the biker use the stitched shapes dies, circle (4).
    • for the scalloped circle use the layering circles dies, scallop (8).
    • for the Son I used (r) neutrals (dsp) and the hand lettered prose dies.
  • Stamp the happy birthday from the label me bold (ss) in garden green onto the smaller piece of balmy blue (cs). Once stamped trim down if required.
  • Adhere the larger piece of lily impressions (dsp) directly below the black cord using liquid glue.
  • Adhere the biker to the scalloped circle using liquid glue.
  • Attach the scalloped circle to the base card using dimensional pads.
  • Cut a 5cm piece of the scalloped linen ribbon and use a balmy blue stampin' blend to change the colour.
  • Adhere the happy birthday sentiment to the ribbon using narrow tear & tape, then attach to the card base using a combination of one dimension pad on the right side and a glue dot on the left side.
  • Adhere the Son letters at the top of the card using liquid glue.
  • Finally add 3 (r) black rhinestones below the happy birthday sentiment. Remember Stampin' Blends can be used to change basic rhinestones to any colour you want.
Will be back again soon with more cards, and thanks for joining me today.
Annette X

Delicate Whispers and more

Welcome to my blog and    t hank you for joining me today! Happy Anniversary to Sylvia & Bill Intermediate level - blending with a brush...