Showing posts with label sheer ribbon. Show all posts

Wednesday, October 2, 2024

Simply Zinnias and a little more

Welcome to my blog

and  thank you for joining me today!

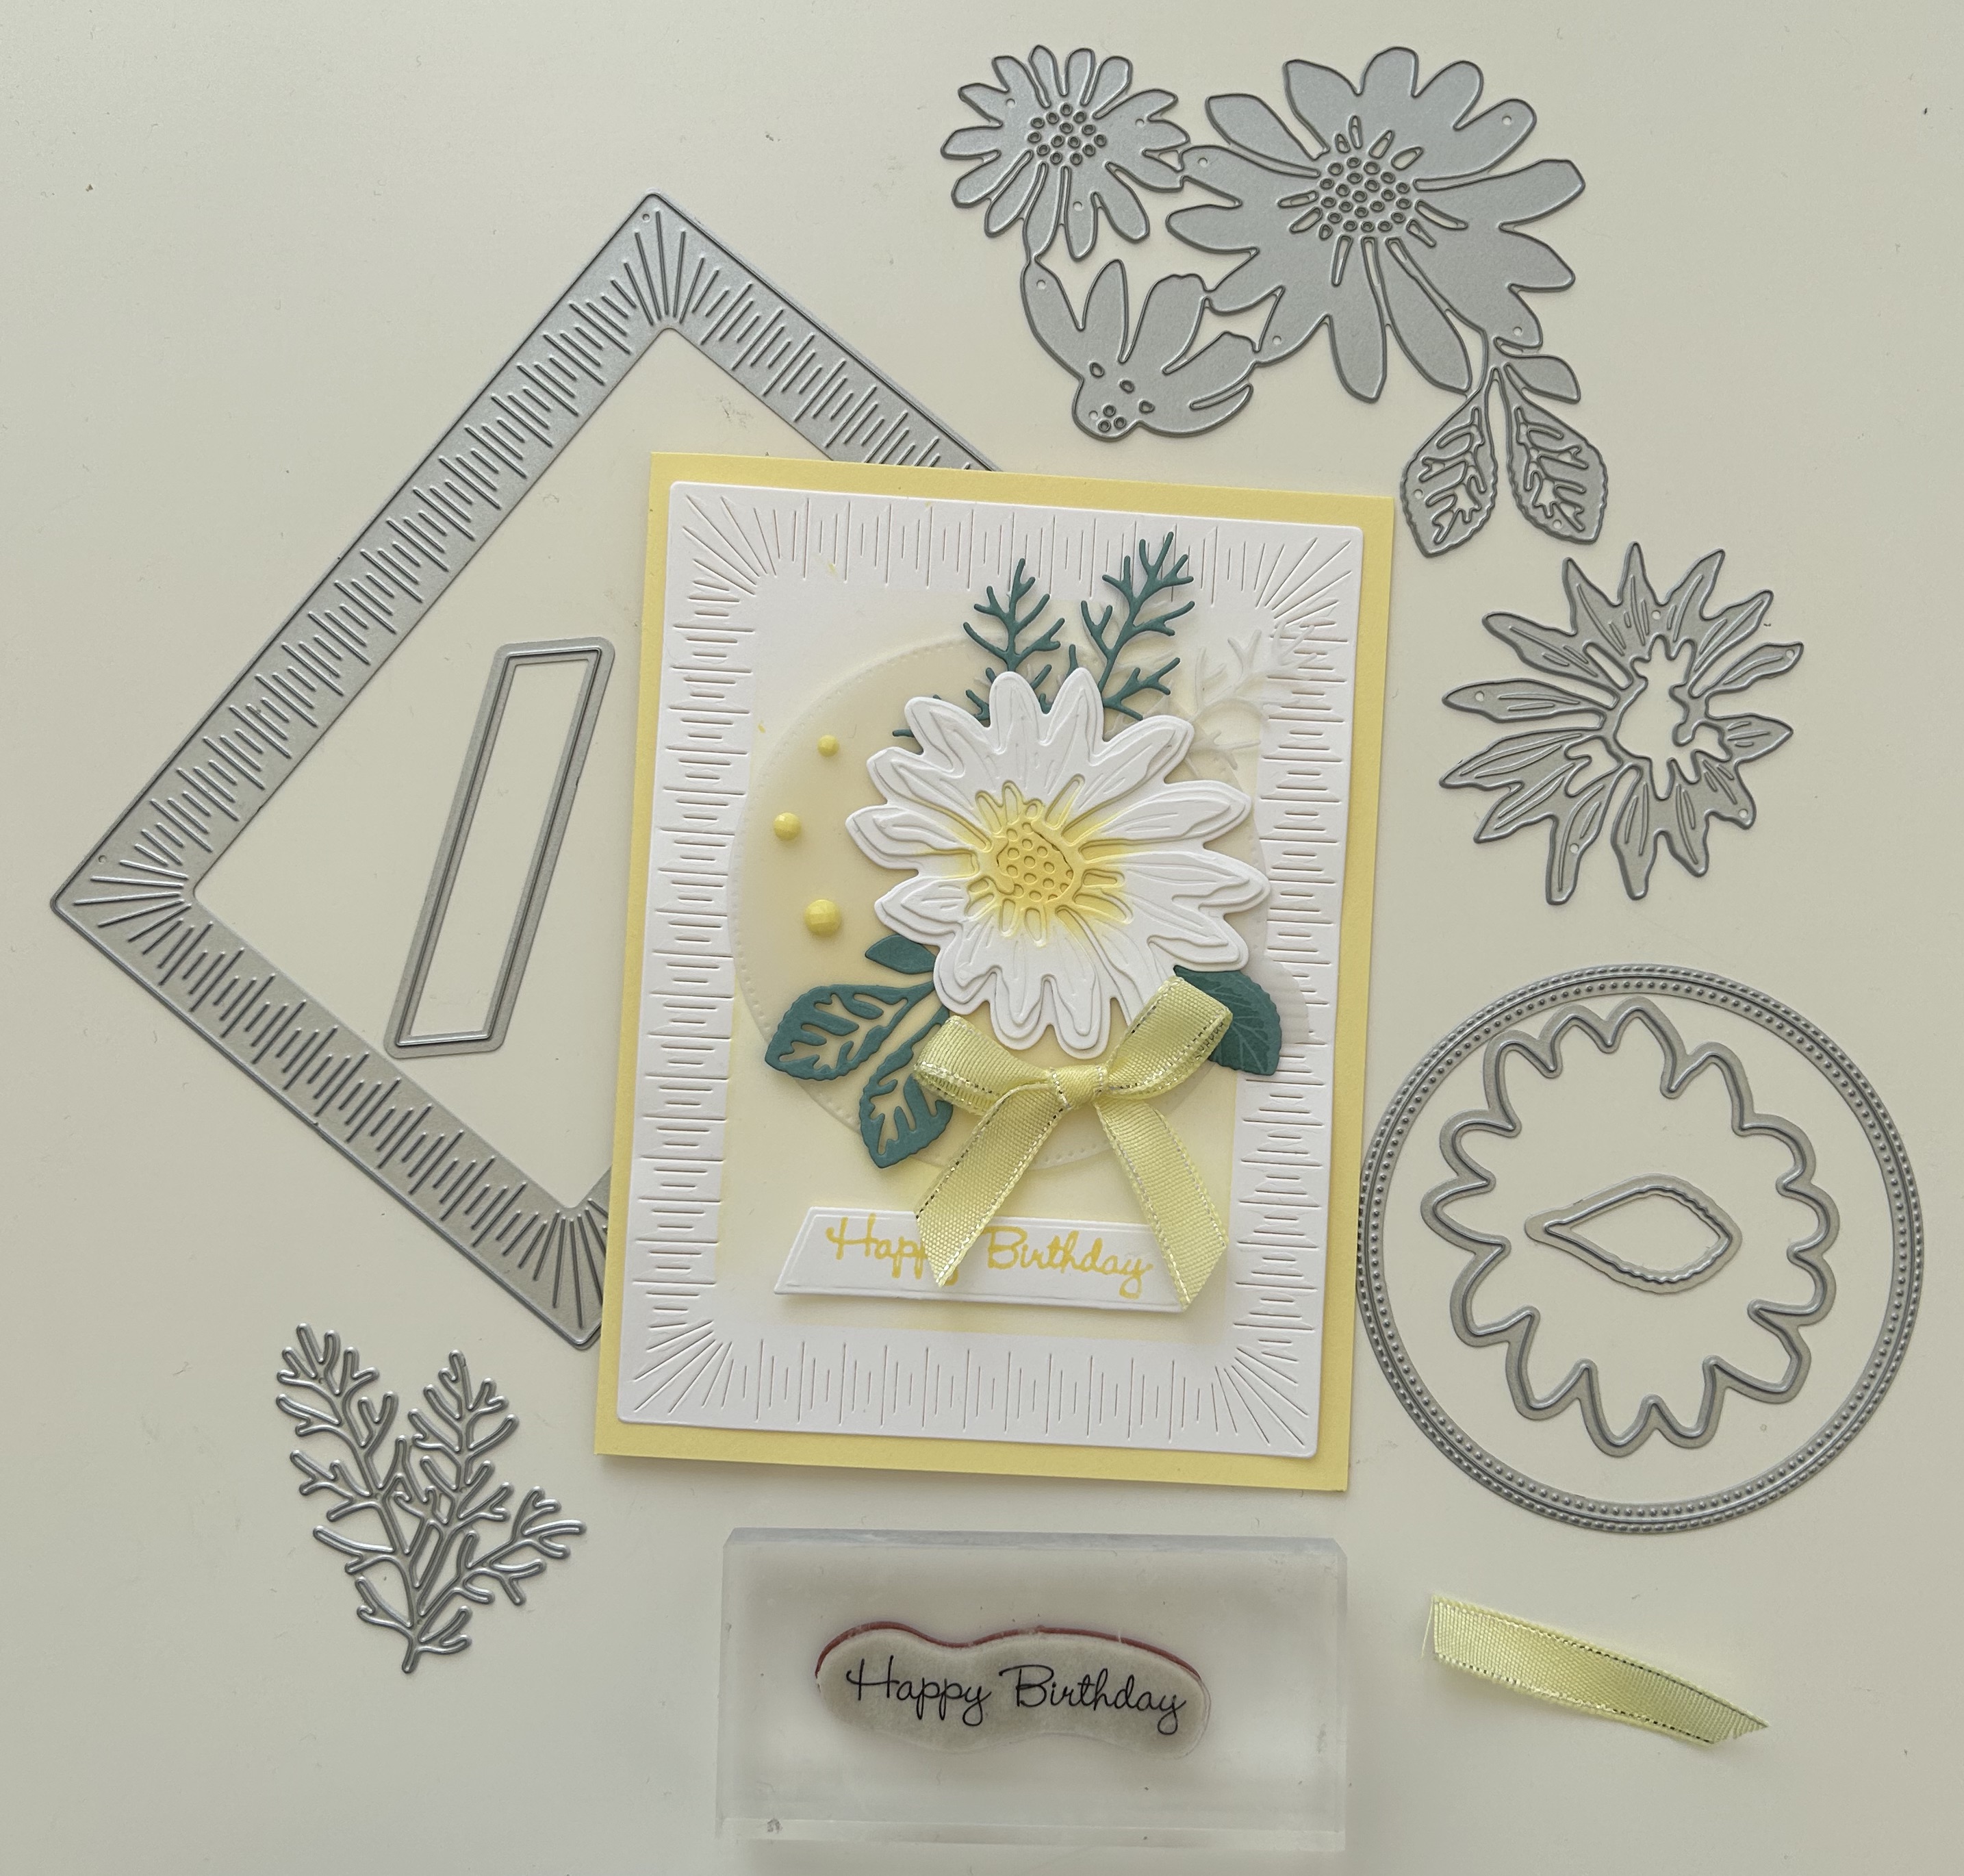
Happy Birthday Karine


Intermediate - colouring with alcohol markers, die cutting, dry embossing, layering

Materials required for this card are:

Bundles: simply zinnias
Card Stock: basic white, vellum
Designer Series Paper: flowering zinias
Embossing Folders: cute crochet
Ink: momento tuxedo black
Stampin' Blends: flirty flamingo, highland heather, lemon lime twist, lemon lolly, melon mambo
Stamps: simply said
Accessories: *sheer ribbon
 
* = no longer available
  1. Start with a base card 14.5 x 21 scored at 10.5, dsp 14.5 x 10.5, vellum 7.5 x 14, two off cuts for stamping
  2. adhere the dsp to the front of the card using liquid glue
  3. dry emboss the vellum and adhere to the card using liquid glue where it won't show
  4. stamp the image and sentiment
  5. colour the image using the stampin' markers, then die cut it
  6. attach the image and sentiment to the card using dimensional pads
  7. make a bow and attach to the card using a glue dot
Hope you liked today's card. If you would like more information on how to make it, please don't hesitate to contact me, I'd love to hear from you.

If you wish to buy any of the items used, go to contacting me at the top of the page for details of how to order.

Will be back again soon with more cards, in the meantime take care and have a great day.

Annette 😊  

Sunday, September 8, 2024

Spotlight on Nature - Anniversary

 Welcome to my blog

and  thank you for joining me today!

Happy 6th Anniversary to a lovely Couple


Intermediate - die cutting, dry embossing, fussy cutting, layering, stamping

Materials required for this card are:

Bundles: spotlight on nature
Card Stock: basic white, summer splash
Designer Series Paper: 24/26 in color pack
Embossing Folders: basics 3D
Ink: summer splash
Stamps: layers of beauty
Accessories: iridescent rhinestones, sheer ribbon
  1. Start with a base card 14.5 x 21 scored at 10.5, white layer 14.2 x 10.2, circle layer 7.5 x 7.5, small off cut for the butterfly, dsp layer 4 x 14.2
  2. dry emboss the white layer using the folder
  3. adhere the dsp layer using liquid glue to the embossed layer
  4. add the ribbon across the bottom and attach at the back using tape
  5. make the bow and attach with glue dots
  6. adhere to the base card using liquid glue
  7. stamp the butterfly and sentiment, then add the leaves using the stamped off method 
  8. die cut the sentiment and fussy cut the butterfly
  9. attach to the card using dimensional pads
  10. Add the rhinestones
Hope you liked today's card. If you would like more information on how to make it, please don't hesitate to contact me, I'd love to hear from you.

If you wish to buy any of the items used, go to contacting me at the top of the page for details of how to order.

Will be back again soon with more cards, in the meantime take care and have a great day.
Annette 😊 

Tuesday, May 7, 2024

Everyday Details meets Something Fancy

 Welcome to my blog

and  thank you for joining me today!

Happy Birthday Idwin


Intermediate level - colouring, die cutting, dry embossing, layering and stamping

Materials required for this card are:

Bundles: everyday details (4), something fancy
Card Stock: basic white, bubble bath
Designer Series Paper: *poetic expressions
Embossing Folders: exposed brick 3D
Ink: bubble bath, memento black 
Stampin' Blends: bubble bath, lost lagoon
Accessories: *adhesive backed sequins & gems, blending brush
 
* = no longer available, when using layering dies (1) is the smallest
  1. Start with a base card 14.5 x 21 scored at 10.5, dsp 5.5 x 10.5, white layer 9 x 10.5, pink 6.4 x 10.1, white 6.4 x 10.1, strip of white for the sentiment
  2. dry emboss the white layer using the folder
  3. die cut the crosses across the bottom of the dsp
  4. Join the dsp layer to the embossed layer at the back using some tape
  5. add the ribbon across and adhere at the back
  6. using the bubble bath ink, colour  across the base card towards the bottom using a blending brush (for the pink behind the crosses in the dsp
  7. adhere this layer to the base card using liquid glue
  8. die cut the white rectangle, stamp and colour the flowers and leaves using the blending markers
  9. attach this to the pink rectangle using dimensional pads and adhere to base card
  10. stamp the sentiment and die cut, then attach to the base card using dimensional pads
  11. add the sequins
Hope you liked today's card. If you would like more information on how to make it, please don't hesitate to contact me, I'd love to hear from you.

If you wish to buy any of the items used, go to contacting me at the top of the page for details of how to order.

Will be back again soon with more cards, in the meantime take care and have a great day.
Annette 😊 

Saturday, March 30, 2024

Quiet Meadow meets Sentimental Park

  Welcome to my blog

and  thank you for joining me today!

Happy Birthday Carole


Intermediate easy - die cutting, dry embossing, layering, stamping

Materials required for this card are:

Card Stock: basic white, bubble bath
Dies: deckled rectangles (7), meadow
Embossing Folders: *subtle 3D, timeworn type 3D, twisted rope 3D
Ink: bubble bath
Stamps: quiet meadow, sentimental park
Accessories: iridescent pearls, sheer ribbon
 
* = no longer available, when using layering dies (1) is the smallest
  1. Start with a base card 21 x 14.5 scored at 10.5,white matt 14.5 x 10.5, basic white scraps for die cutting and stamping
  2. stamp the flower from the quiet meadow set straight onto the base card using the stamped off method
  3. use the twisted rope folder to emboss the front of the base card
  4. die cut the rectangle from the white matt and emboss using the timeworn type folder
  5. stamp the sentiment
  6. die cut the flowers, butterfly and sentiment
  7. add the ribbon behind the sentiment and attach to the card base at the edge on both sides using glue dots
  8. attach the matt to the base card using dimensional pads
  9. adhere the flowers and butterfly to the base card, tucking the stems behind the sentiment
  10. add the pearls
Hope you liked today's card. If you would like more information on how to make it, please don't hesitate to contact me, I'd love to hear from you.

If you wish to buy any of the items used, go to contacting me at the top of the page for details of how to order.

Will be back again soon with more cards, in the meantime take care and have a great day.
Annette 😊 

Wednesday, November 8, 2023

Soft & Subtle Petal Park

  Welcome to my blog

and  thank you for joining me today!

Happy Birthday Gladys


I must have been in an aggressive mood today as I only used punches 😊
With a little stamping, layering and ribbon

Materials required for this card are:

Card Stock: basic white, lemon lolly
Designer Series Paper: bright & beautiful
Embossing Folders: *subtle, timeworn type 3D
Ink: bubble bath, lemon lolly, old olive
Punches: bough, 2⅜ circle, petal park builder
Stamp Sets: circle sayings, layering leaves, petal park
Accessories: basic rhinestones, sheer ribbon

  1. Start with a base card 14.5 x 21 scored at 10.5 - lemon lolly 14.1 x 10.1 - basic white 13.7 x 9.7
  2. adhere the lemon lolly layer to the base card using liquid glue
  3. emboss the basic white layer using the 3D folder
  4. cut the dsp 4.7 x 9.7 and adhere to the bottom of the white layer using liquid glue
  5. wrap the ribbon across the top of the dsp and attach at the back using tear & tape
  6. attach this layer to the base card using dimensional pads
  7. stamp the sentiment, now stamp the flowers and leaves using 2 step stamping with filler stamp stamped off once for the flowers and twice for the leaves
  8. Punch out all the pieces and emboss them using the subtle folder 
  9. attach the sentiment using dimensional tabs, the yellow and larger pink flower using dimensional tabs and the rest using glue dots
  10. add the rhinestones, make a bow and attach with glue dots
Hope you liked today's card. If you would like more information on how to make it, please don't hesitate to contact me, I'd love to hear from you.

If you wish to buy any of the items used, go to contacting me at the top of the page for details on how to order.

Will be back again soon with more cards, in the meantime take care and have a great day.

Annette 😘 

Friday, October 6, 2023

Earthen Textures meets Go To Greetings

   Welcome to my blog

and  thank you for joining me today!

Happy Birthday Alison


die cutting, embossing and stamping

Materials required for this card are:

Card Stock: pecan pie, parakeet party, very vanilla
Bundles: earthen textures
Dies: something fancy
Embossing Folders: stripes & spalatters
Ink: crumb cake, bubble bath
Stamp Sets: go to greetings
Accessories: sheer ribbon, *sequins & gems

 * = no longer available
  1. Start with a base card 13.5 x 27 scored at 13.5
  2. first layer 12.9 x12.9, stamp down the left side using crumb cake stamped off once. Then emboss down the right side using the folder
  3. add a strip of ribbon down the middle attached at the back with tear & tape
  4. stamp the flowers, vase & sentiment in bubble bath 
  5. die cut all 4 pieces
  6. adhere the grass using liquid glue to the base card
  7. attach the rest of the pieces using dimensional pads (you will need to cut down the sentiment banner on both sides)
  8. add the sequins 
Hope you liked today's card. If you would like more information on how to make it, please don't hesitate to contact me, I'd love to hear from you.

If you wish to buy any of the items used, go to contacting me at the top of the page for details on how to order.

Will be back again soon with more cards, in the meantime take care and have a great day.
Annette 😘

Monday, October 2, 2023

Translucent Florals meets various dies

    Welcome to my blog

and  thank you for joining me today!

Happy Birthday Karine


die cutting, embossing, layering, stamping and masking
Inspired by Akiko Sudano

Materials required for this card are:

Card Stock: basic white, lemon lolly, lost lagoon, vellum
Designer Series Paper: bringt & beautiful
Dies: deckled rectangles (6), scalloped contours (5), translucent florals
Embossing Folders: timeworn type 3D
Ink: lemon lolly, lost lagoon
Stamp Sets: translucent florals
Accessories: sheer ribbon, solid gems

 When using layering dies (1) is the smallest
  1. Start with a base card 14 x 21 scored at 10.5
  2. die cut the scalloped rectangle in the dsp
  3. die cut the deckled rectangle in white 
  4. die cut the 2 flower heads and a leaf in vellum and then the larger flower head in paper for masking
  5. stamp the 2 flower heads on the deckled rectangle, then place the mask down and stamp the two stems, then the leaves
  6. stamp the sentiment on a piece of white card and fussy cut around it
  7. emboss the white rectangle and the sentiment using the 3D folder
  8. adhere the 2 rectangles together using liquid glue
  9. wrap a piece of ribbon across the rectangles and through the loops of the scalloped layer and stick down at the back 
  10. loop a piece of ribbon through at the front of the card and tie a knot, then secure with a glue dot
  11. attach the sentiment using dimensional pads
  12. adhere the vellum down using liquid glue (only needs a small dot of glue on the vellum slightly smudged so it can't really be seen before adhering)
  13. add the gems
  14. attach these layers to the base card using dimensional pads.
Hope you liked today's card. If you would like more information on how to make it, please don't hesitate to contact me, I'd love to hear from you.

If you wish to buy any of the items used, go to contacting me at the top of the page for details on how to order.

Will be back again soon with more cards, in the meantime take care and have a great day.
Annette 😘

Sunday, July 23, 2023

Cheerful Daisies meets Go to Greetings

   Welcome to my blog

and  thank you for joining me today!

Happy Birthday Anne


easy decoupage, layering, die cutting and stamping

Materials required for this card are:

Card Stock: basic white, lemon lolly, lost lagoon 
Dies: cheerful daisies, radiating stitches, something fancy, stylish shapes
Ink: lemon lolly, lost lagoon, versamark
Stamp Sets: cheerful daisies, go to greetings
Accessories: adhesive-backed solid gems, clear embossing powder, sheer ribbon
  1. Start with a base card 14 x 21 scored at 10.5, white layer 14 x 11, lost lagoon, vellum, basic white for leaves and flower and sentiment
  2. die cut the background layer and use a blending brush to colour the centre
  3. adhere this layer to the base card using liquid glue
  4. stamp the sentiment using versamark & lemon lolly ink, add the clear embossing powder and heat emboss.
  5. stamp the single leaf 
  6. die cut all the pieces - flower layers (3), leaves (2) one green and one vellum, sentiment label, large vellum circle 
  7. using a blending brush, colour the centre of the flower pieces and then build the layers using glue dot
  8. adhere the circle to the base card using liquid glue
  9. adhere the leaves around the vellum circle using liquid glue
  10. add the flower to the top using glue dots
  11. make a bow and attach using a glue dot
  12. attach the sentiment using dimensional pads
  13. add the gems
Hope you liked today's card. If you would like more information on how to make it, please don't hesitate to contact me, I'd love to hear from you.

If you wish to buy any of the items used, go to contacting me at the top of the page for details on how to order.

Will be back again soon with more cards, in the meantime take care and have a great day.
Annette 😘

Saturday, January 2, 2021

Warm & Toasty

 Hello and welcome to my haven in a hectic world!

Thanks for joining me today!

Filling in with a few more Christmas cards I've made, before the birthdays start 😊

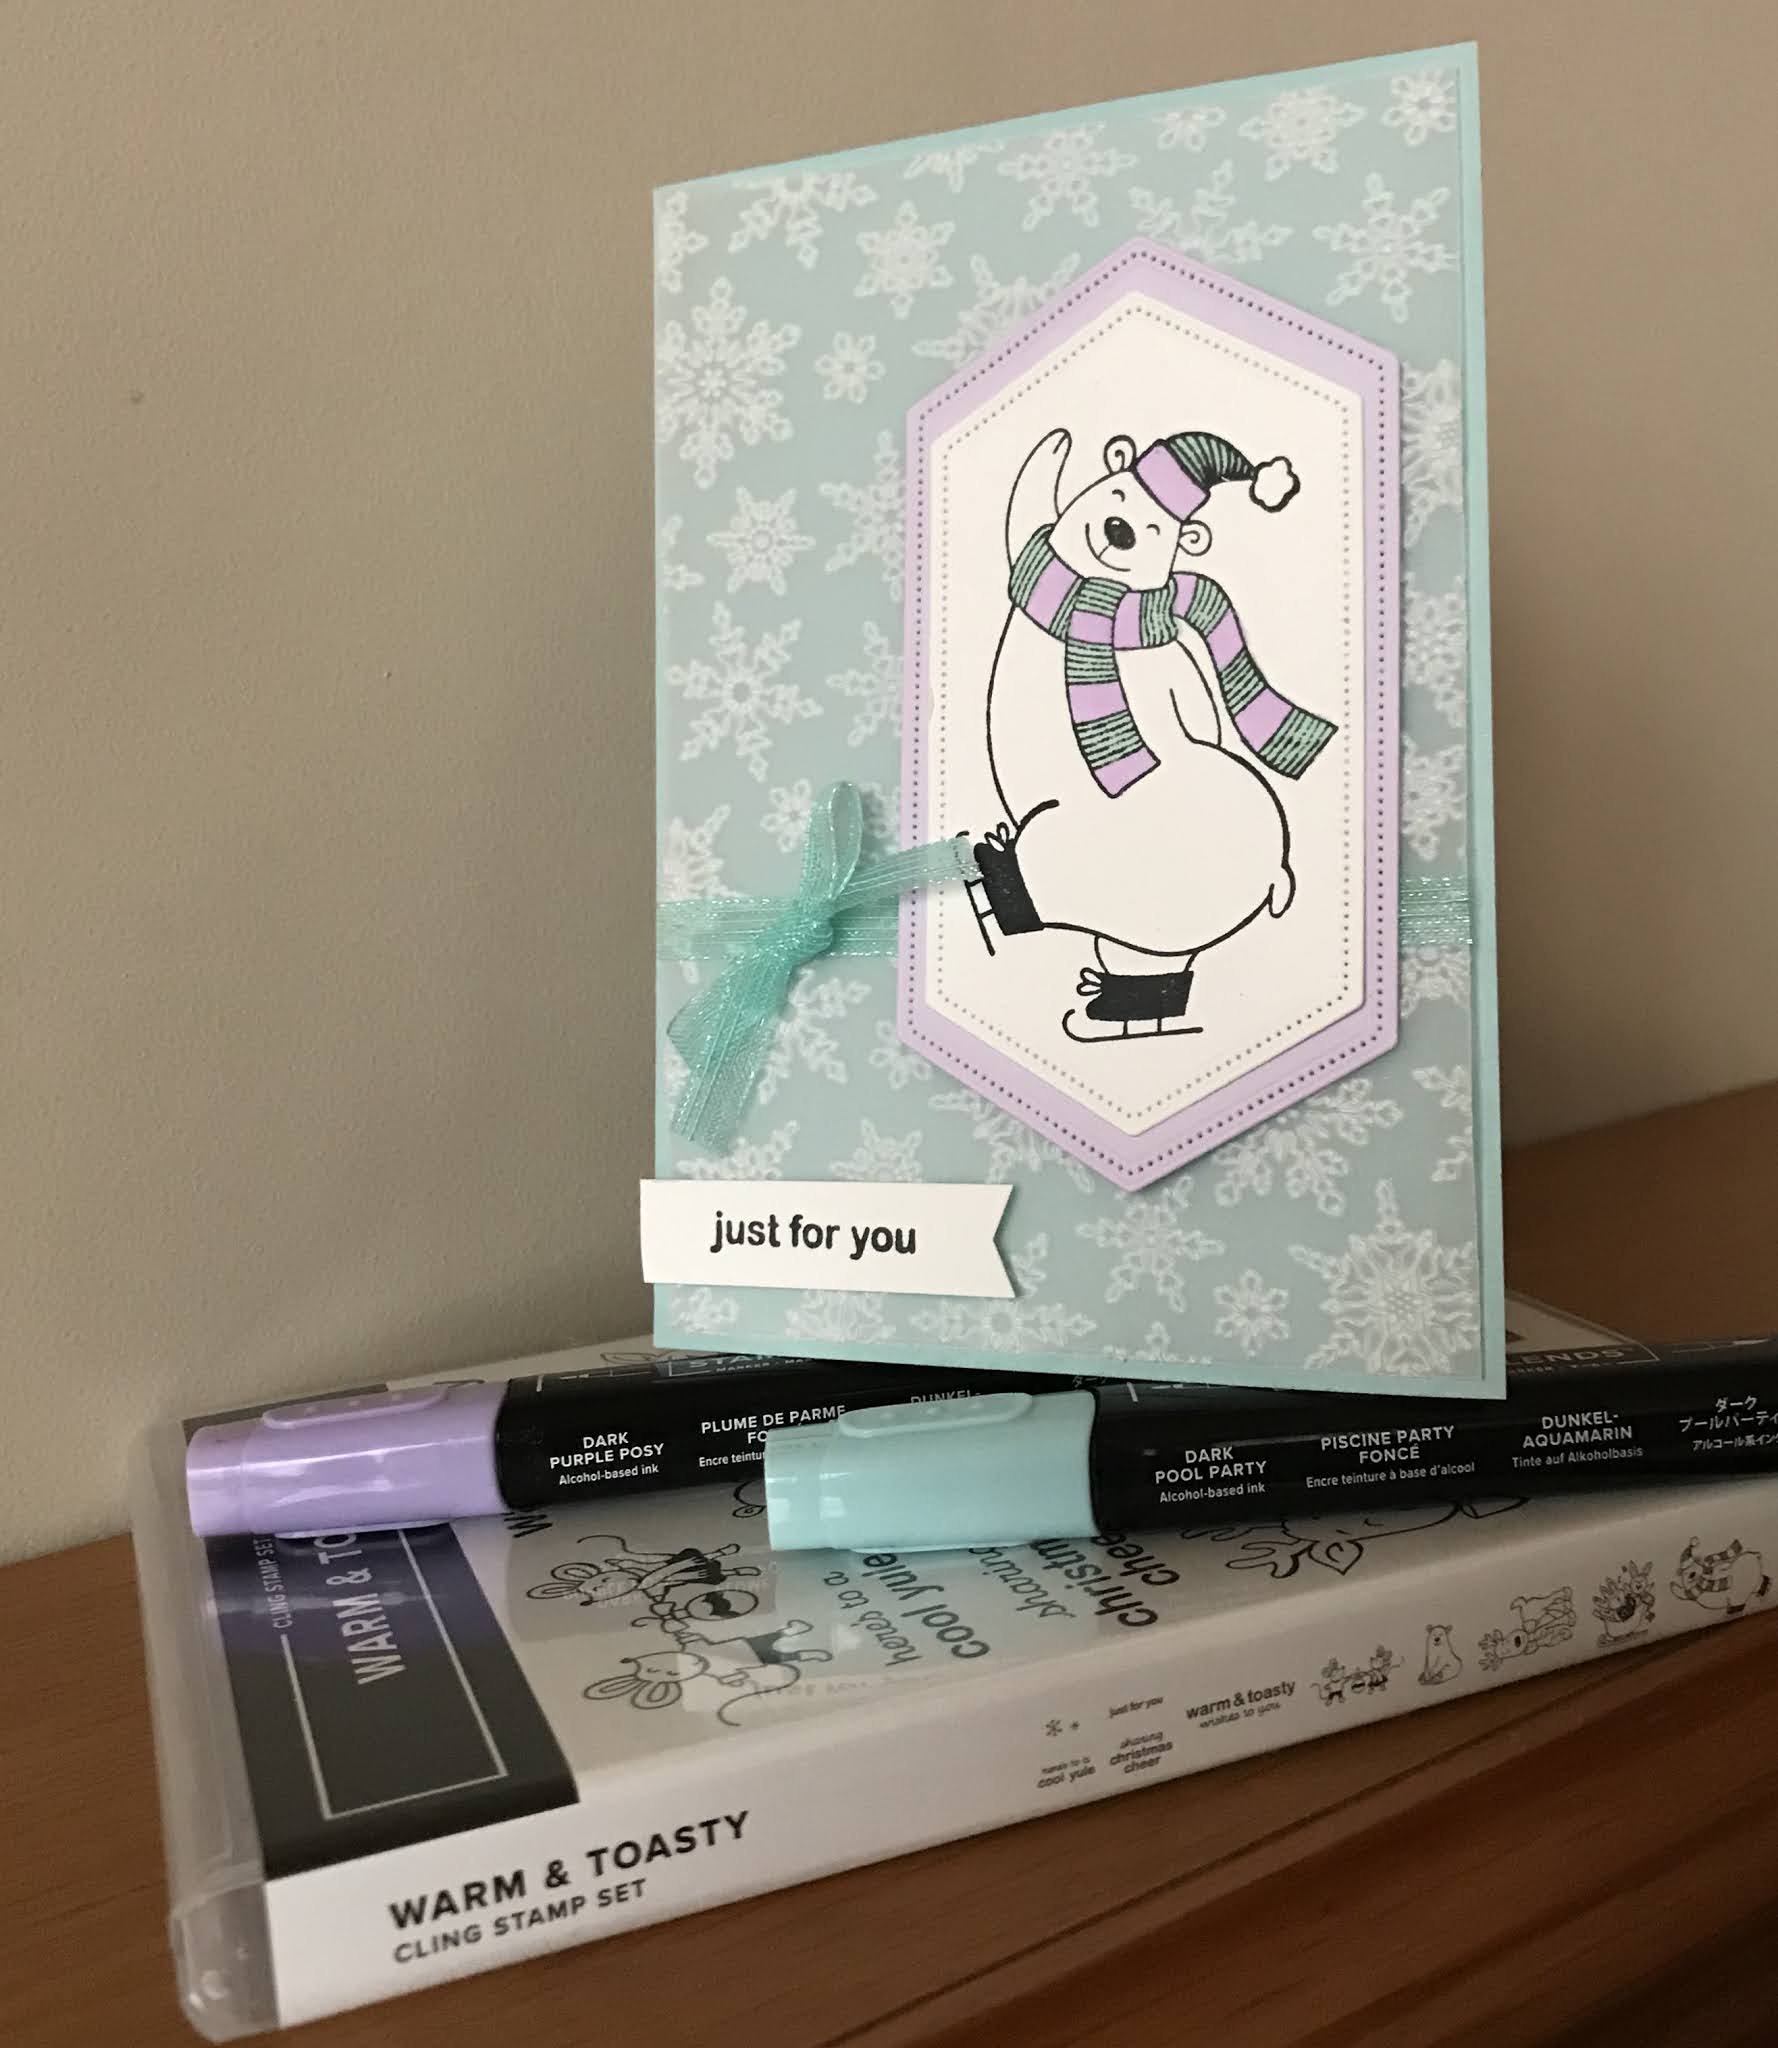
To a beautiful Granddaughter


Quick and easy, and looks just perfect for her!

Materials required for this card are:

Card Stock: pool party, purple posy, vellum
Dies:stitched nested labels (6&7)
Embossing Folders: winter snow
Ink: memento tuxedo black
Punches: banner pick a punch
Ribbon: sheer
Stampin' Blends: pool party, purple posy
Stamp Sets: warm & Toasty
when using layering dies (1) is the smallest

Hope you liked today's card. If you would like more information on how to make it, please don't hesitate to contact me, I'd love to hear from you.

If you wish to buy any of the items used, go to contacting me at the top of the page for details on how to order.

Will be back again soon with more cards, in the meantime take care and have a great day.
Annette 😘

Delicate Whispers and more

Welcome to my blog and    t hank you for joining me today! Happy Anniversary to Sylvia & Bill Intermediate level - blending with a brush...