Showing posts with label stylish shapes. Show all posts

Saturday, August 1, 2026

Masculine card

Welcome to my blog

and  thank you for joining me today!

Happy Birthday Charles

Easy step up level - die cutting, dry embossing, layering, stamping

Materials required for this card are:
 
Card Stock: basic black & white, misty moonlight
Designer Series Paper: country woods
Dies: stylish shapes (5,6)
Embossing Folders: *plaster painting 
Ink: crumb cake, misty moonlight
Stamps: with you in mind, words & wishes
Accessories: *candy dots
 * = no longer available, when using layering dies (1) is the smallest

Start with a basic card base 29 x 14.5 scored at 14.5, black 13.5 x 9.5, .5 x 9, dsp 13 x 9, misty moonlight 9 x 9, white 8 x 8
  1. die cut both circles
  2. stamp the happy birthday and stars
  3. dry emboss the white circle and dsp layer
  4. adhere the black strip to the dsp, using liquid glue
  5. attach the white circle to the blue circle using dimensional pads
  6. adhere the dsp to the black layer using liquid glue 
  7. adhere the black layer to the base card using liquid glue
  8. adhere the blue circle to the dsp
  9. add the candy dots
Hope you liked today's card. If you would like more information on how to make it, please don't hesitate to contact me. I'd love to hear form you.

If you wish to buy any of the items used, go to contacting me at the top of the page for details of how to order.
 
Will be back again soon with more cards, in the meantime take care and have a great day.

Annette 😊 

Thursday, July 23, 2026

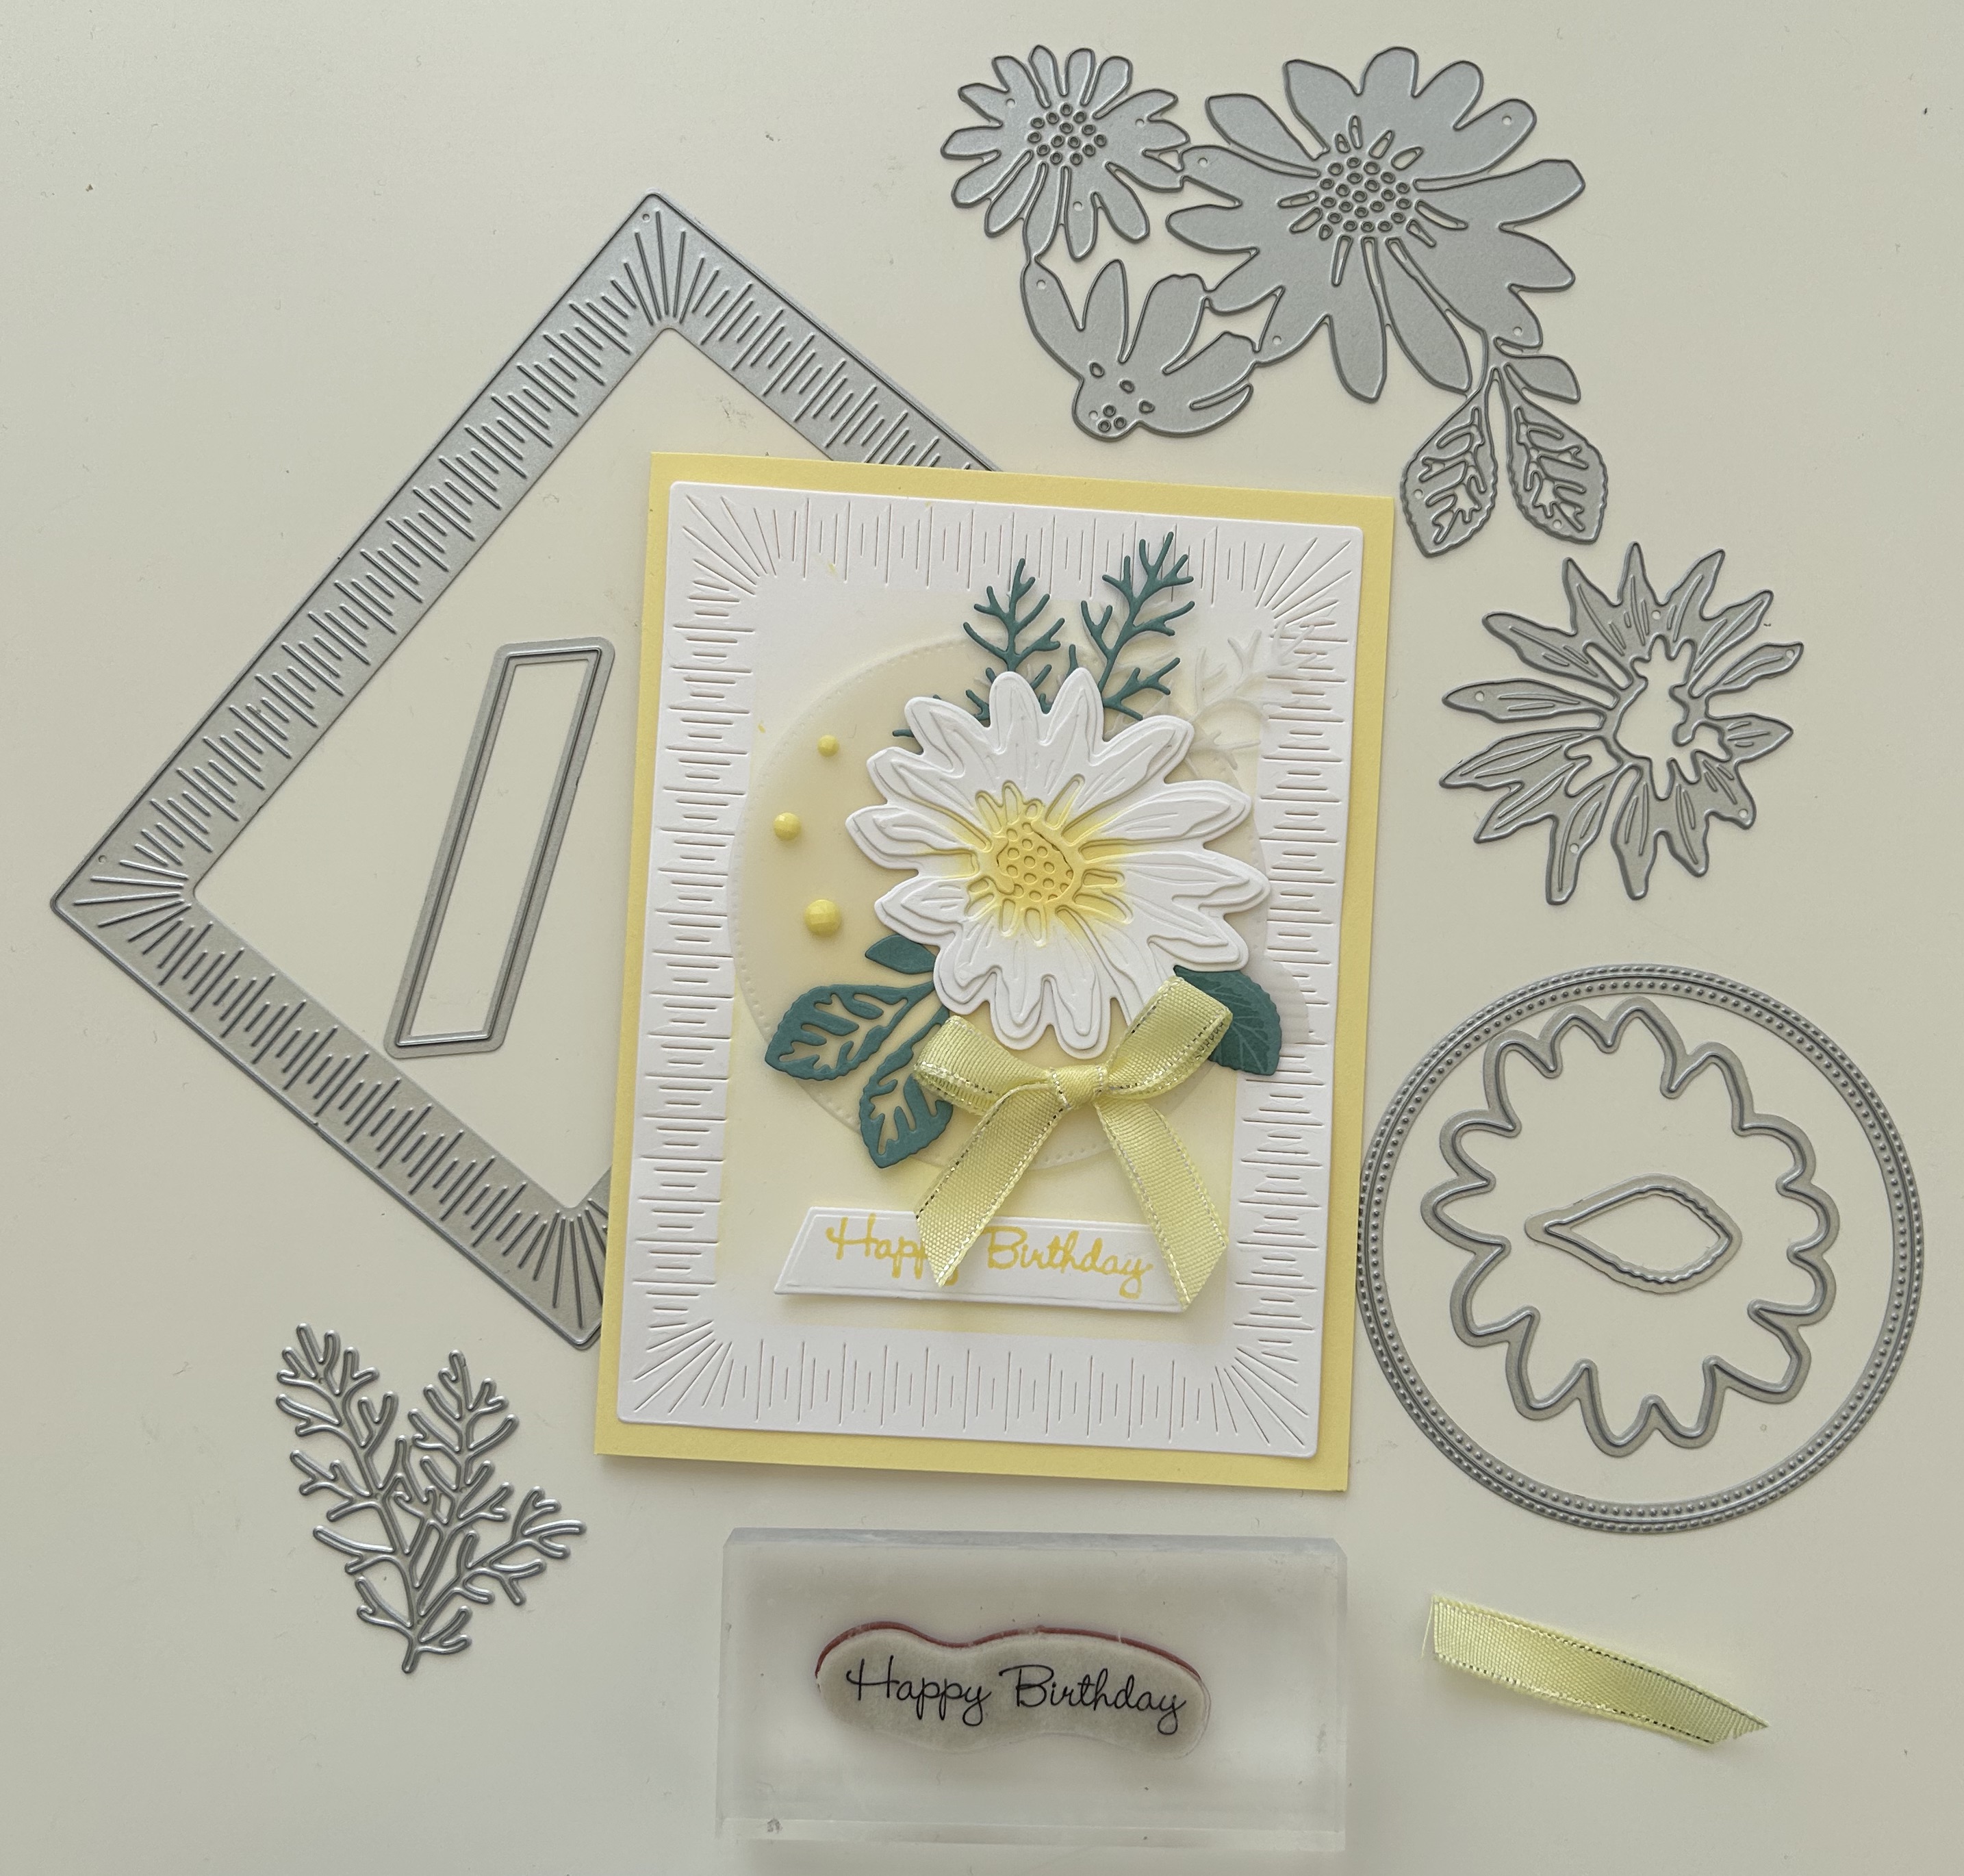
Designer Paper Birthday Card

 Welcome to my blog

and  thank you for joining me today!

Happy Birthday Anne

Intermediate level - die cutting, dry embosisng, layering, stamping

Materials required for this card are:
 
Card Stock: basic white, balmy blue, secret sea
Designer Series Paper: true blue florals
Dies: *basic borders, spotlight on nature (3), stylish shapes (3)
Embossing Folders: *subtle 3D 
Ink: secret sea 
Stamps: *framed florets
Accessories: *rainbow dots, borders open weave ribbon
 * = no longer available, when using layering dies (1) is the smallest

Start with a backing card 14.5 x 10.5, dsp 14 x 26.5, basic white 6 x 6, balmy blue 14 x 3.5, secret sea 6 x 6, 2.5 x 15
  1. score the designer paper at 10 and 20, and fold into a Z, narrower piece at the front
  2. die cut the dark blue border along the one edge then turn and die cut a second time to make the diamonds
  3. emboss the light blue strip
  4. line up the light blue strip against the dsp and adhere the diamonds down the join using liquid glue
  5. adhere the dsp to the backing card using liquid glue
  6. stamp the sentiment
  7. die cut the 2 circles
  8. attach the sentiment to blue circle using dimensional pads
  9. adhere the blue circle to the base card using liquid glue
  10. make a bow and attach it to the card using a glue dot
  11. add the dots
Hope you liked today's card. If you would like more information on how to make it, please don't hesitate to contact me. I'd love to hear form you.

If you wish to buy any of the items used, go to contacting me at the top of the page for details of how to order.
 
Will be back again soon with more cards, in the meantime take care and have a great day.
Annette 😊

Monday, June 17, 2024

Magnolia Moods meets Stylish Shapes

 Welcome to my blog

and  thank you for joining me today!

Happy Birthday Sheilah


Simple yet stunning - die cutting, dry & heat embossing, layering, stamping

Materials required for this card are:

Bundles: magnolia mood
Card Stock: coastal cabana
Dies: stylish shapes (2)
Embossing Folders: basics 3D
Ink: versaMark
Accessories: blending brush, *garden gems, white embossing powder
 
* = no longer available, when using layering dies (1) is the smallest
  1. Start with a base card 14.5 x 21 scored at 10.5, basic white 10 x 14 and 9 x 12, off cut for sentiment
  2. colour the white 10 x 14 wherever you want to place the flower using the blending brush, then dry emboss using the folder and adhere to the base card using liquid glue
  3. stamp the sentiment using versaMark, add the embossing powder and heat
  4. die cut both the sentiment and flower
  5. adhere the flower to to the base card using small dots of liquid glue
  6. attach the sentiment using dimensional pads
  7. add the gems
Hope you liked today's card. If you would like more information on how to make it, please don't hesitate to contact me, I'd love to hear from you.

If you wish to buy any of the items used, go to contacting me at the top of the page for details of how to order.

Will be back again soon with more cards, in the meantime take care and have a great day.
Annette 😊 

Thursday, June 6, 2024

Adoring Hearts meets Sentimental Park

 Welcome to my blog

and  thank you for joining me today!

Happy Anniversary Stuart & Rachael


Easy - die cutting, dry embossing, stamping

Materials required for this card are:

Bundles: adoring hearts
Card Stock: petal pink, very vanilla
Dies: stylish shapes (banner 2) (square 3)
Embossing Folders: cheery patterns
Ink: pecan pie
Stamps: sentimental park
accessories: linen thread, Kraft note cards & Envelopes
 when using layering dies (1) is the smallest
  1. Start with a note card & envelope, two pieces of petal pink for die cutting and one piece of very vanilla for the heart
  2. stamp the heart and sentiment
  3. die cut the square, heart and sentiment
  4. dry emboss the square and heart
  5. adhere the square and heart to the card base using liquid glue
  6. attach the sentiment using dimensional pads
  7. make a double bow and adhere using a glue dot
Hope you liked today's card. If you would like more information on how to make it, please don't hesitate to contact me, I'd love to hear from you.

If you wish to buy any of the items used, go to contacting me at the top of the page for details of how to order.

Will be back again soon with more cards, in the meantime take care and have a great day.
Annette 😊 

Tuesday, April 30, 2024

Sketched Plaid meets Beautiful Balloons

 Welcome to my blog

and  thank you for joining me today!

Happy Birthday Nigel


Quick card, Inspired by 'stampinpretty' - die cutting, layering, stamping

Materials required for this card are:

Bundles: beautiful balloons
Card Stock: basic black, *gold foil
Dies: deckled rectangles (7), stylish shapes squares (3,4) circle (3)
Ink: memento tuxedo black
Stamps: sketched plaid
Accessories: classic matte dots
 
* = no longer available, when using layering dies (1) is the smallest

  1. Start with a base card 14 x 21 scored at 10.5, white and gold layers 9.5 x 13, black layer 7 x 7, off cuts for the stars
  2. stamp the white layer using the plaid stamp and then die cut it using the deckled rectangle
  3. die cut the 3 stars from the middle of the gold rectangle
  4. adhere the plaid layer to the gold layer using liquid glue
  5. adhere this layer to the base card again using liquid glue
  6. stamp the sentiment and die cut using the circle die
  7. die cut the black frame using both square dies at the same time
  8. adhere the black frame using liquid glue
  9. attach the sentiment and stars using dimensional pads
  10. add the dots
Hope you liked today's card. If you would like more information on how to make it, please don't hesitate to contact me, I'd love to hear from you.

If you wish to buy any of the items used, go to contacting me at the top of the page for details of how to order.

Will be back again soon with more cards, in the meantime take care and have a great day.
Annette 😊 

Heartfelt Hexagon meets Stylish Shapes

 Welcome to my blog

and  thank you for joining me today!

Happy birthday Georgia


Quick & Easy - dry embossing, layering, punching, stamping

Materials required for this card are:

Bundles: heartfelt hexagon
Card Stock: basic white, blueberry bushel
Designer Series Paper: bright & beautiful
Dies: stylish shapes (2)
Embossing Folders: timeworn type 3D
Ink: berry burst, blueberry bushel
Stampin' Blends: berry burst 
Accessories: cotton combo ribbon, basic rhinestones
 
When using layering dies (1) is the smallest

My base card was from my old stash
  1. Start with a base card 12 x 24 scored at 12, first layer 11 x 11, backing for 2nd layer 10 x 10, dsp 5 x 10, basic white 5 x 10, pieces of white & blue for die cutting and punching
  2. The first sentiment is computer generated changing the colour to #B74984
  3. die cut the sentiment and put to one side
  4. colour 3 rhinestones using the alcohol blend marker and again put to one side
  5. adhere the second layer to the base card using liquid glue
  6. emboss the white rectangle using the folder, and adhere to the backing piece at the bottom using liquid glue
  7. adhere the dsp rectangle above the embossed one
  8. attach the ribbon across the middle of this layer securing it at the back with tape
  9. slide another piece of the ribbon under the first and tie a knot to create a faux knot bow 
  10. adhere this layer to the card
  11. stamp the second sentiment then punch it out using the hexagon, along with a blue hexagon
  12. adhere the 2 hexagons together using liquid glue and attach to the card using dimension pads
  13. add the die cut sentiment again using dimensional pads
  14. add the rhinestones
Hope you liked today's card. If you would like more information on how to make it, please don't hesitate to contact me, I'd love to hear from you.

If you wish to buy any of the items used, go to contacting me at the top of the page for details of how to order.

Will be back again soon with more cards, in the meantime take care and have a great day.
Annette 😊 

Sunday, March 31, 2024

Easter Card past & present

 Welcome to my blog

and  thank you for joining me today!

Happy Easter Freddie


Intermediate - colouring with alcohol inks, dry embossing, die cutting, dying ribbon, layering, masking, punching, stamping. The main feature was designed by 'Stampin' with Kim'

Materials required for this card are:

Card Stock: basic white, *mint macaron
Designer Series Paper: *country gingham (2.5 x 8.5)
Dies: basic borders, stylish shapes label (2) square (5)
Embossing Folders: basics 3D
Ink: balmy, blue, granny apple green, *mint macaron, momento black
Punches: banner pick a punch
Stampin' Blends: crumb cake, lemon lolly, flirty flamingo, pool party
Stamps: easter bunny
Accessories: blending brushes, herringbone ribbon (approx 12cm)
 
* = no longer available, when using layering dies (1) is the smallest
  1. Start with a base card 14.5 x 21 scored at 10.5, white matt 14 x 10, white scraps for stamping
  2. dye the ribbon using the flirty flamingo stampin' blend pen then lay to one side to dry
  3. die cut the square, label and cloud border 
  4. emboss the white matt using the dots folder, add the dyed ribbon toward the bottom and secure at the back with tape. Adhere to the base card using liquid glue
  5. stamp the sentiment on the label 
  6. stamp the bunny and eggs using memento black, colour these using the stampin blends, then fussy cut round them
  7. using the clouds border as a mask, blend in the clouds with the brush at the top of the square, then stamp the grass across the bottom
  8. attach the bunny and eggs using dimensional pads, then adhere to the base card using liquid glue
  9. Hope you liked today's card. If you would like more information on how to make it, please don't hesitate to contact me, I'd love to hear from you.
  10. flag each end of the dsp and attach the sentiment label using dimensional pads.
  11. attach the sentiment to the base card using dimensional pads 
If you wish to buy any of the items used, go to contacting me at the top of the page for details of how to order.

Will be back again soon with more cards, in the meantime take care and have a great day.
Annette 😊 

Thursday, August 24, 2023

Cheerful Daisies meets Sunkissed

  Welcome to my blog

and  thank you for joining me today!

Happy 60th Birthday Donna


This card came together quite nicely - dry embossing, heat embossing, die cutting, water colouring, and stamping 

Materials required for this card are:

Card Stock: basic white, *champagne foil, daffodil delight, fluid 100
Dies: alphabet a la mode, cheerful daisies, stylish shapes (4)
Embossing Folders: basics 3D
Ink: crushed curry, daffodil delight, lost lagoon, versamark
Stamp Sets: cheerful daisies, *sunkissed
Accessories: clear and white embossing powder, wink of stella
 * = no longer available, when using layering dies (1) is the smallest
  1. Start with a base card 14.5 x 21 scored at 10.5, basic white layer 10 x 14
  2. die cut the square out of the basic white layer
  3. emboss the basic white layer using the folder and adhere to the base card using liquid glue
  4. attach the square above the opening using dimensional pads
  5.  stamp the outline daisies, using versaMark on the fluid 100 card, cover with the white embossing powder and heat set
  6. die cut the daisies and the ferns,  3 ferns in fluid 100 and 3 in the foil along with the numbers in daffodil delight
  7. water colour the daisies lightly in daffodil delight with a splash of crushed curry for depth and the ferns in lost lagoon varying the depth of colour
  8. once dry add some wink of stella to the flowers
  9. On a scrap of basic white stamp the happy birthday using versaMark and daffodil delight add clear embossing powder then heat set. Trim down the sentiment, split the words and attach to card using dimensional pads
  10. adhere the numbers using liquid glue (sparingly)
  11. attach the larger daisy to the raised square using a dimensional pad in the middle and the smaller flower with a small amount of liquid glue in the middle 
  12. arrange the ferns around the flowers and adhere using liquid glue
Hope you liked today's card. If you would like more information on how to make it, please don't hesitate to contact me, I'd love to hear from you.

If you wish to buy any of the items used, go to contacting me at the top of the page for details on how to order.

Will be back again soon with more cards, in the meantime take care and have a great day.

Annette 😘 

Saturday, August 5, 2023

Brewed For You birthday

   Welcome to my blog

and  thank you for joining me today!

Happy Birthday Rob


card scoring, embossing, stamping and die cutting

Materials required for this card are:

Card Stock: basic white, blueberry bushel
Designer Series Paper: glorious gingham
Dies: brewed, stylish shapes circle (6) banner (3)
Embossing Folders: basics 3D
Ink: blueberry bushel, crushed curry, memento black
Stamp Sets: brewed for you
Accessories: wink of stella
for layering shapes ie. (6) one is the smallest
  1. Start with a base card 14.8 x 21 scored at 10.5, basic white 8 x 13 for the elements and a piece of dsp 5 x 14.8
  2. use a scoreboard to score 8 lines on each side of the card 4mm apart or ⅛" inch
  3. adhere the dsp down the middle using liquid glue
  4. using the white cardstock stamp the sentiment, glass and froth leaving room to die cut the circle on the same piece.
  5. die cut all the elements including the circle.
  6. add wink of stella to the beer froth
  7. emboss the circle using the 3D dots folder
  8. adhere a thin strip of the blueberry bushel card across the bottom area of the base card using liquid glue.
  9. adhere the circle to the base card using liquid glue
  10. attach the beer glass and sentiment using dimensional tabs
Hope you liked today's card. If you would like more information on how to make it, please don't hesitate to contact me, I'd love to hear from you.

If you wish to buy any of the items used, go to contacting me at the top of the page for details on how to order.

Will be back again soon with more cards, in the meantime take care and have a great day.
Annette 😘

Sunday, July 23, 2023

Cheerful Daisies meets Go to Greetings

   Welcome to my blog

and  thank you for joining me today!

Happy Birthday Anne


easy decoupage, layering, die cutting and stamping

Materials required for this card are:

Card Stock: basic white, lemon lolly, lost lagoon 
Dies: cheerful daisies, radiating stitches, something fancy, stylish shapes
Ink: lemon lolly, lost lagoon, versamark
Stamp Sets: cheerful daisies, go to greetings
Accessories: adhesive-backed solid gems, clear embossing powder, sheer ribbon
  1. Start with a base card 14 x 21 scored at 10.5, white layer 14 x 11, lost lagoon, vellum, basic white for leaves and flower and sentiment
  2. die cut the background layer and use a blending brush to colour the centre
  3. adhere this layer to the base card using liquid glue
  4. stamp the sentiment using versamark & lemon lolly ink, add the clear embossing powder and heat emboss.
  5. stamp the single leaf 
  6. die cut all the pieces - flower layers (3), leaves (2) one green and one vellum, sentiment label, large vellum circle 
  7. using a blending brush, colour the centre of the flower pieces and then build the layers using glue dot
  8. adhere the circle to the base card using liquid glue
  9. adhere the leaves around the vellum circle using liquid glue
  10. add the flower to the top using glue dots
  11. make a bow and attach using a glue dot
  12. attach the sentiment using dimensional pads
  13. add the gems
Hope you liked today's card. If you would like more information on how to make it, please don't hesitate to contact me, I'd love to hear from you.

If you wish to buy any of the items used, go to contacting me at the top of the page for details on how to order.

Will be back again soon with more cards, in the meantime take care and have a great day.
Annette 😘

Monday, June 19, 2023

Dainty Delight meets Very Best Occasions

  Welcome to my blog

and  thank you for joining me today!

Loss of a life partner
One of our dearest neighbours has gone to heaven


Cased from 'Mary Anne Coven'
I don't seem to have any of my own creative mojo at the moment. 

Materials required for this card are:

Card Stock: basic white, soft see foam
Dies: dainty delight, scalloped contours (4), stylish shapes (2)
Embossing Folders: timeworn type 3D
Ink: versaMark, soft sea foam
Stampin' Up Blends: soft sea foam
Stamp Sets: very best occasions
Accessories: *basic adhisive sequins, *crinkled seamed binding ribbon, vellum basics
 
* = no longer available, when using layering dies (1)
  1. Start with a base card 14.5 x 21 scored at 10.5, green panel 10 x 14, vellum 9 x 12, extra white and green for die cutting
  2. emboss the green panel using the folder and adhere to the base card using liquid glue
  3. die cut the vellum using the scalloped rectangle
  4. die cut 2 green leaves and 1 white, along with 1 of each of the buds
  5. adhere the leaves and buds to the vellum rectangle using liquid glue
  6. stamp the sentiment, then cut using the banner die 
  7. attach the sentiment to the base card using dimension pads
  8. ink up the ribbon using the stampin' blend, tie a bow and adhere to the base card using glue dots
  9. now add the sequins.
Hope you liked today's card. If you would like more information on how to make it, please don't hesitate to contact me, I'd love to hear from you.

If you wish to buy any of the items used, go to contacting me at the top of the page for details on how to order.

Will be back again soon with more cards, in the meantime take care and have a great day.
Annette 😘

Friday, April 28, 2023

Best Family Ever meets Biggest Wish

  Welcome to my blog

and  thank you for joining me today!

Happy birthday Ste


Creative use of the deckled rectangles to make my own shape, along with some old and current products. The instructions for this card seem a lot, but it's not too difficult to make.

Materials required for this card are:

Card Stock: basic black, basic white
Designer Series Paper: *pattern party
Dies: basic borders, deckled rectangles (5), stylish shapes (2)
Ink: memento black, poppy parade, versamark
Stamp Sets: best family ever, biggest wish
Accessories: clear embossing powder, matte dots, *stripped ribbon
 
* = no longer available, when using layering dies (1) is the smallest
  1. Start with a base card 14.5 x 21 scored at 10.5 (landscape orientation)
  2. black & white dots 5 x 14.5, black & white lines 9 x 14.5
  3. adhere black & white dots to the bottom of the card using wet glue
  4. die cut the black and white lined dsp using the curved border, then adhere to the top of the base card using wet glue
  5. die cut the rectangle, then reduce the size of it by 1cm along the long edge by running through again (this makes it 10 x 5.5)
  6. die cut the circle
  7. stamp the happy in black, then stamp the birthday and son by inking the stamp with versamark and poppy parade before stamping, add the clear embossing powder
  8. heat emboss the birthday and son 
  9. add a strip of black card across the base using wet glue
  10. attach the main sentiment using dimensional's
  11. attach the ribbon behind the smaller sentiment using a large dimensional then place 2 smaller dimensional's either side of first one and attach to the card
  12. add the 3 dots
Hope you liked today's card. If you would like more information on how to make it, please don't hesitate to contact me, I'd love to hear from you.

If you wish to buy any of the items used, go to contacting me at the top of the page for details on how to order.

Will be back again soon with more cards, in the meantime take care and have a great day.
Annette 😘

Monday, March 27, 2023

Best Family Ever and more

  Welcome to my blog

and  thank you for joining me today!

Happy Anniversary to the best Husband in the world


This is a mixture of old and new, didn't have a clue what I was going to do and this was the result.

Materials required for this card are:

Card Stock: basic white, *champagne foil, real read, 
Designer Series Paper: *pattern party
Dies: *playful alphabet, sentiment silhouettes, stylish shapes (2)
Embossing Folders: *subtle 3D
Ink: memento tuxedo black
Stamp Sets: best family ever
Accessories: basic pearls, *glittered organdy
 
* = no longer available, when using layering dies (1)

Hope you liked today's card. If you would like more information on how to make it, please don't hesitate to contact me, I'd love to hear from you.

If you wish to buy any of the items used, go to contacting me at the top of the page for details on how to order.

Will be back again soon with more cards, in the meantime take care and have a great day.
Annette 😘

Monday, November 7, 2022

Hippest Hippos meets Split card

 Welcome to my blog

and  thank you for joining me today!

Happy Birthday Roy


Really wasn't sure for this year's card but when I saw a similar layout made by Pricilla's paper crafts, I new what to do and loved it!

Materials required for this card are:

Card Stock: basic white thick and normal, sweet sorbet
Designer Series Paper: 22 - 24 in colors 8.5.x 13
Dies: hippo, split card, stylish shapes
Embossing Folders: *subtle 3D
Ink: memento tuxedo black
Stampin' Up Blends: parakeet party, smoky slate, sweet sorbet
Stamp Sets: *for the family, hippest hippos
* = no longer available

  1. card base 14 x 28 scored at 14, matt 13.5 x13.5
  2. on a piece of white card stock stamp the hippo and and husband
  3. colour the hippo using the blends
  4. die cut the hearts, hippo and husband
  5. die cut matt down the left side
  6. stamp the sentiment on the right side
  7. emboss the matt
  8. adhere the dsp using wet glue
  9. adhere the matt to the base card using wet glue
  10. attach the elements as desired using a mixture of wet glue and dimensionals

Hope you liked today's card. If you would like more information on how to make it, please don't hesitate to contact me, I'd love to hear from you.

If you wish to buy any of the items used, go to contacting me at the top of the page for details on how to order.

Will be back again soon with more cards, in the meantime take care and have a great day.

Annette 😘 

Thursday, October 6, 2022

Happiness Abounds meets Stylish Sketches

  Welcome to my blog

and  thank you for joining me today!

Happy birthday Alison


This is a mixture of old and new. Stamping, watercoloring, dry embossing, die cutting and punching.

Materials required for this card are:

Card Stock: balmy blue, basic white thick
Designer Series Paper: *simply marbleous 
Dies: stylish shapes (6)
Embossing Folders: *seaside
Ink: balmy blue, memento black
Punches: decorative circle, lovely labels
Watercolor Pencils: basic black, daffodil delight, early espresso, garden green, pacific point, pumpkin pie
Stamp Sets: happiness abounds, *stylish sketches
Accessories: blender pen, *organdy combo ribbon

* = no longer available, when using layering dies (1)
  1. base card 14.8 x 10.5, dsp 10 x 14.3
  2. stamp and colour the ducks, punch out using the decorative circle 
  3. colour round the edge of the circle using a balmy blue stampin' marker
  4. stamp the sentiment on a ½" strip and flag the ends, then make a ¾" background strip and adhere together
  5. die cut a circle in the dsp, then die cut a balmy blue circle the same size
  6. emboss the dsp and add a strip of ribbon about 2.5cm from the bottom then attach to the base card using dimensionals
  7. adhere the blue circle using wet glue, then the ducks & sentiment using dimensionals 
Hope you liked today's card. If you would like more information on how to make it, please don't hesitate to contact me, I'd love to hear from you.

If you wish to buy any of the items used, go to contacting me at the top of the page for details on how to order.

Will be back again soon with more cards, in the meantime take care and have a great day.
Annette 😘

Tuesday, August 16, 2022

Wildlife Wonder meets Stylish Shapes

  Welcome to my blog

and  thank you for joining me today!

Happy Birthday Gareth


I love black & white cards and owls so this card is a Side fold landscape with some scoring down the lefthand side, dsp on the right, die cut 2 squares, emboss the owl and sentiment using black embossing powder, add some bakers twine, fishtail the sentiment. Job done. 

Materials required for this card are:

Card Stock: basic black & white
Designer Series Paper: *patterned party
Dies: stylish shapes (3&4)
Embossing Powder: black
Ink: versamark
Punches: banner pick a punch
Stamp Sets: wildlife wonder
Accessories: bakers twine essentials, classic matte dots, score board
 
* = no longer available, when using layering dies (1) is the smallest

Hope you liked today's card. If you would like more information on how to make it, please don't hesitate to contact me, I'd love to hear from you.

If you wish to buy any of the items used, go to contacting me at the top of the page for details on how to order.

Will be back again soon with more cards, in the meantime take care and have a great day.
Annette 😘

Friday, August 5, 2022

Handsomely Suited meets Stylish Shapes

  Welcome to my blog

and  thank you for joining me today!

Happy Birthday Rob


Easy fun fold card A6 with 2cm fold back on the right, originally created by Mary EB.

Materials required for this card are:

Card Stock: basic white, pacific point
Designer Series Paper: *well suited
Dies: *suit & tie, stylish shapes (4&5)
Embossing Folders: stripes & splatters 3D
Ink: memento black, pacific point
Stamp Sets: *handsomely suited
 
* = no longer available, when using layering dies (1) is the smallest, N = narrow, W = wide

Hope you liked today's card. If you would like more information on how to make it, please don't hesitate to contact me, I'd love to hear from you.

If you wish to buy any of the items used, go to contacting me at the top of the page for details on how to order.

Will be back again soon with more cards, in the meantime take care and have a great day.
Annette 😘

Sunday, July 17, 2022

Nature's Prints meets Love & Happiness

  Welcome to my blog

thank you for joining me today!

Happy Anniversary to Jean & Gareth and also later in the month Carole & Nigel.


This is a CASE from the lovely 'Mary Deatherage' with just a couple of small changes. I'm loving this new suite Sun Prints which i've teamed up with a stamp set that's no longer available, but I adore the sentiments, sorry

Materials required for this card are:

Card Stock: thick basic white (card base), basic white (for the rest)
Designer Series Paper: sun prints
Dies: natural prints, stylish shapes
Embossing Folders: fern 3D
Ink: evening evergreen (3rd generation), fresh freesia, soft succulent
Punches: lovely labels
Stampin' Markers: fresh freesia, soft succulent
Stamp Sets: *love & happiness, nature's prints

 * = no longer available, CASE = copy and share everything

Hope you liked today's card. If you would like more information on how to make it, please don't hesitate to contact me, I'd love to hear from you.

If you wish to buy any of the items used, go to contacting me at the top of the page for details on how to order.

Will be back again soon with more cards, in the meantime take care and have a great day.
Annette 😘

Blast from the past - You are amazing meets Alphabet a la mode

  Welcome to my blog and    t hank you for joining me today! Happy Birthday Stuart  Quick Intermediate  level - die cutting, layering, punch...