Showing posts with label High seas folder. Show all posts

Sunday, December 22, 2019

Dashing Deer with Detailed Deer

Hi folks, hope your having a great day!

I think this is my favourite card so far, and what's more it came out of my head for a change!
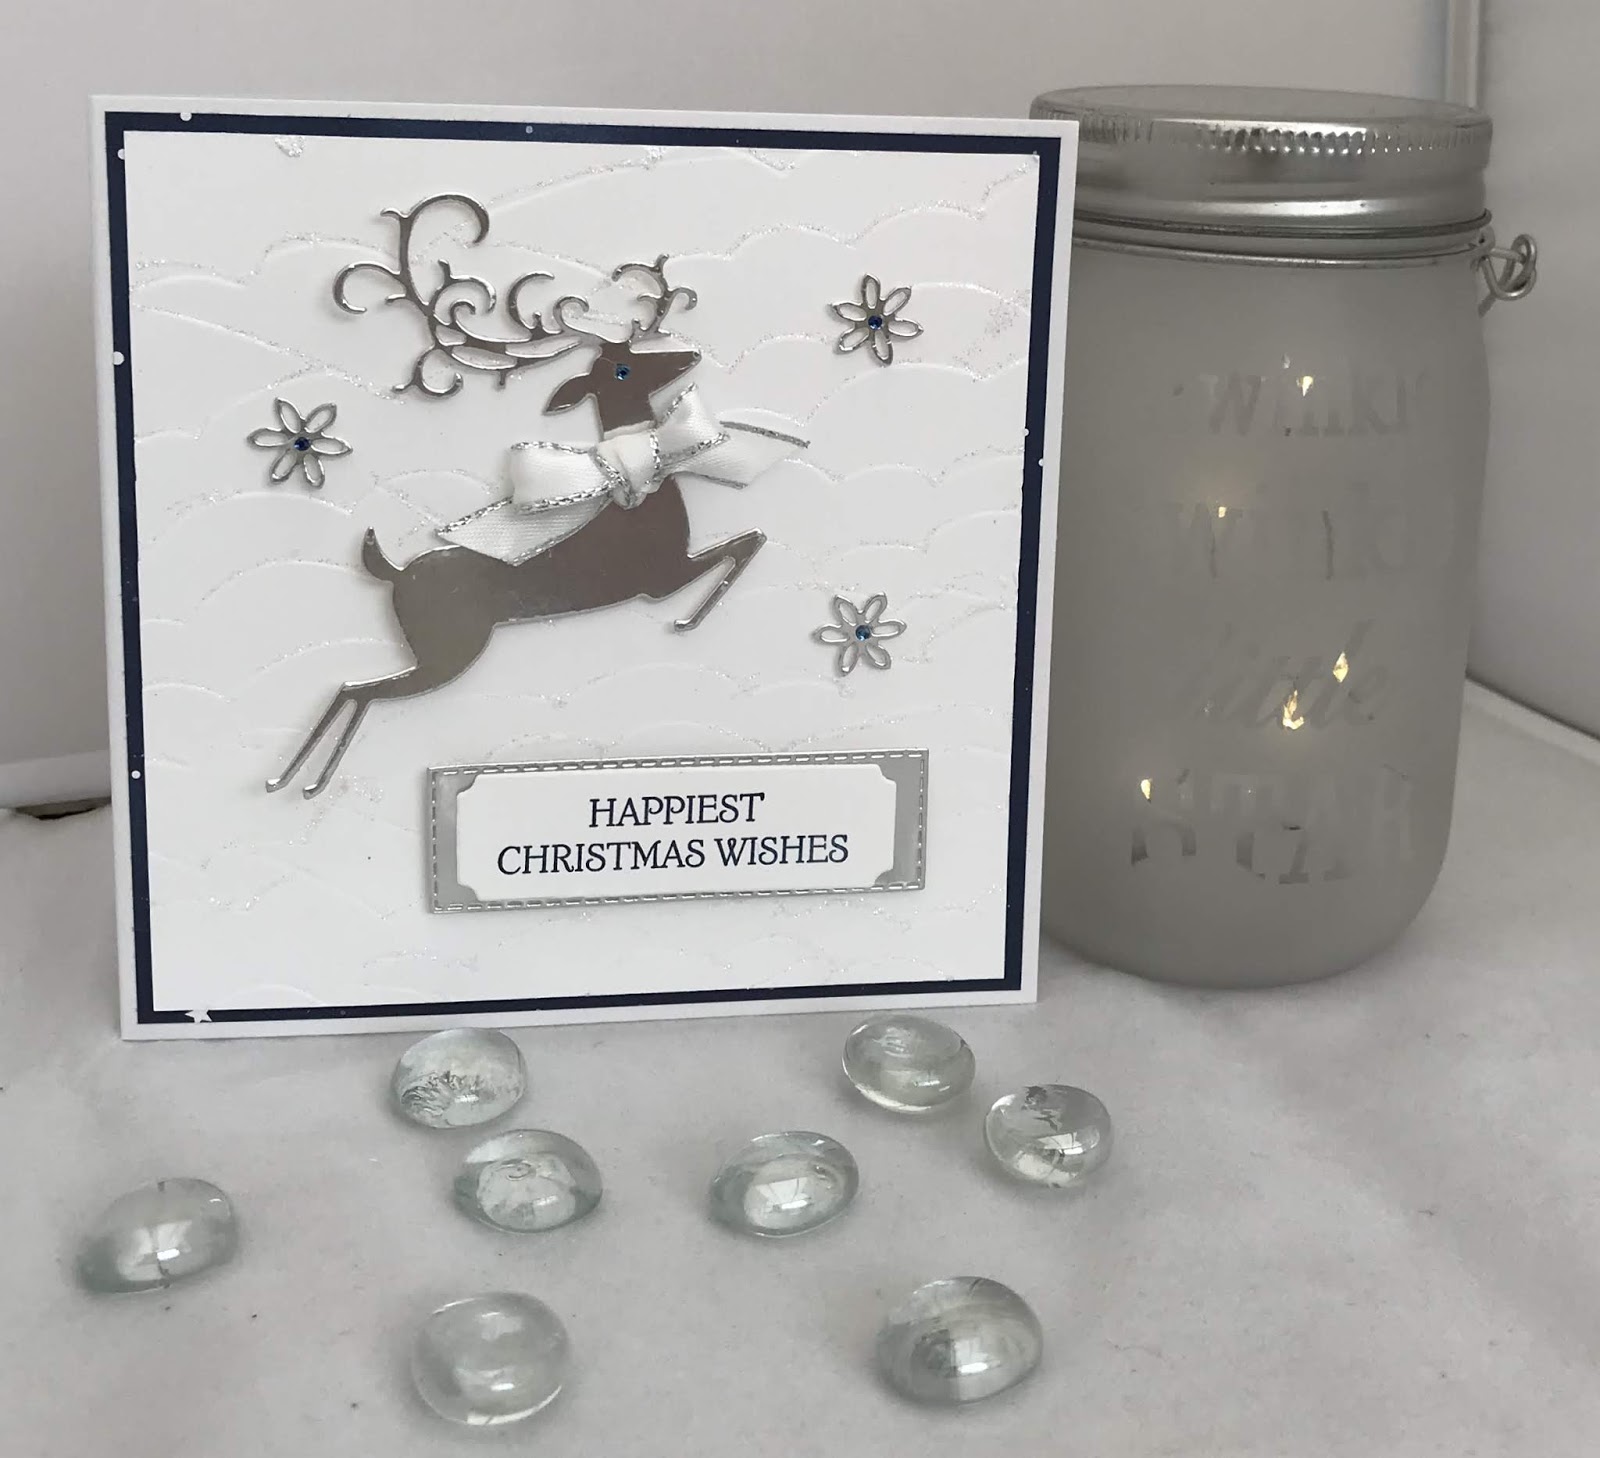
Card base 13.5 x 27 scored at 13.5 with each layer being .5 smaller than the layer before.
Colours for this card are Night of Navy, Silver foil and Whisper White (thick)
When working with nested dies (1) is the smallest, (dsp) = designer paper (ef) = embossing folder, (r) = retired, (ss) = stamp set,

Adhere the first layer of (r) twinkle twinkle (dsp) directly onto the front of the card.
Emboss the second layer with the high seas (ef) then with the waves upside down glitter the edges of each wave using fine glue and stampin' glitter. Once dry adhere to the card base.
Stamp the sentiment from the dashing deer (ss) in night of navy and die cut using the label from the  merry christmas dies. At the same time die cut a narrow (2) stitched rectangle in silver foil.
With another piece of silver foil die cut the reindeer and 3 stars from the detailed deer dies.
Attach the deer using dimensional pads and the stars using liquid glue.
Colour in 4 basic rhinestones using the night of navy stampin' blends and adhere to the 3 stars, using the last one as the reindeer's eye.
Make a bow using the metallic edge ribbon and adhere to the deer's neck using a couple of glue dots.
Attach the sentiment and foil backing using dimensional pads.

Hope you enjoyed todays card.

Will be back again soon with more cards!
Annette X

Tuesday, September 3, 2019

Smooth Sailing meets Itty Bitty Birthdays

Hi folks, thanks for dropping by, hope you like the card.

Happy Birthday Stuart!

You've joined me on a day where I'm using one of my favourite stamp sets. There are quite a few cards being made with this set just now.

I know it's his birthday today and his card says belated birthday, but he won't get his card until the middle of October, as he's away at sea just now. Hope the boys give him a good day!
I've case'd this one from Dena Rekow's web site thecreativitycave.com she does some fantastic video's (thanks Dena).

To recreate this card follow the guide below:
(cs) = Card Stock, (ss) = Stamp Set, DSP = Designer Series Paper,

All measurements are in Centimetres.

Card Stock: Pretty Peacock 2 pieces 4 x 9 (seaweed), 1.5 x 10.5 (trim)
Soft Sea Foam 4 x 9 (seaweed)
Soft Suede 2 pieces 21 x 14.8 (card base), 4 x 4 (helm)
Vellum  4 x 9 (seaweed)
Very Vanilla 2 pieces 10.5 x 5 (waves), 6 x 5 (sentiment)
DSP: Come Sail Away 10 x 14.3 (1st layer)
Stampin' Pads: Crumb Cake, Pretty Peacock
Accessories: Basic Rhinestones, Sail Away Trinkets


Start with the soft suede (cs) measuring 21 x 14.8, score and fold at 10.5, this is the card base.

Adhere the first layer sail away DSP using liquid glue.

Next you will need the bigger piece of very vanilla (cs)  and the narrow piece of pretty peacock (cs).  With the very vanilla piece tear a thin strip off along the 10.5 edge and then adhere the other edge to the pretty peacock strip.

Emboss this piece with the high sea's 3D folder (having the 3D embossing plate gives a lovely finish).

Sponge the top edge of the embossed piece with crumb cake ink.

Tie some of the braided linen thread around this where the two colours meet using a knot, then fray the ends, and adhere to the base card using dimensional pads.

Using the other piece of  very vanilla (cs)  stamp the sentiment using the itty bitty birthdays (ss) in pretty peacock.

It's now time to do the die cutting and all elements come from the smooth sailing die set.

You will need to run the foliage die through your machine 3 times, once for each of the colours: soft sea foam (cs), pretty peacock (cs) and vellum (cs), while doing one of them die cut the other 2 elements at the same time, the ship's wheel (helm) in soft suede (cs) and the Sentiment stamped earlier with the label.

Edge the sentiment label in pretty peacock ink.

Staggering the foliage adhere to the base card using little dabs of liquid glue, add the helm using a single glue dot then do the same for the sail away trinket.

I also placed a small basic rhinestone in the middle of the trinket.

Trim the braided linen thread if needed and jobs done!

Will be back again soon with more cards
Annette X

Blast from the past - You are amazing meets Alphabet a la mode

  Welcome to my blog and    t hank you for joining me today! Happy Birthday Stuart  Quick Intermediate  level - die cutting, layering, punch...