Showing posts with label basic black rhinestones. Show all posts

Tuesday, August 5, 2025

Birthday Celebration meets Spring Corners & more

 Welcome to my blog

and  thank you for joining me today!

Happy Birthday Rob


Mixture of old and new - Intermediate level - die cutting, dry embossing, layering, stamping

Materials required for this card are:

Bundles: birthday celebration
Card Stock: basic black & white
Designer Series Paper: *all together
Dies: *deckled circles (4), deckled rectangles (7)
Embossing Folders: plaster painting 3D
Ink: memento tuxedo black 
Stamps: spring corners
Accessories: *basic black rhinestones
 
* = no longer available, when using layering dies (1) is the smallest

Start with a base card 14 x 21 scored at 10.5, background layer 9.5 x 12.5, dsp 9.5 x 12.5, scraps for circle and banner
  1. dry emboss the background layer
  2. die cut the dsp rectangle and black circle
  3. stamp the first sentiment around the side of the dsp layer
  4. stamp the happy onto the dsp and the TH on white scrap
  5. adhere the dsp layer to the background layer and then the background layer to base card using liquid glue
  6. die cut the banner and numbers
  7. adhere the numbers to the circle using liquid glue
  8. attach the circle and banner to the base card using dimensional pads
  9. add the rhinestones
Hope you liked today's card. If you would like more information on how to make it, please don't hesitate to contact me, I'd love to hear from you.

If you wish to buy any of the items used, go to contacting me at the top of the page for details of how to order.
 
Will be back again soon with more cards, in the meantime take care and have a great day.
Annette 😊

Thursday, May 8, 2025

Blast from the past - Biggest Wish

 Welcome to my blog

and  thank you for joining me today!

Happy Birthday Jim


Blast from the past Easy level - glueing on bakers twine, layering, stamping, 

Materials required for this card are:

Card Stock: basic gray, basic black (not seen)
Designer Series Paper: *well suited
Embossing Folders: exposed brick 3D
Ink: basic gray, poppy parade
Stamps: *biggest wish
Accessories: *bakers twine, *rhinestones basics
 * = no longer available

Start with a base card 14.5 x 21 scored at 10.5, black layer 14.1 x 10.1, dsp 3 x 10.1, 11.1 x 10.1, 3.3 x 6.7 (need 2)
  1. adhere the 3 x 10.1 piece down the left hand side of the black layer
  2. stamp the happy birthday and adhere this piece next to the other one
  3. add very small dots of glue down the lines of the dsp and attach the twine
  4. trim the 3.3 x 6.7 pieces to become triangles, then emboss using the folder
  5. attach the triangle's using dimensional pads
  6. add the rhinestones
  7. adhere to the base card using liquid glue
Hope you liked today's card. If you would like more information on how to make it, please don't hesitate to contact me, I'd love to hear from you.

If you wish to buy any of the items used, go to contacting me at the top of the page for details of how to order.
 
Will be back again soon with more cards, in the meantime take care and have a great day.
Annette 😊

Wednesday, March 26, 2025

Timeless Charm meets Simply Said

 Welcome to my blog

and  thank you for joining me today!

Happy Birthday Jean


intermediate level - colouring using stampin' blends, die cutting, heat embossing,  layering, scoring, stamping

Materials required for this card are:

Bundles: timeless charm
Card Stock: basic black & white, flirty flamingo
Dies: *well written 
Embossing Folders: 
Embossing Powder: white
Ink: lost lagoon (stamped off), versaMark
 Stampin' Blends: soft sea foam
Stamps: simply said
Accessories: *black rhinestones, brushed brass butterflies, gold cord, scoreboard
 * = no longer available

  1. Start with a base card 11.5 x 23 scored at 11.5, coloured layer 11 x 11, white layer 10.6 x 10.6, scraps of black for sentiments, scraps of flirty flamingo for flower head
  2. stamp the leaves in the middle of the white layer and colour the leaves in (not the flower)
  3. score 4 lines down the middle of white layer
  4. now adhere the coloured layer to the base card and the white layer to the coloured layer
  5. on black card heat emboss the happy birthday using versaMark and white embossing powder
  6. Trim this sentiment down and cut it in half
  7. add some adhesive sheet to a piece of black card and die cut the friend sentiment along with the flower head in flirty flamingo
  8. remove the adhesive sheet backing and adhere the sentiment to the card
  9. attach the happy birthday sentiment and the flowerhead using dimensional pads
  10. attach the butterflies and add the bow using a glue dot
Hope you liked today's card. If you would like more information on how to make it, please don't hesitate to contact me, I'd love to hear from you.

If you wish to buy any of the items used, go to contacting me at the top of the page for details of how to order.

Will be back again soon with more cards, in the meantime take care and have a great day.
Annette 😊

Sunday, July 21, 2024

Bird's Eye View meets Sentimental Park

Welcome to my blog

and  thank you for joining me today!

Happy Birthday Bill


Intermediate - colouring with blends, die cutting, dry embossing, glassing, layering, stamping

Materials required for this card are:

Card Stock: basic white thick, gray granite
Designer Series Paper: nature's sweetness
Dies: radiating stitches (2)
Embossing Folders: subtle 3D
Ink: memento black
Stampin' Blends: balmy blue, cherry cobbler, gray granite, misty moonlight, old olive, smoky slate
Stamps: birds's eye view, sentimental park
Accessories: black rhinestones, fine tip glue pen

when using layering dies (1) is the smallest
  1. Start with a base card 14.5 x 21 scored at 10.5, dsp 9.5 x 14.5, basic white 7.5 x 10.5, gray granite 7 x 10, off cut for sentiment
  2. stamp the owl, books and sentiment, trim down the sentiment
  3. colour the images using the blends
  4. using the fine tip glue create the lens for the glasses and leave to dry for a little while
  5. adhere the dsp to base card using liquid glue
  6. adhere the gray rectangle to dsp using liquid glue
  7. once the lens glue is dry die cut the rectangle, then dry emboss it and adhere it with liquid glue
  8. attach the sentiment and add the rhinestones
Hope you liked today's card. If you would like more information on how to make it, please don't hesitate to contact me, I'd love to hear from you.

If you wish to buy any of the items used, go to contacting me at the top of the page for details of how to order.

Will be back again soon with more cards, in the meantime take care and have a great day.

Annette 😊  

Sunday, June 4, 2023

Biggest Wish meets Banner Pick A Punch

  Welcome to my blog

and  thank you for joining me today!

Happy Birthday Rick


This is the second card in Carolyn Kings 'All Together designers series paper marathon', of which I will be making 5, for my cards this month. Seem to have lost my mojo at the moment and came across these great cards. All measurements are in centimetres.

Materials required for this card are:

Card Stock: basic black, *galvanised metallic
Designer Series Paper: *all together
Dies: *painted labels
Embossing Folders: basic 3D 
Ink: crumb cake, memento tuxedo black
Punches: banner pick a punch
Stamp Sets: biggest wish
Accessories: *basic black rhinestones
 * = no longer available
  1. Start with a base card 14.5 x 21 scored at 10.5, galvanised metallic foil 12.5 x 8.5, and 1.9 x 5, dsp 2pieces 4.5 x 8 and 1 piece 3 x 8
  2. adhere the 3 pieces of dsp to the galvanised metallic foil using liquid glue, then attach this to the base card using dimensional pads
  3. die cut the label, stamp the happy and birthday across the centre
  4. dry emboss the label
  5. use the banner punch to cut each end off the narrow strip of galvanised metallic paper then cut this this in half.
  6. adhere these pieces to either side of the label using liquid glue
  7. attach this to the base card using dimensional pads
  8. add some rhinestones to finish
Hope you liked today's card. If you would like more information on how to make it, please don't hesitate to contact me, I'd love to hear from you.

If you wish to buy any of the items used, go to contacting me at the top of the page for details on how to order.

Will be back again soon with more cards, in the meantime take care and have a great day.
Annette 😘

Wednesday, September 29, 2021

Feels Like Home

 Thank you for joining me today!

A thank you card for Paul!
Embossing on cork Technique. 


Had the idea for this card from seeing Bruno Bertucci use the technique in a video he made not so long back, so thanks Bruno!

Funnily enough I've just finished a card I've CASed from his lovely wife 'Kylie' which will be coming up towards the end of October.

Materials required for this card are:

Card Stock: cork, pale papaya, very vanilla 
Embossing Folders: tasteful textile 3D
Embossing Powder: black
Ink: versamark
Ribbon: glittered organdy
Stamp Sets: feels like home (sab) 
Accessories: *basic rhinestones
* = no longer available

Hope you liked today's card. If you would like more information on how to make it, please don't hesitate to contact me, I'd love to hear from you.

If you wish to buy any of the items used, go to contacting me at the top of the page for details on how to order.

Will be back again soon with more cards, in the meantime take care and have a great day.
Annette 😘

Wednesday, September 22, 2021

Ornate Thanks, card in a Trice!

 Thank you for joining me today!

A card in a trice!


Have you ever realised you need a card right now, well that's what happened to me today! And this is what I made in less than 5 minutes.

Materials required for this card are:

Card Stock: very vanilla 
Ink: mint macaron
Punches: banner pick a punch
Stamp Sets: ornate thanks  
Accessories: *black rhinestone jewel, *delightfully detailed note card & envelopes
(you still need to use up your old stash) don't you agree!
* = no longer available

Hope you liked today's card. If you would like more information on how to make it, please don't hesitate to contact me, I'd love to hear from you.

If you wish to buy any of the items used, go to contacting me at the top of the page for details on how to order.

Will be back again soon with more cards, in the meantime take care and have a great day.
Annette 😘

Saturday, August 14, 2021

A Wish For Everything meets Stitched Triangles

 Thank you for joining me today!

Happy Birthday Jack


Fancied using the stitched triangles today and this is what I came up with!
The edging was the hardest part and not quite equal but who care's.

Materials required for this card are:

Card Stock: basic black, Merry Merlot
Designer Series Paper: pattern party
Dies: playful alphabet, stitched triangles (2) of each type
Embossing Folders: *subtle 3D (sorry I can't stop using this one)
Ink: memento tuxedo black
Stamp Sets: a wish for everything 
Accessories: *black basic rhinestones, foam adhesive sheets
* = no longer available, when using layering dies (1) is the smallest

Hope you liked today's card. If you would like more information on how to make it, please don't hesitate to contact me, I'd love to hear from you.

If you wish to buy any of the items used, go to contacting me at the top of the page for details on how to order.

Will be back again soon with more cards, in the meantime take care and have a great day.
Annette 😘

Monday, August 17, 2020

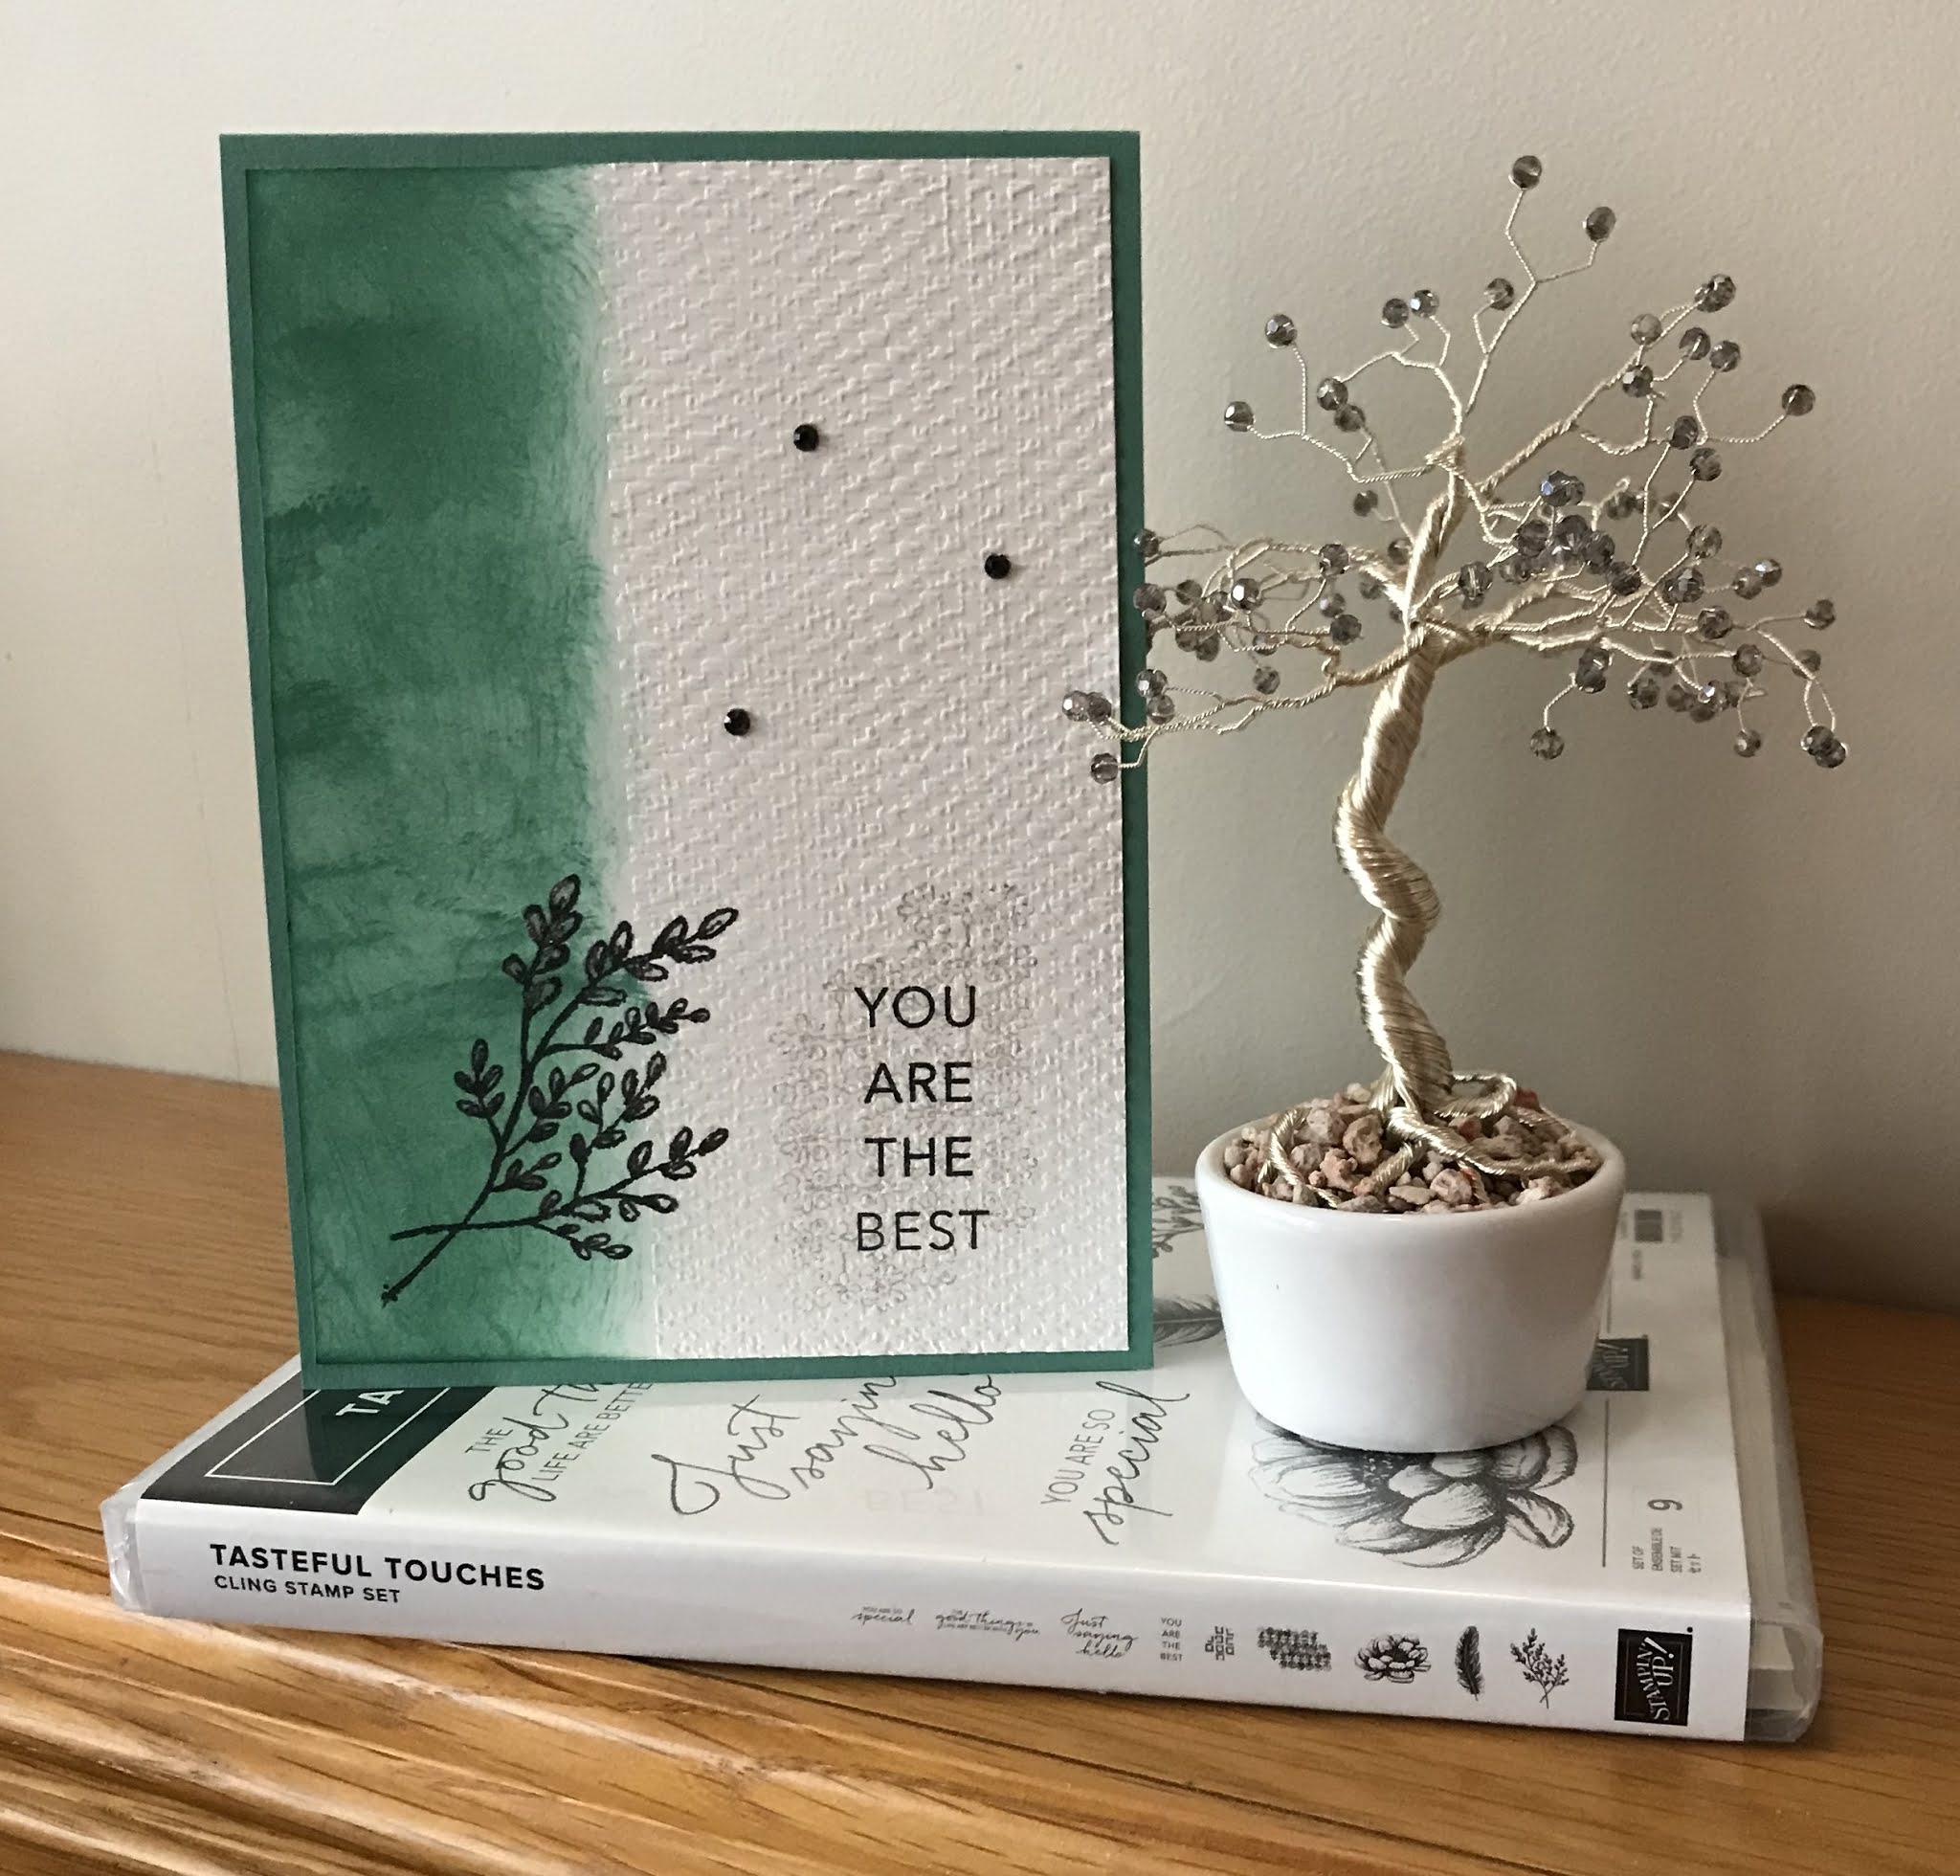
Tasteful Touches, ink and Rhinestones!!

 Hello and welcome to my haven in a hectic world!

Thanks for joining me today!

Sue has decided not to re-open for the time being, she feels it's easier and safer for her customers to carry on with the take-away and delivery service offered at the moment. Which I must say is brilliant!!


Very quick and simple

Materials required for this card are:

Card stock: just jade, whisper white
Embossing folders: tasteful textile
Ink: gray granite, just jade, memento tuxedo black
Stamp sets: tasteful touches
Accessories: *black rhinestones, wink of stella (on leaves)
* = retired 

Hope you liked today's card. If you would like more information on how to make it, please don't hesitate to contact me, I'd love to hear from you.

If you wish to buy any of the items used, go to contact me at the top of the page for details on how to order.

Will be back again soon with more cards, in the meantime take care and have a great day.
Annette 😘

Delicate Whispers and more

Welcome to my blog and    t hank you for joining me today! Happy Anniversary to Sylvia & Bill Intermediate level - blending with a brush...