Showing posts with label metallic edge ribbon. Show all posts

Wednesday, December 23, 2020

Delightful Dozen meets Hometown Greetings

 Hello and welcome to my haven in a hectic world!

Thanks for joining me today!

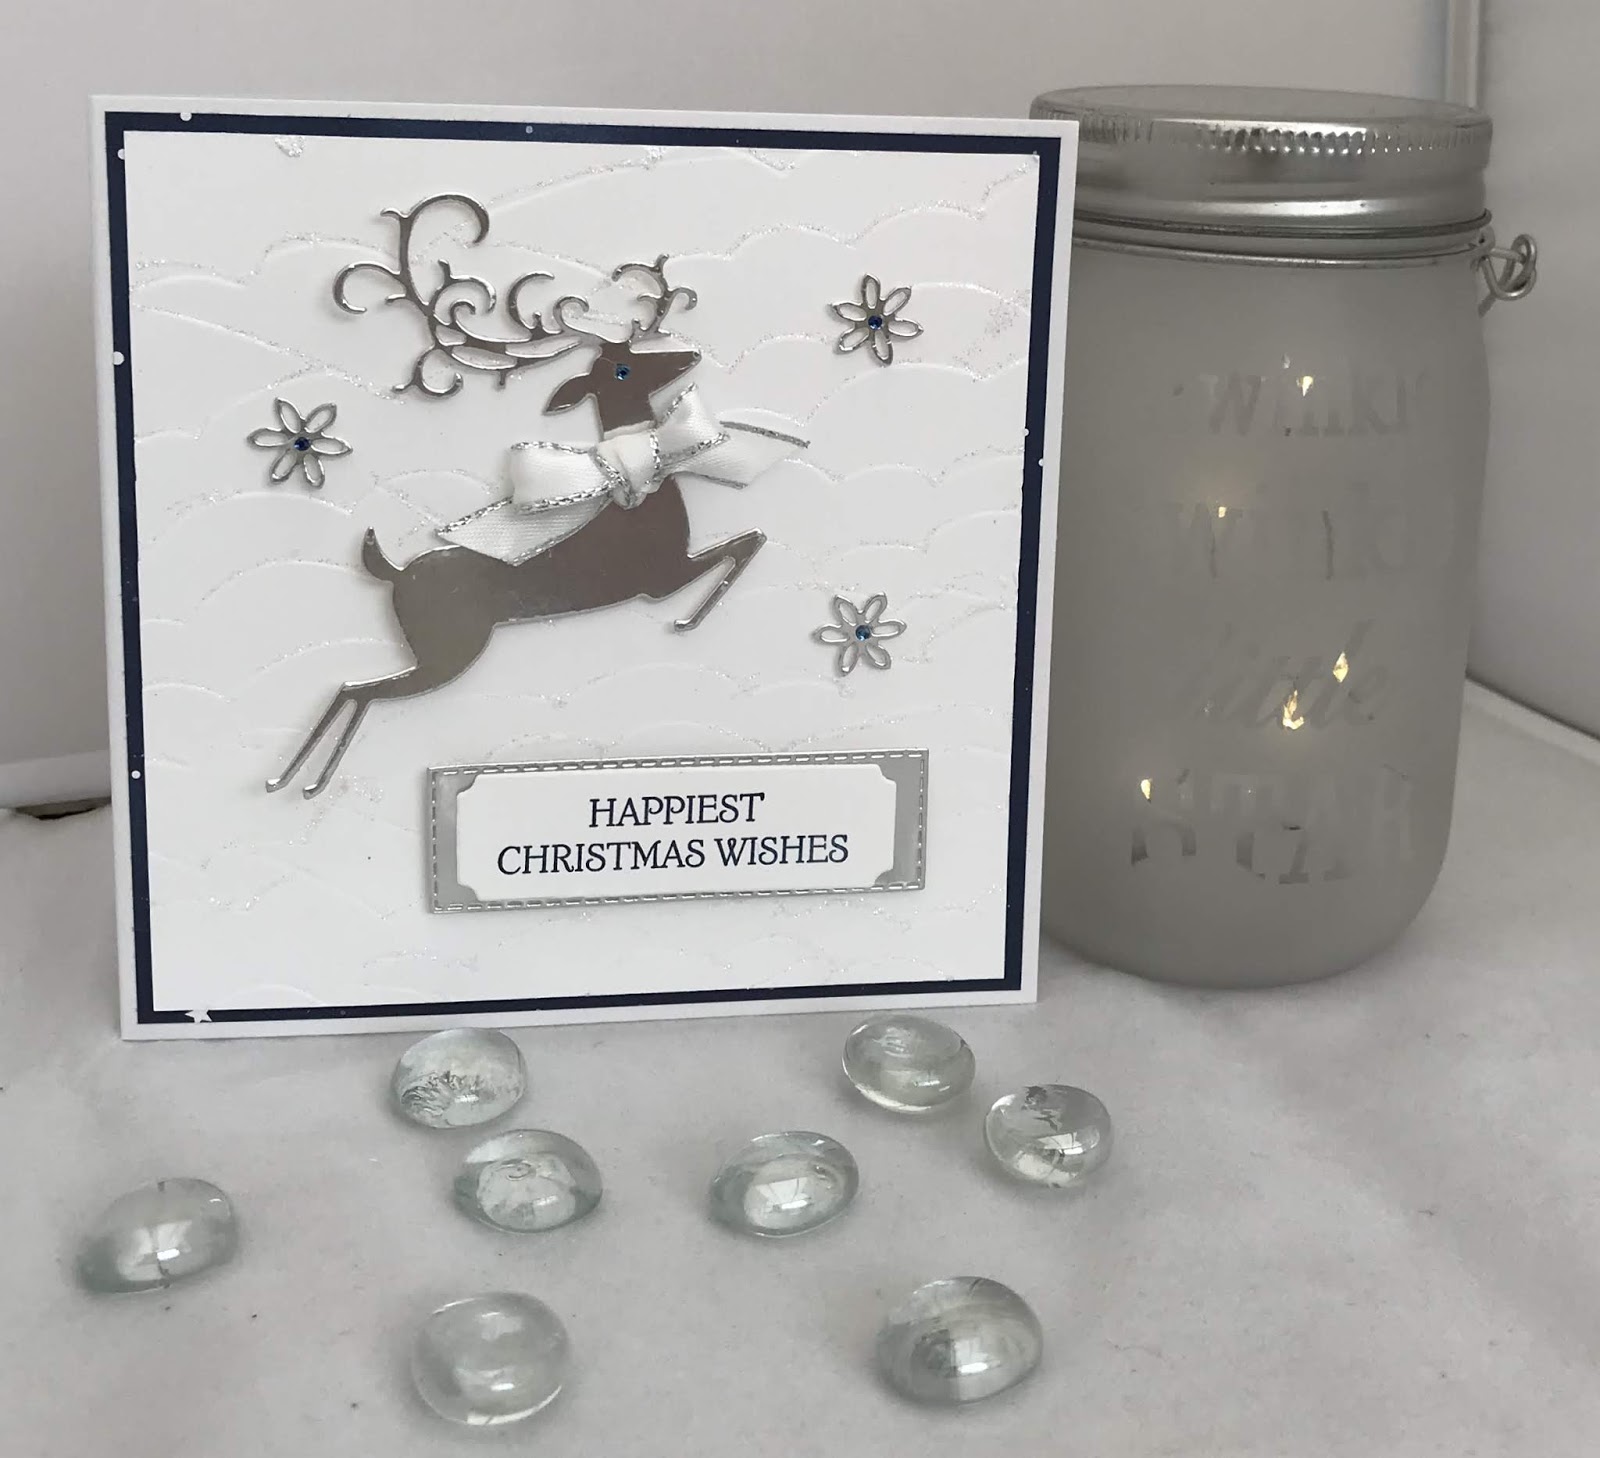
Christmas greetings to all 3 of my children

This card is CASd from Pinterest, and I fancied something different for my brood this year.


Materials required for this card are:

Card stock: basic black, gold foil
DSP: *year of cheer
Dies:*hometown greetings
Embossing Powder: gold
Ink: versamark
Ribbon: metallic edged
Stamp sets: *delightful dozen
Accessories: basic rhinestones
* = retired and when using layering dies (1) is the smallest

Hope you liked today's card. If you would like more information on how to make it, please don't hesitate to contact me, I'd love to hear from you.

If you wish to buy any of the items used, go to contact me at the top of the page for details on how to order.

Will be back again soon with more cards, in the meantime take care and have a great day.
Annette 😘

Tuesday, December 22, 2020

Itty Bitty Christmas meets Toile Tidings

Hello and welcome to my haven in a hectic world!
Thanks for joining me today!

For friends abroad

This needed to be a fairly flat card as it's going to New Zealand and Canada and travels air mail.


Materials required for this card are:

Card stock: cherry cobbler, gold foil, very vanilla, 
DSP: toile tidings
Dies: christmas layers, *christmas stockings
Embossing folders: tasteful textiles
Ink: mossy meadow
Ribbon: metallic edged
Stamp sets: itty bitty christmas
Accessories: gilded gems
* = retired 

Hope you liked today's card. If you would like more information on how to make it, please don't hesitate to contact me, I'd love to hear from you.

If you wish to buy any of the items used, go to contacting me at the top of the page for details on how to order.

Will be back again soon with more cards, in the meantime take care and have a great Christmas.

Annette 😘 

Wednesday, November 18, 2020

Piece of Cake meets Power of Hope

Power of Hope meets Piece of Cake

Hello and welcome to my haven in a hectic world.

Made this card some time ago for my niece, so it's my old style of layout!


 I have to be able to tell hubby I've used every stamp set at least once

Colours: Petal Pink 2 pieces 10 x 14 (1st layer), 9.5 x 7 (scallop oval),Whisper White 3 pieces 21 x 14.5 scored at 10.5 (card base), 9 x 6.5 (stitched oval), 2 x 7 (sentiment).
DSP: Parisian Blossoms 4 x 14 (2nd layer).

All measurements are in centimetres.
(cs) = card stock, (dsp) = designer series paper,  (ef ) = embossing folder, (ss) = stamp set, * = retired, when using layering dies (1) is the smallest.

  • Emboss the larger piece of  petal pink (cs) using the parisian flourish (ef).
  • Now adhere the *parisian blossoms (dsp) down the left hand side of the embossed layer using liquid glue.
  • Add some of the petal pink metallic edged ribbon along the join of these two pieces, (I used sellotape at the back to do this), then make a small bow and attach it towards the top using a glue dot.
  • This is then adhered to the base card using liquid glue.
  • Stamp both the sentiment from the *piece of cake (ss) and the lady from the *power of hope (ss) on their respective pieces of whisper white (cs) using memento black ink.
  • Colour the lady using petal pink blends.
  • Die cut the sentiment using the ornate frames dies, the lady with the stitched shapes dies oval (4) and the petal pink (cs) with the layering ovals dies scallop (7) .
  • Adhere the two ovals together using liquid glue.
  • Attach the ovals and the sentiment to the base card using dimensional pads.
  • Arrange some champagne rhinestones around the lady to add some dimension.
Will be back again soon with more cards!
Annette X

Tuesday, April 21, 2020

Lovely Lily Pad meets New Wonders

Hi, welcome to my haven in a hectic world, thanks for joining me today.

Happy Birthday Peg!

I'm always nervous doing Peg's card as she's my Stampin' Up upline and of course I want to impress. Hope she likes it.
All measurements are in centimetres.

(cs) = card stock, (ef) = embossing folder, (ss) = stamp set,

Petal Pink 21 x 14.5 scored at 10.5 (card base), 15 x 5 (wavy lines), 7.5 x 8 (swirls), Whisper White 14 x 10 (1st layer), 6 x6 (flower), 5 x 5 (circle).
  • Using the swirly scribbles dies and the petal pink (cs) die cut the waves and swirls.
  • With the 6 x 6 whisper white (cs) stamp the outline flower from the lovely lily pads (ss) using memento black ink, then flip the stamp on the block so the flat side up and stamp again using petal pink ink. As you can see it doesn't fit the outline stamp perfectly, but that's how its supposed to be.
  • With the smallest piece of whisper white (cs) stamp the happy birthday from the new wonders (ss) in petal pink ink.
  • Now die cut the flower using the lily pad dies, and the happy birthday using the stitched labels dies.
  • Lightly sponge down the left hand side of the 1st layer whisper white (cs) using petal pink ink. If I was doing this card again I'd take the sponging right to the edge.
  • Emboss this layer using the stone 3D (ef).
  • Adhere the waves to the 1st layer using liquid glue.
  • Wrap a piece of the petal pink metallic edged ribbon across the 1st layer at the bottom adhering to the back using glue dots, then tie a faux bow at the front.
  • Attach this layer to card base using dimensional pads.
  • Place the swirls where you want it to be and adhere down, again using liquid glue.
  • Attach the happy birthday sentiment using dimensional pads along with the lily.
  • Add some champagne rhinestones. 
Will be back again soon with more cards, enjoy the rest of your day!
Annette X

Wednesday, March 4, 2020

Petals & More meets Stitched Lace

Hello and welcome to my haven in a hectic world.

My Niece had her big 40 last week and I forgot to post the blog! Oops....

When I'd completed the card I was quite pleased with it, then realised it was her 40th  this year so had to quickly add the little bit at the bottom. Just glad there was room.
All measurements are in centimetres and nested dies start with (1) being the smallest.
(cs) = card stock, (dsp) = designer series paper, (ep) = embossing powder, (nsu) = not stampin' up, (r) = retired, (ss) = stamp set,

Card Stock: Lovely Lipstick 2 pieces 14.85 x 21 scored at 10.5 (card base),  6 x 6 (scallop circle), Whisper White 3 pieces 10.5 x 14.8 (stitched lace), 6 x 6 (stitched circle), small scrap (today).
DSP: 18-20 In Color Pack 4.1 x 10.
Foil: (r) lovely lipstick 2 x 5
  • Using the birthday cheer stamp from the parcels & petals (ss) add first versamark and then lovely lipstick before stamping on the  6 x 6 whisper white (cs) then heat emboss using clear (ep).
  • With the Stitched lace dies and the 10.5 x 14.8 whisper white (cs) die cut the front panel (this may need to go through the die cutting machine more than once). Then use the edge piece to cut off the bottom piece.
  • Adhere the 18/20 in color (dsp) across the bottom of the card base using liquid glue.
  • Dye a piece of white metallic edge ribbon using the dark lovely lipstick blends approximately 21cms is needed
  • Cut a piece of the dyed ribbon to about 13cm and adhere to the card base using glue dots at the back of each edge. Then with the rest of the ribbon tie a loose knot at the front right side. (the tighter the knot the fatter the card).
  • Die cut the following
    • scallop circle 6 x 6 lovely lipstick (cs) layering circles dies scallop (4) 
    • birthday sentiment (cs) stitched shapes dies circle (2)
    • (nsu) numbers  in (r) lovely lipstick foil 2 x 5 
  • Using the well said (ss), stamp the today using the to, and the day from "mothers day", then trim down to make a small tag.
  • Adhere the birthday cheer to the scallop circle using liquid glue, then attach to the card base using dimensional pads.
  • Adhere the age using liquid glue and the today using dimensional pads.
  • Colour a basic rhinestone with the lovely lipstick stampin' blends and adhere to the greeting.
Thanks for popping by and have a great day!

Will be back again soon with more cards.
Annette X

Sunday, December 22, 2019

Dashing Deer with Detailed Deer

Hi folks, hope your having a great day!

I think this is my favourite card so far, and what's more it came out of my head for a change!
Card base 13.5 x 27 scored at 13.5 with each layer being .5 smaller than the layer before.
Colours for this card are Night of Navy, Silver foil and Whisper White (thick)
When working with nested dies (1) is the smallest, (dsp) = designer paper (ef) = embossing folder, (r) = retired, (ss) = stamp set,

Adhere the first layer of (r) twinkle twinkle (dsp) directly onto the front of the card.
Emboss the second layer with the high seas (ef) then with the waves upside down glitter the edges of each wave using fine glue and stampin' glitter. Once dry adhere to the card base.
Stamp the sentiment from the dashing deer (ss) in night of navy and die cut using the label from the  merry christmas dies. At the same time die cut a narrow (2) stitched rectangle in silver foil.
With another piece of silver foil die cut the reindeer and 3 stars from the detailed deer dies.
Attach the deer using dimensional pads and the stars using liquid glue.
Colour in 4 basic rhinestones using the night of navy stampin' blends and adhere to the 3 stars, using the last one as the reindeer's eye.
Make a bow using the metallic edge ribbon and adhere to the deer's neck using a couple of glue dots.
Attach the sentiment and foil backing using dimensional pads.

Hope you enjoyed todays card.

Will be back again soon with more cards!
Annette X

Daisies meets Nature's Symphony

  Welcome to my blog and    t hank you for joining me today! Happy birthday Serenia Intermediate level - die cutting, dry embossing, layerin...