Showing posts with label dashing deer. Show all posts

Thursday, January 2, 2020

Snowman Season & more

Hello and welcome to my little haven, hope you're having a good day!

This card is for one of my Grand Daughters who is very girlie.
All measurements are in centimetres
(cs) = card stock, (r) = retired

Card stock: 3 pieces of Whisper White 21 x 14.5 (card base) scored at 10.5, 10 x 14 (first mat), 8 x 2 (sentiment), Seaside Spray 7 x 3.5 (globe base)
Colours:  Pool Party, Seaside Spray, Smoky Slate, VersaMark
Stampin' Blends: Balmy Blue, Gray Granite, Pumpkin Pie

  • Start with the first mat and die cut the dome leaving about 1.5 cm from each side.
  • Place the mat on the base card and trace the dome shape onto the card base using a light pencil.
  • Now emboss the mat with the the brick & mortar folder then add the ribbon and lay to one side for now.
  • Stamp the snowman in memento ink, and the globe using 2nd generation stamping in smoky slate. Then erase the pencil marks.
  • Colour the snowman using the stampin' blends. Then sponge lightly with pool party round the globe edges.
  • Stamp the globe base pattern on the seaside spray (cs) in versamark and cover it with the silver embossing powder then heat set it.
  • Stamp the sentiment in veramark & seaside spray then cover it with clear embossing powder and heat set it. Die cut this with the label from the petals & more dies.
  • Remove the backing from the top side of the dome and adhere to the back of the first layer and press down so it is firmly secured.
  • Now lay some snowflake sequins and a little stampin' glitter on top of the snow man, remove the second backing from the back of the dome, add some liquid glue around the rest of the first mat and then adhere down onto the card base without moving the card base so the sequins and glitter stay inside the dome area. Once in place secure dome firmly.
  • Using liquid glue adhere the globe base to the card, then using dimensional pads add  the sentiment to the bottom.
Will be back again soon with more cards!
Annette X

Friday, December 27, 2019

Winter Woods meets Dashing Deer and more!

Hello and welcome to my blog, glad you popped by.

This is a card l've cased from JanB's blog at janbcards.com Floating Christmas Tree dated 29th September 2019.

Jan did a video which I followed and found very clear and easy to follow.


Abbreviations: (cs) = Card Stock, (ef) = Embossing Folder, (r) = retired, (ss) = Stamp Set
All measurements are in inches, and you will need the following:

Card Stock: Garden Green 4 pieces, 5¾" x 5½" scored along the short edge at 4¼" (card base), 5¾" x 1¼" (bottom front base), 5" x " (2 pieces matting). Glimmer paper: 1" x 3" (3 stars) Whisper White 5 pieces 3" x 5½" (card insert), 5½"  x 1" (2 pieces matting), 3½" x 6" (2 pieces trees). 3" x 1" (sentiment)
Embossing Folders: Brick & Mortar
Dies: In The Woods, Merry Christmas, Starlight (r)
Stamp Sets: Dashing Deer, Winter Woods
Embellishments: Red Rhinestones

  • Adhere the card insert using liquid glue.
  • Emboss the 2 green panels with the brick & mortar (ef) and adhere to the 2 white panels using liquid glue.
  • Adhere one of these panels to the wider green panel (bottom front base), adhere the other panel at the top of the card base.
  • Using pegs align the bottom front base across the bottom the the base card.
  • With a piece of the white trees (cs) stamp the big tree from the Winter Woods (ss) in Garden Green 3 times.
  • Now die cut the trees using the In The Woods dies, then with the other piece of white trees (cs) die cut another 3 trees without stamping. (you now have 3 stamped trees and 3 plain trees).
  • Putting a little liquid glue at the top and bottom of first stamped tree, adhere to the front of the card on the left hand side, repeat this for the right hand side then open the card and adhere a plain tree at the back of each tree.
  • With the middle tree use  dimensional pads along the bottom and top of the tree to adhere in place. With the plain back for this tree use liquid glue for the top and bottom and a couple of dimensional pads in the middle to stop it sagging.
  • With the glimmer paper die cut 3 stars, I used the Starlight dies for this, then adhere using dimensional pads.
  • Stamp the sentiment  from the Dashing Deer (ss) in Garden Green and die cut using the label die from the Merry Christmas dies. Lightly edge this with Garden Green and adhere using dimensional pads.
  • Add some Red Rhinestones to the trees!!

Thank you for dropping by and see you again soon with more cards
Annette X

Wednesday, December 25, 2019

Dashing Deer meets Merry Moose

Wishing you all a Happy Christmas and a day full of joy!


There are a lot of similar cards to this on Pinterest at the moment and this is my take on it.

All measurements are in centimetres
For the label die it's the group of 4 narrower dies and I start with the smallest being 1
(cs) = card stock, (ss) stamp set, (r) = retired,

Card Stock: Crumb Cake 14.5 x 21 scored at 10.5 (card base), Merry Merlot 3 pieces, 14 x 10 (first mat) 3 x 10 (sentiment backing) 2.5 x 6 (letters) Very Vanilla 3 pieces 13.5 x 9.5 (second mat) 3 x 10 (sentiment), 11 x 6 (moose & scarf)
Dies: Stitched Rectangles (narrow 2), Petals & More, Well Written
Embossing Folders: Subtle
Punches: Moose
Stamp Sets: Dashing Deer, Merry Moose
Accessories: Metallic Enamel Shapes (r)

  • Adhere the merry merlot (cs)  mat to the card base using liquid glue.
  • Carry out the stamping of the trees on the Very Vanilla (cs) mat using the merry moose (ss) and mossy meadow ink. For lighter trees use 2nd and 3rd generation stamping.
  • Again using the merry moose (ss) and soft suede ink stamp the moose footsteps where you wish to place your moose.
  • Now emboss this mat using the subtle folder and adhere it to the card base using dimensional pads.
  • Stamp the sentiment from the dashing deer (ss) in merry merlot and die cut it using the petals & more label die. At the same time you can die cut the letters you want, using the well written dies.
  • With the merry merlot (cs) sentiment backing, you need to extend the length of it by only partially cutting then turning the die round and adding a little more length cut again, again only partially cutting.
  • Adhere the sentiment to sentiment backing using dimensional pads. and adhere the completed sentiment to the card base again with dimensional pads.
  • Trim the letters so as to join up the word and adhere to the card using liquid glue.
  • Stamp the moose outline in soft suede and then over stamp with the full moose in crumb cake.
  • Punch out the moose and attach to card using dimensional paps.
  • Stamp the scarf in merry merlot ink and fussy cut it. Adhere around the neck of the moose using liquid glue.
  • Add a star to the top on one of the trees.
  • I spritz my card with shimmer paint to give it a little sparkle.

Will be back again soon with more cards!
Annette X

Sunday, December 22, 2019

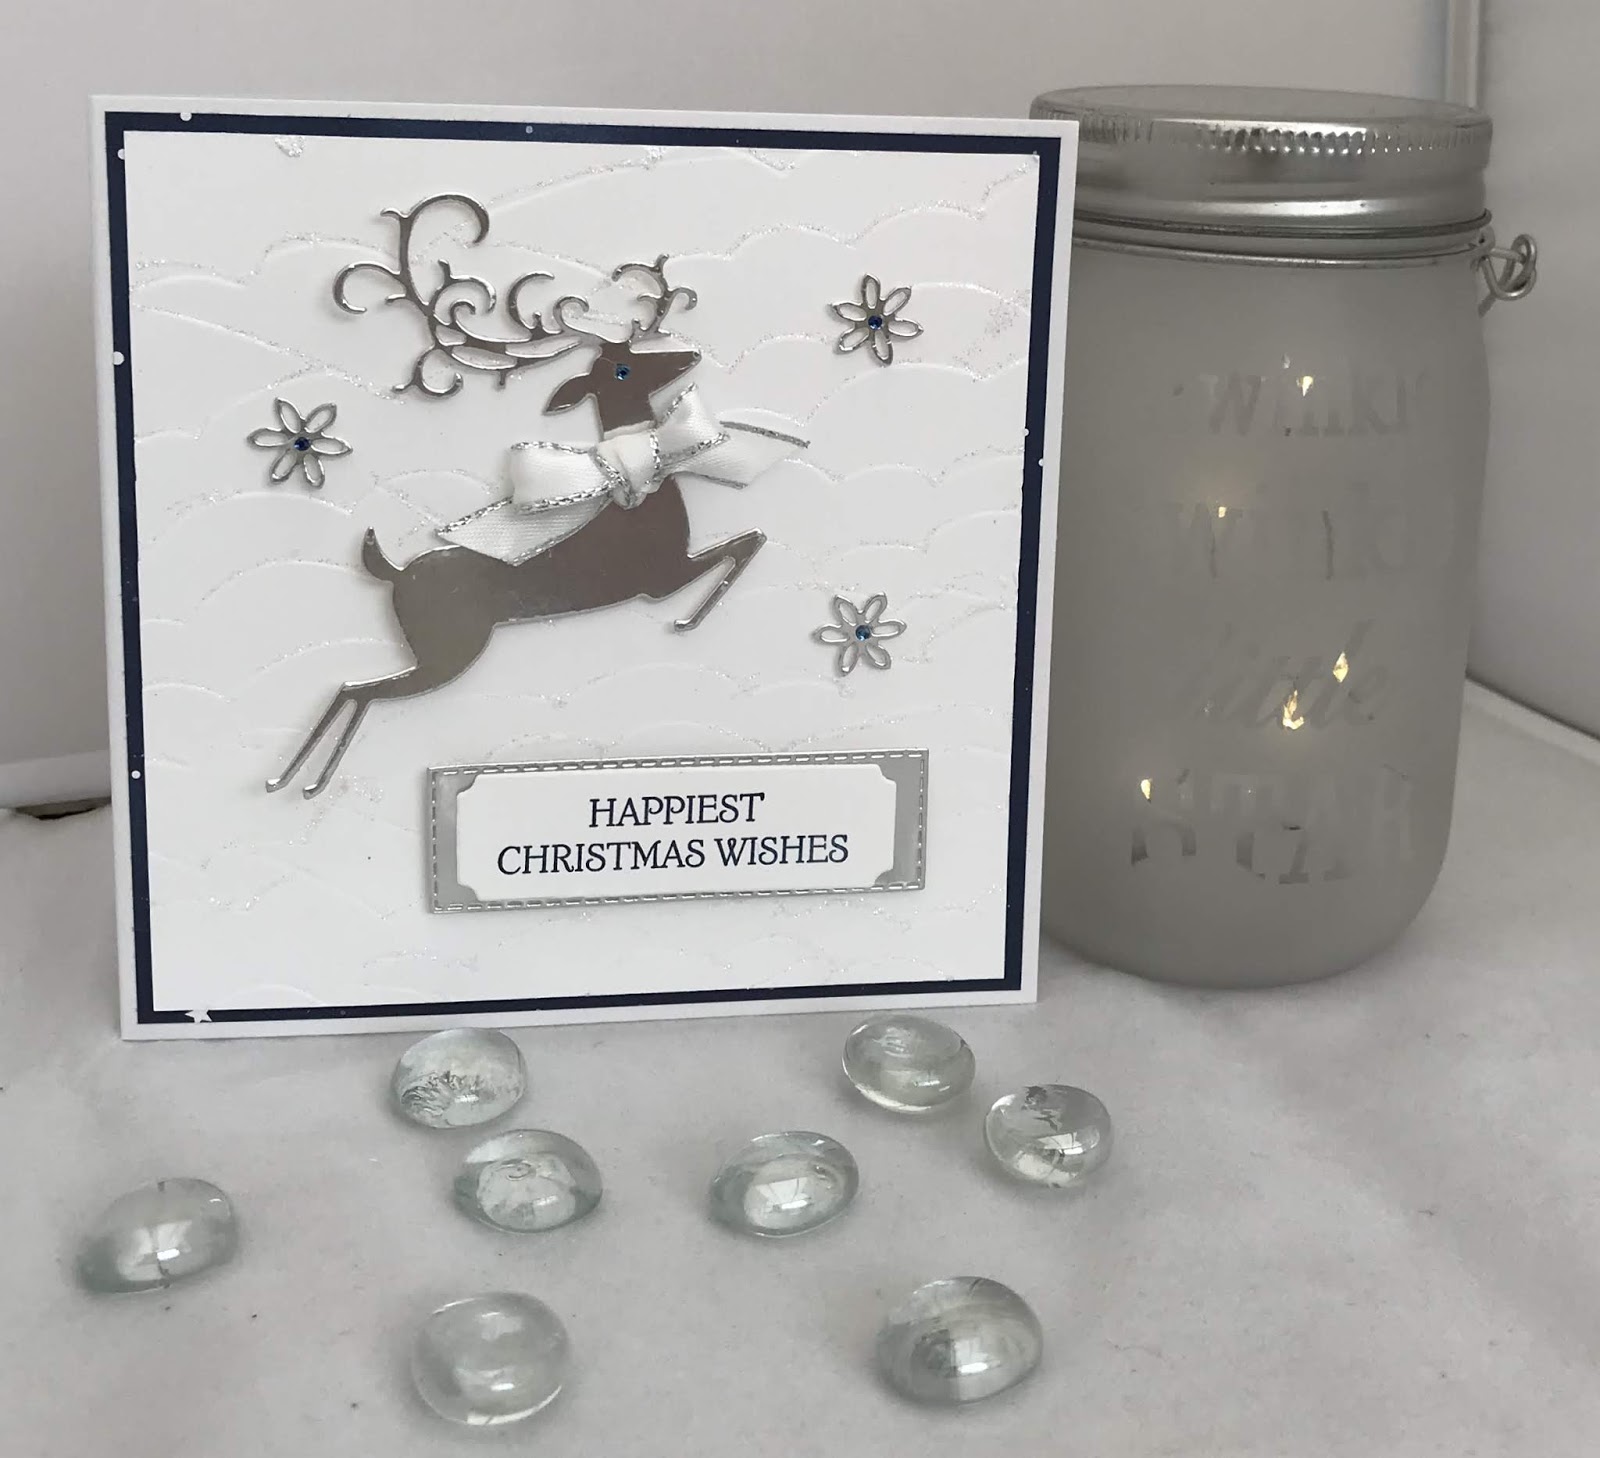
Dashing Deer with Detailed Deer

Hi folks, hope your having a great day!

I think this is my favourite card so far, and what's more it came out of my head for a change!
Card base 13.5 x 27 scored at 13.5 with each layer being .5 smaller than the layer before.
Colours for this card are Night of Navy, Silver foil and Whisper White (thick)
When working with nested dies (1) is the smallest, (dsp) = designer paper (ef) = embossing folder, (r) = retired, (ss) = stamp set,

Adhere the first layer of (r) twinkle twinkle (dsp) directly onto the front of the card.
Emboss the second layer with the high seas (ef) then with the waves upside down glitter the edges of each wave using fine glue and stampin' glitter. Once dry adhere to the card base.
Stamp the sentiment from the dashing deer (ss) in night of navy and die cut using the label from the  merry christmas dies. At the same time die cut a narrow (2) stitched rectangle in silver foil.
With another piece of silver foil die cut the reindeer and 3 stars from the detailed deer dies.
Attach the deer using dimensional pads and the stars using liquid glue.
Colour in 4 basic rhinestones using the night of navy stampin' blends and adhere to the 3 stars, using the last one as the reindeer's eye.
Make a bow using the metallic edge ribbon and adhere to the deer's neck using a couple of glue dots.
Attach the sentiment and foil backing using dimensional pads.

Hope you enjoyed todays card.

Will be back again soon with more cards!
Annette X

Delicate Whispers and more

Welcome to my blog and    t hank you for joining me today! Happy Anniversary to Sylvia & Bill Intermediate level - blending with a brush...