Showing posts with label ornate frames. Show all posts

Saturday, January 24, 2026

Extraordinary Flora Bundle meets meets Beautiful Balloons

  Welcome to my blog

and  thank you for joining me today!

Happy Birthday Ashlie


Intermediate level - die cutting, dry embossing, dying ribbon, layering, stamping
Materials required for this card are:
 
Bundles: extraordinary Flora
Card Stock: basic white, *basic vellum
Dies: *ornate frames
Embossing Folders: Exposed brick 3D
Ink: secret sea, *soft succulent
Stampin' Blends: petunia pop
Stamps: *beautiful balloons, *elements of text
Accessories: *24/6 in color resin dots, *crinkled seam binding, extraordinary flora washi tape, wink of stella
 * = no longer available, when using layering dies (1) is the smallest

Start with a basic card base 14.5 x 29 scored at 14.5, basic white 8.5 x 17 (2 needed), 10.1 x 14.1, 6 x 6 vellum 10.1 x 14.1, ribbon 16cm
  1. stamp the flowers on one of the basic white 8.5  x 17 pieces in secret sea
  2. adhere the washi tape to the second piece then die cut both pieces
  3. dry emboss the vellum
  4. tear 3 strips of paper about 2 cm wide and mask across the white layer 
  5. stamp randomly using the circle stamp in soft succulent
  6. stamp the sentiment on the 6 x 6 piece in secret sea, then die cut it
  7. dye the ribbon using the stampin' blend, and wrap around the embossed vellum using tape to secure on the reverse side
  8. arrange the flowers adhering the ones at the back with liquid glue and the ones at the front with dimensional pads
  9. attach the sentiment with dimensional pads and add the dots across the ribbon
  10. adhere to the stamped layer using liquid glue only where there are elements to hide the glue
  11. adhere the white layer to the base card
  12. add wink of stella to the leaves at the back 
Hope you liked today's card. If you would like more information on how to make it, please don't hesitate to contact me. I'd love to hear form you.

If you wish to buy any of the items used, go to contacting me at the top of the page for details of how to order.
 
Will be back again soon with more cards, in the meantime take care and have a great day.
Annette 😊

Wednesday, November 3, 2021

Sailing Home meets lots of Dies

 Thank you for joining me today!

A bit of a blast from  the past for Paul this week


A mixture of old and current products for this card! A 
little bit of a mistake with the embossing but just went with it. I swiped the embossing folder with some night of navy ink before putting it through the stampin' cut & emboss machine, but realised it  would have been better to swipe the other side. Will try to remember this for next time.

Materials required for this card are:

Card Stock: balmy blue, basic white, night of navy
Designer Series Paper: *come sale away
Dies: ornate frames, smooth sailing, stitched rectangles (5) wide
Embossing Folders: *old world paper 3D (one from my forever box)
Ink: night of navy, smoky slate
Ribbon: *boho frayed grosgain
Stampin' Blends: balmy blue, crumb cake, smoky slate
Stampin' Markers: smoky slate
Stamp Sets: sailing home
* = no longer available, when using layering dies (1) is the smallest

Hope you liked today's card. If you would like more information on how to make it, please don't hesitate to contact me, I'd love to hear from you.

If you wish to buy any of the items used, go to contacting me at the top of the page for details on how to order.

Will be back again soon with more cards, in the meantime take care and have a great day.
Annette 😘

Monday, April 12, 2021

Saying goodbye to the 2019 - 2021 in colors and more!

 Thank you for joining me today!


Well it's that time of year again when we're saying goodbye to so many of our favourite goodies, in order to make room for our new favourite goodies. Because I'm sure a lot of the new products will become well loved, I know of one already!

This card includes one of my favourite colours form the 2019 -2021 in color selection, seaside spray along with the much loved Very Versailles stamp set.


Materials required for this card are:

Card Stock: basic white, sahara sand, soft suede
Dies: ornate 
Embossing Folders: subtle 3D
Ink: sahara sand, seaside spray 
Ribbon: scalloped linen
Stamp Sets: *perfectly framed, very Versailles 
Accessories: blending brushes
* = retired

Hope you liked today's card. If you would like more information on how to make it, please don't hesitate to contact me, I'd love to hear from you.

If you wish to buy any of the items used, go to contacting me at the top of the page for details on how to order.

Will be back again soon with more cards, in the meantime take care and have a great day.
Annette 😘

Sunday, April 4, 2021

Welcome to Easter and more

Thank you for joining me today!

My first Easter card for this year 


This is a mixture of both past and current products, I only make a couple of Easter cards each year, one for my aunt and one to send to Plymouth with a cheque instead of an egg for my grandson.

Materials required for this card are:

Card Stock: basic white, soft sea foam
Designer Series Paper: twinkle twinkle
Dies: dockside, nature's thoughts, ornate frames, stitched shapes (c3)
Embossing Folders: tasteful textile 3D
Ink: memento black
Punches: medium daisy (makes the groove for the twine)
Ribbon: snail mail twine
Stampin' Blends: petal pink, smoky slate
Stamp Sets: timeless tulips, *welcome to easter  

* = retired, when using layering dies (1) is the smallest

Hope you liked today's card. If you would like more information on how to make it, please don't hesitate to contact me, I'd love to hear from you.

If you wish to buy any of the items used, go to contacting me at the top of the page for details on how to order.

Will be back again soon with more cards, in the meantime take care and have a great day.

Annette 😘 

Monday, January 25, 2021

Family Party with lots of die cutting

 Hello and welcome to my haven in a hectic world!

Thanks for joining me today!

This is the 2nd card for my Granddaughter, Jenny asked if I would do A Daughter card for my Granddaughter and also a sister card which you will see tomorrow!


I made this card using a layout from Pinterest and mostly retired products. Plus, the daughter and numbers which are NSU!

Materials required for this card are:

Card Stock: Basic White, *glimmer
Designer Series Paper: *falling in love
Dies: be mine stitched, butterflies, ornate frames, smooth sailing
Embossing Folders: meadow moments
Embossing Powder: clear
Ink: bermuda bay, versamark
Stamp Sets: family party
* = retired, NSU = non stampin' up!

Hope you liked today's card. If you would like more information on how to make it, please don't hesitate to contact me, I'd love to hear from you.

If you wish to buy any of the items used, go to contacting me at the top of the page for details on how to order.

Will be back again soon with more cards, in the meantime take care and have a great day.
Annette 😘

Sunday, December 20, 2020

In The Pines meets Warm & Toasty

 Hello and welcome to my haven in a hectic world!

Thanks for joining me today!

Happy Christmas Kayden 


Felt this is ok for boy's card, hope he likes it.

Materials required for this card are:

Card Stock: highland heather, shaded spruce, whisper white
Designer Series Paper: snowflake splendor
Dies: home together, ornate frames, pine woods
Embossing Folders: subtle 3D
Ink: memento tuxedo black, shaded spruce
Stampin' Blends: highland heather, misty moonlight, night of navy
Stamp Sets: in the pines, warm & toasty
Accessories: *white perfect accents
* = retired

Hope you liked today's card. If you would like more information on how to make it, please don't hesitate to contact me, I'd love to hear from you.

If you wish to buy any of the items used, go to contacting me at the top of the page for details on how to order.

Will be back again soon with more cards, in the meantime take care and have a great day.
Annette 😘

Wednesday, November 18, 2020

Piece of Cake meets Power of Hope

Power of Hope meets Piece of Cake

Hello and welcome to my haven in a hectic world.

Made this card some time ago for my niece, so it's my old style of layout!


 I have to be able to tell hubby I've used every stamp set at least once

Colours: Petal Pink 2 pieces 10 x 14 (1st layer), 9.5 x 7 (scallop oval),Whisper White 3 pieces 21 x 14.5 scored at 10.5 (card base), 9 x 6.5 (stitched oval), 2 x 7 (sentiment).
DSP: Parisian Blossoms 4 x 14 (2nd layer).

All measurements are in centimetres.
(cs) = card stock, (dsp) = designer series paper,  (ef ) = embossing folder, (ss) = stamp set, * = retired, when using layering dies (1) is the smallest.

  • Emboss the larger piece of  petal pink (cs) using the parisian flourish (ef).
  • Now adhere the *parisian blossoms (dsp) down the left hand side of the embossed layer using liquid glue.
  • Add some of the petal pink metallic edged ribbon along the join of these two pieces, (I used sellotape at the back to do this), then make a small bow and attach it towards the top using a glue dot.
  • This is then adhered to the base card using liquid glue.
  • Stamp both the sentiment from the *piece of cake (ss) and the lady from the *power of hope (ss) on their respective pieces of whisper white (cs) using memento black ink.
  • Colour the lady using petal pink blends.
  • Die cut the sentiment using the ornate frames dies, the lady with the stitched shapes dies oval (4) and the petal pink (cs) with the layering ovals dies scallop (7) .
  • Adhere the two ovals together using liquid glue.
  • Attach the ovals and the sentiment to the base card using dimensional pads.
  • Arrange some champagne rhinestones around the lady to add some dimension.
Will be back again soon with more cards!
Annette X

Sunday, November 15, 2020

Field of Flowers meet Lovely You

 Hello and welcome to my haven in a hectic world!

Thanks for joining me today!

A mixture of new and old for Sue's week 34


I just loved this colour combo

Materials required for this card are:

Card Stock: flirty flamingo, whisper white
Designer Series Paper: *16/18 in colors
Dies: ornate frames, stitched rectangles (4) wide
Embossing Folders: subtle 3D
Ink: flirty flamingo, *just jade, memento tuxedo black
Ribbon: *rushed 16/18 in colors, *scalloped edge
Stamp Sets: field of flowers, lovely you
Accessories: basic pearls
* = retired, when using layering dies (1) is the smallest

Hope you liked today's card. If you would like more information on how to make this card, please don't hesitate to contact me, I'd love to hear from you.

If you wish to buy any of the items used, go to contacting me at the top of the page for details on how to order.

Will be back again soon with more cards, in the meantime take care and have a great day.
Annette 😘

Sunday, October 25, 2020

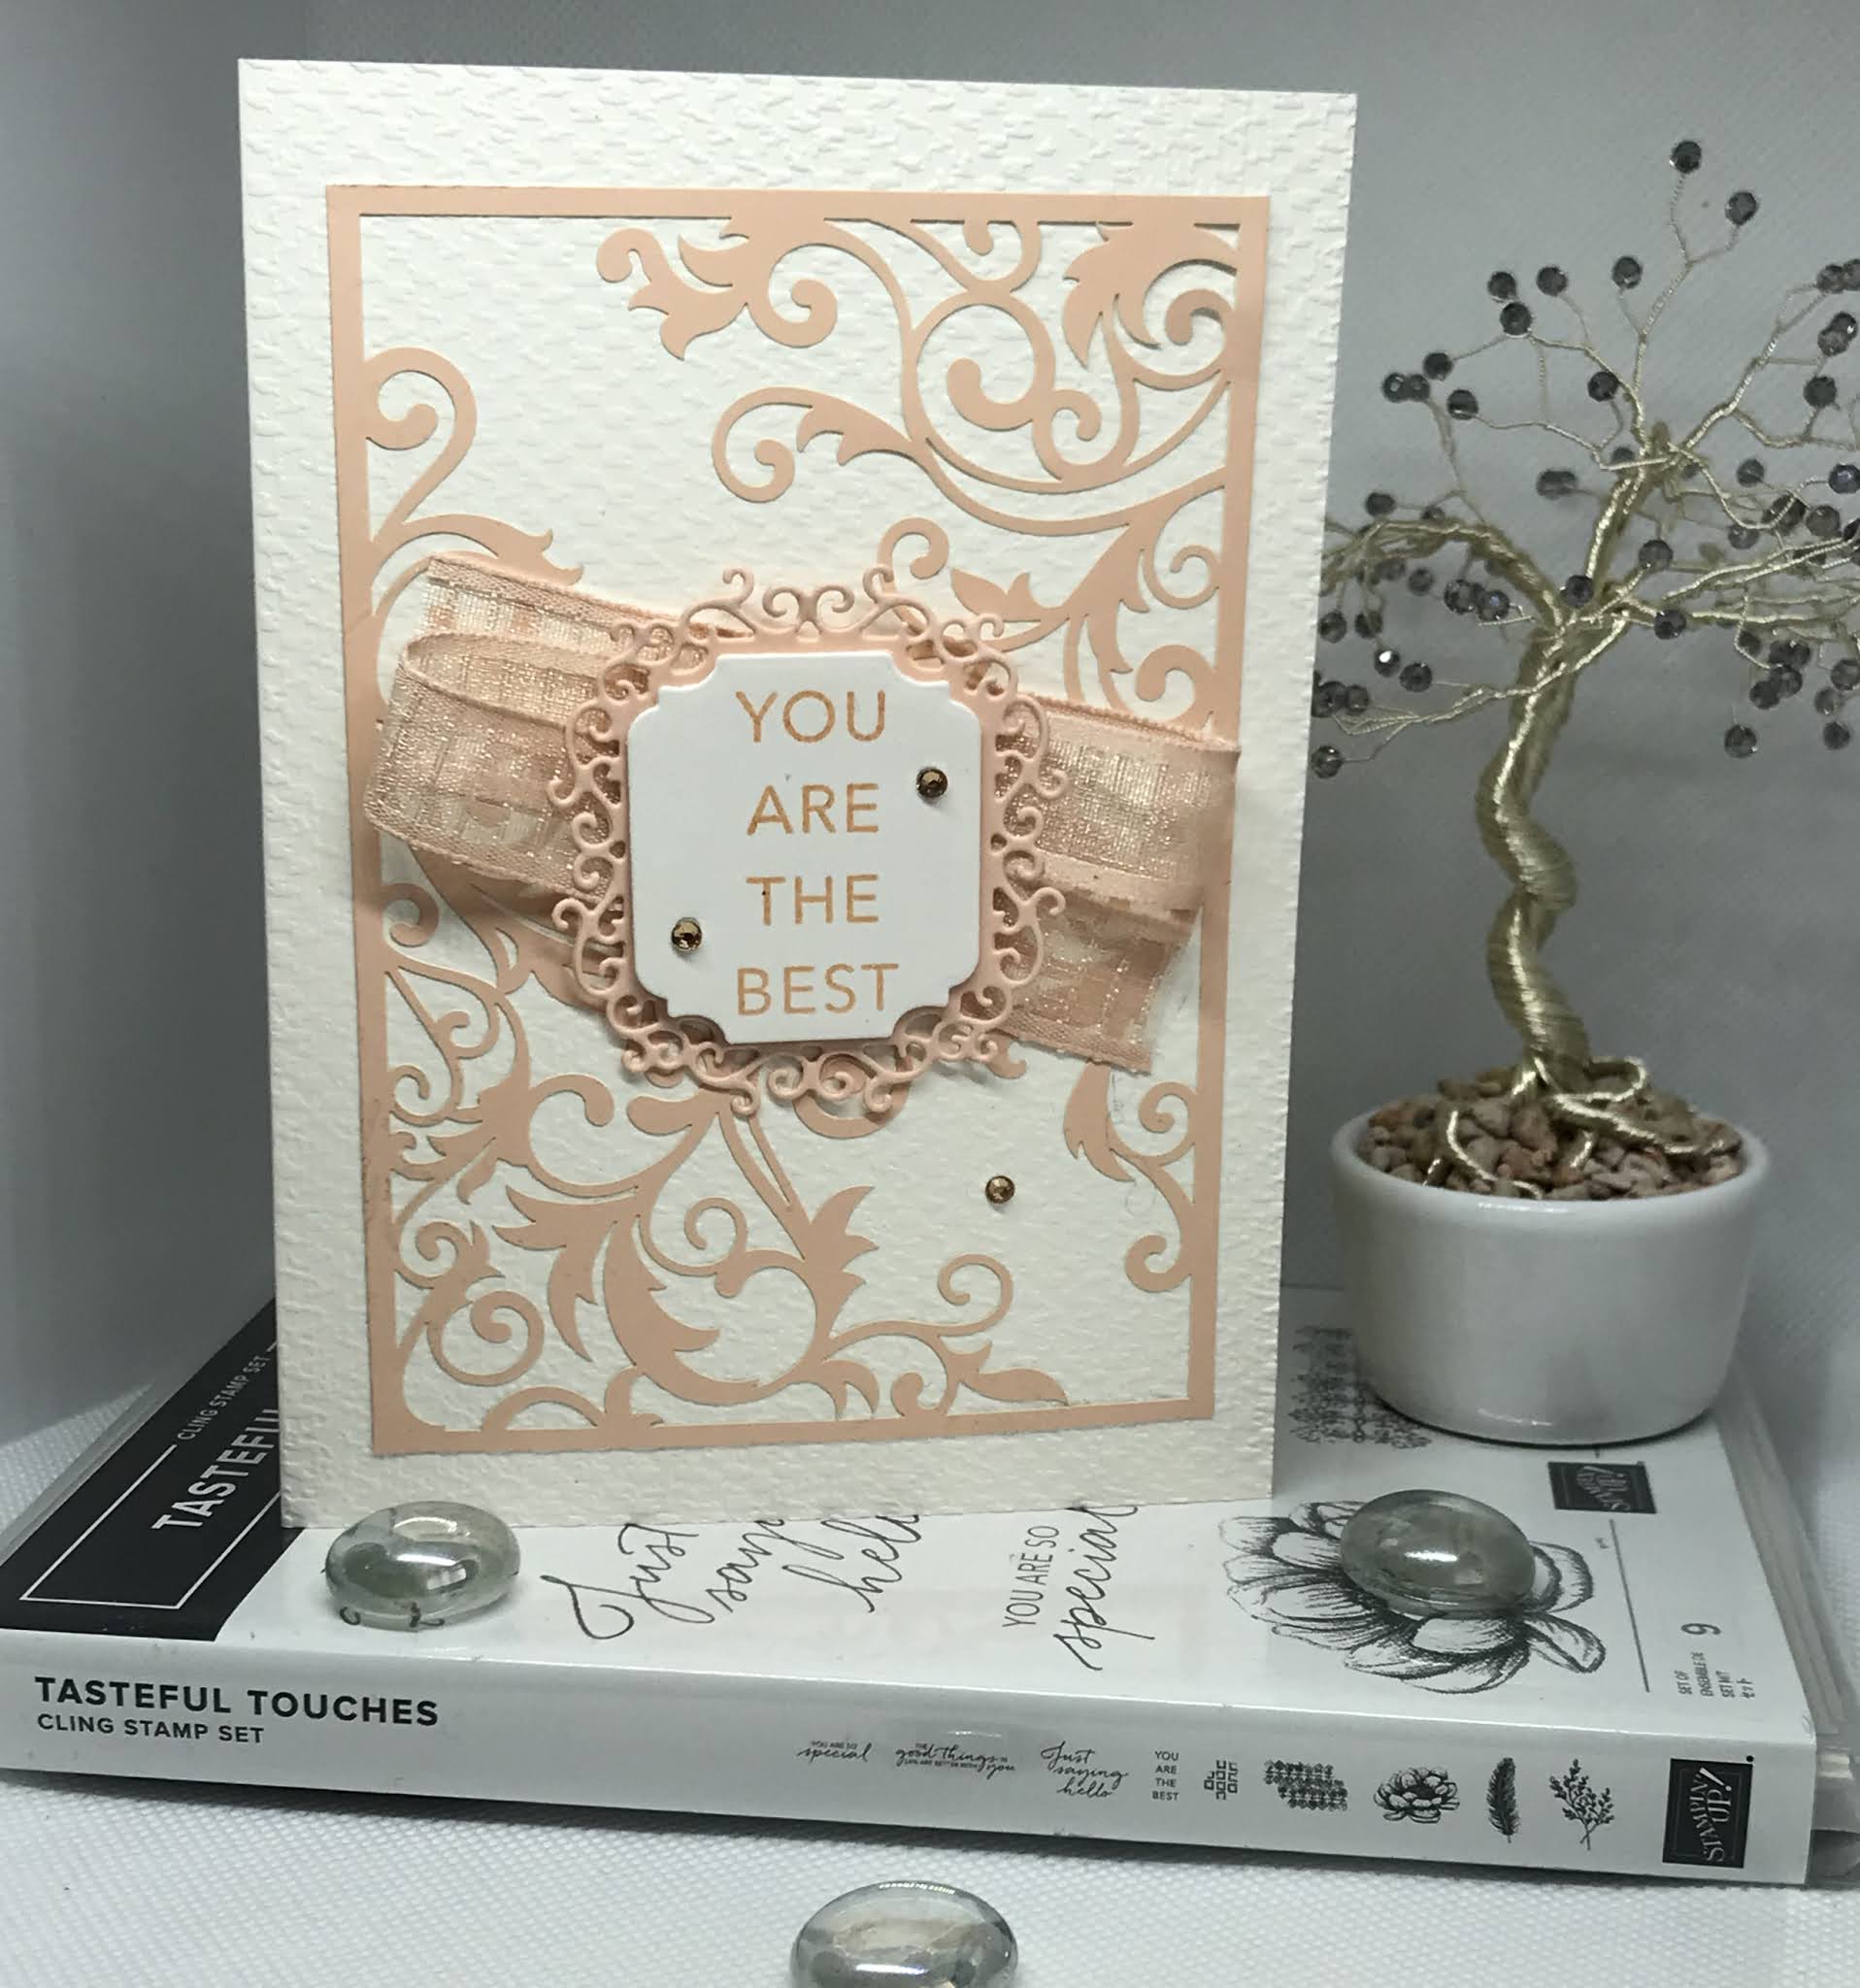
Tasteful Touches meets Ornate Frames

 Hello and welcome to my haven in a hectic world!

Thanks for joining me today!

I'm starting to get really fed up with not being able to go out and see family and friends now, and the only thing that's keeping me sane is spending time in my craft room each morning. 

Sunday Dinner card for Sue & family


Decided to look at retired DSP for this weeks card and liked what I came up with!

Materials required for this card are:

Card Stock: Petal Pink, Very Vanilla
Dies: ornate frames
Embossing Folders: tasteful textiles 3D
Embossing Powder: clear
Ink: petal pink, versamark
Laser Cut Speciality Paper: *beautifully detailed
Ribbon: organdy striped
Stampin' Blends: 
Stamp Sets: tasteful touches
Accessories: champagne rhinestones
* = retired

Hope you liked today's card. If you would like more information on how to make it, please don't hesitate to contact me, I'd love to hear from you.

If you wish to buy any of the items used, go to contacting me at the top of the page for details on how to order.

Will be back again soon with more cards, in the meantime take care and have a great day.
Annette 😘

Monday, September 21, 2020

Gather Together meets Peaceful Moments

 Hello and welcome to my haven in a hectic world!

Thanks for joining me today!

Sympathy card for a close neighbour whose father has just dies aged 98. He was a lovely man, who was out and about till the very end.


Materials required for this card are:

Card stock: crumb cake, merry merlot, whisper white
Designer Series Paper: *come to gather
Dies: gathered leaves, ornate frames
Embossing folders: pinewood planks
Embossing Powder: 
Ink: cajun craze
Ribbon: linen thread
Stampin' blends: merry merlot
Stamp sets: gathered together, peaceful moments
Accessories: candy dots 
* = retired, 

Hope you liked today's card. If you would like more information on how to make it, please don't hesitate to contact me, I'd love to hear from you.

If you wish to buy any of the items used, go to contacting me at the top of the page for details on how to order.

Will be back again soon with more cards, in the meantime take care and have a great day.
Annette 😘

Tuesday, August 4, 2020

Celebrate Sunflowers meets Free As A Bird

Hello and welcome to my haven in a hectic world!

Hi Sue, yes it's week 20

Playing with my new stash of goodies!!


Materials required for this card are:

Card stock: thick whisper white, whisper white
DSP: flowers for every season
Dies: ornate frames, sunflowers
Embossing folders: tasteful textile 3D
Embossing Powder: *black
Ink: memento tuxedo black, petal pink, versamark
Punches: detailed trio 
Ribbon: scalloped linen
Stampin' blends: cinnamon cider, just jade, petal pink
Stamp sets: celebrate sunflowers, free as a bird
Accessories: *glitter enamel dots, *silver metallic thread
* = retired

Hope you liked today's card. If you would like more information on how to make it, please don't hesitate to contact me, I'd love to hear from you.

If you wish to buy any of the items used, go to contact me at the top of the page for details on how to order.

Will be back again soon with more cards, in the meantime have a great day.
Annette 😘

Tuesday, June 30, 2020

Painted Poppies meets Silhouette Scenes

Hello and welcome to my haven in a hectic world!

Happy Birthday to our wonderful Daughter-in-law Serenia

I enjoyed making this card, but next time will use wax paper when die cutting the tree, it took a bit of teasing out. The sentiment was computer generated.


Materials required for this card are:

Card stock: basic black, shimmery white, whisper white
Dies: ornate, sweet silhouettes
Embossing powder: black
Ink: soft suede, so saffron, pumpkin pie, cajun craze, cherry cobbler, versamark, memento tuxedo black
Punch: detailed trio
Ribbon: glittered organdy
Stamp sets: painted poppies, silhouette scenes
Accessories: * black rhinestones

* = retired

Hope you liked today's card. If you would like more information on how to make the card please don't hesitate to contact me, I'd love to hear from you.

If you wish to buy any of the items used, go to contact me at the top of the page for details on how to order.

Will be back again soon with more cards, in the meantime have a great day.
Annette 😘

Monday, June 8, 2020

Last A Lifetime meets Lasting Elegance

Hello and welcome to my haven in a hectic world, hope you're have a good day!

It's now week 12 for the lockdown and we actually went to the bank the other day, Yippee!!!
Still don't go out unless we have to so it made a change.

This is Sue's card for this week.

I created it using a u tube video from Lisa Curio's channel made some time ago. I changed the front and was very pleased with the outcome.
As this has come from an American demonstrator the measurements are in imperial inches.
(but I will soon be bring you a metric version, so keep your eye out for it!)

(cb) = card base, (cs) = card stock, (dsp) = designer series paper, (ef) embossing folder,  (r) = retired, (ss) = stamp set.
Colours used are: purple posy, soft sea foam, so saffron.

  • Start with a (cb) of thick whisper white (cs) 8½ x 5½  scored at 4¼. 
  • Emboss the front of the (cb) using the subtle (ef)
  • Cut 2 pieces of in color 19/21 (dsp) 4 x 4 and 3 x 4 making sure  the pattern goes in the same direction.
  • Using the 4 x 4 piece of (dsp) make a mark on the left side at 1½  then the bottom at 1¾ and finally the right side at 2¼. 
  • Cut off from the left side mark down to the bottom mark, now cut from the right mark down to make a point at the bottom.
  • Place the right side of the 4 x 4 piece level with the top of the 3 x 4 piece, line up so each side is level, then draw a line around the edge of the 4 x 4 piece onto the 3 x 4 piece, now cut along the line to get the corresponding shape for the bottom.
  • Place these pieces onto the (cb) and stamp the sentiments from the ornate thanks (ss) in the gap.
  • Using foam adhesive strips adhere the top and bottom pieces of (dsp) to the (cb).
  • Stamp the flowers from the last a life time (ss) onto whisper white (cs) using memento ink and colour using stampin' blends.
  • Die cut the flowers using the lasting elegance dies.
  • For the top sentiment I used the (r) new wonders (ss) and stamped in purple posy, then die cut using the ornate frames dies.
  • Adhere this sentiment using liquid glue to the (cb).
  • Attach the flowers using dimensional tabs.
  • Add some basic rhinestones in between the gap sentiments and jobs done!!!!
Thanks for dropping by and enjoy the rest of your day
Annette X

Saturday, February 22, 2020

Gather Together meets Rooted in Nature and more

Hello and welcome to my haven in a hectic world.

Happy Birthday Dave!

This is a bundle I won't be selling any time soon! I might not use it all that often but I'll know it's there when I want it.
All measurements are in centimetres.
(cs) = card stock, (r) = retired, (ss) = stamp set, (ef) = embossing folder, (ep) = embossing powder

Card Stock, Crumb Cake 14.85 x 21 scored at 10.5 (card base), Velum 15 x 10.5 (leaves etc) Very Vanilla (1st layer)14.4 x 10.1
DSP: Come to Gather 14.4 x 5.1 (layer 2 top)
Foil: (r) Galvanised Metallic 14.4 x 5 (layer 2 bottom).
  • Adhere the come to gather (dsp) across the top of 1st layer (cs), using liquid glue.
  • Emboss the (r) galvanised metallic foil using the hammered metal (ef) and adhere to the bottom of the 1st layer (cs) using liquid glue.
  • Using the large leaf from the gather together (ss) stamp onto the velum using pretty peacock ink, then cover with clear (ep) and heat set.
  • Now do the same with the sentiment from the perennial birthday (ss).
  • Using the rooted in nature (ss) stamp the rest of the leaves using versamark and heat emboss using a mixture of both copper and sliver (ep).
  • Die cut the following:
    • Large leaf using the gathered leaves dies
    • Sentiment using the ornate frames dies
    • The rest of the leaves using the nature's roots dies
  • Attach some loosened off copper trim across the join between the (dsp) and the foil using glue dots at the back.
  • Attach the 1st layer to the card base using dimensional pads.
  • Arrange the leaves as you wish them and adhere using liquid glue (this should not show through the velum).
  • Adhere the sentiment again using liquid glue and adhere a leaf by it.
  • Make a bow with some of the copper trim and attach where desired.
Thanks for dropping by, and have a great day!

Will be back again soon with more cards.
Annette X


Delicate Whispers and more

Welcome to my blog and    t hank you for joining me today! Happy Anniversary to Sylvia & Bill Intermediate level - blending with a brush...