Showing posts with label stitched satin ribbon. Show all posts

Friday, April 11, 2025

Simply Said meets Heartfelt Hexagonal punch

 Welcome to my blog

and  thank you for joining me today!

Happy Birthday Andy


Easy level - dry embossing, heat embossing, layering, stamping 

Materials required for this card are:

Card Stock: basic white. smoky slate
Designer Series Paper: take to the sky
Embossing Folders: *subtle 3D
Embossing Powder: black
Ink: versaMark
Punches: heartfelt hexagon
Stamps: simply said
Accessories: neutrals sequins, *stithced satin ribbon
 * = no longer available

Start with a base card 14.5 x 21 scored at 10.5
  • basic white 14.5 x 5, 8 x 8
  • basic black 7.5 x 7.5
  • dsp 14.5 x 5, 7 x 7
  • smoky slate 14.5 x 10.5
  1. dry emboss the smoky slate and adhere to the base card using liquid glue
  2. punch out a hexagon from the centre of the black square
  3. In the middle of the white square stamp the sentiment in versaMark, cover with black embossing powder and heat set
  4. punch out using the hexagon
  5. layer the 2 rectangle strips using liquid glue
  6. dry emboss the 8 x 8 white square
  7. layer the 3 squares using liquid glue
  8. adhere these 2 pieces to the base card using liquid glue
  9. cut the black hexagon in half and adhere to the white one top and bottom using liquid glue
  10. using sticky tape adhere the ribbon behind the sentiment and attach the card using dimensional pads
  11. add the sequins               
Hope you liked today's card. If you would like more information on how to make it, please don't hesitate to contact me, I'd love to hear from you.

If you wish to buy any of the items used, go to contacting me at the top of the page for details of how to order.

Will be back again soon with more cards, in the meantime take care and have a great day.
Annette 😊

Wednesday, April 28, 2021

You Are Amazing

 Thank you for joining me today!


It's my eldest son's birthday today so!

Happy Birthday Stephen
I won't tell you how old he is, it makes me feel too old.


Old stash and a free Sale-a-bration stamp set now no longer available. The stamparatus was used to create the repeated sentiment on the left.

Materials required for this card are:

Card Stock: basic white, misty moonlight
Designer Series Paper: in colour 20/22
Dies: layering circles (s6), stitched shapes (c3)
Embossing Folders: subtle 3D
Ink: misty moonlight
Ribbon: *stitched satin
Stamp Sets: *you are amazing  
Accessories: *noble peacock rhinestones
* = retired, when using layering dies (1) is the smallest

Hope you liked today's card. If you would like more information on how to make it, please don't hesitate to contact me, I'd love to hear from you.

If you wish to buy any of the items used, go to contacting me at the top of the page for details on how to order.

Will be back again soon with more cards, in the meantime take care and have a great day.
Annette 😘

Tuesday, November 3, 2020

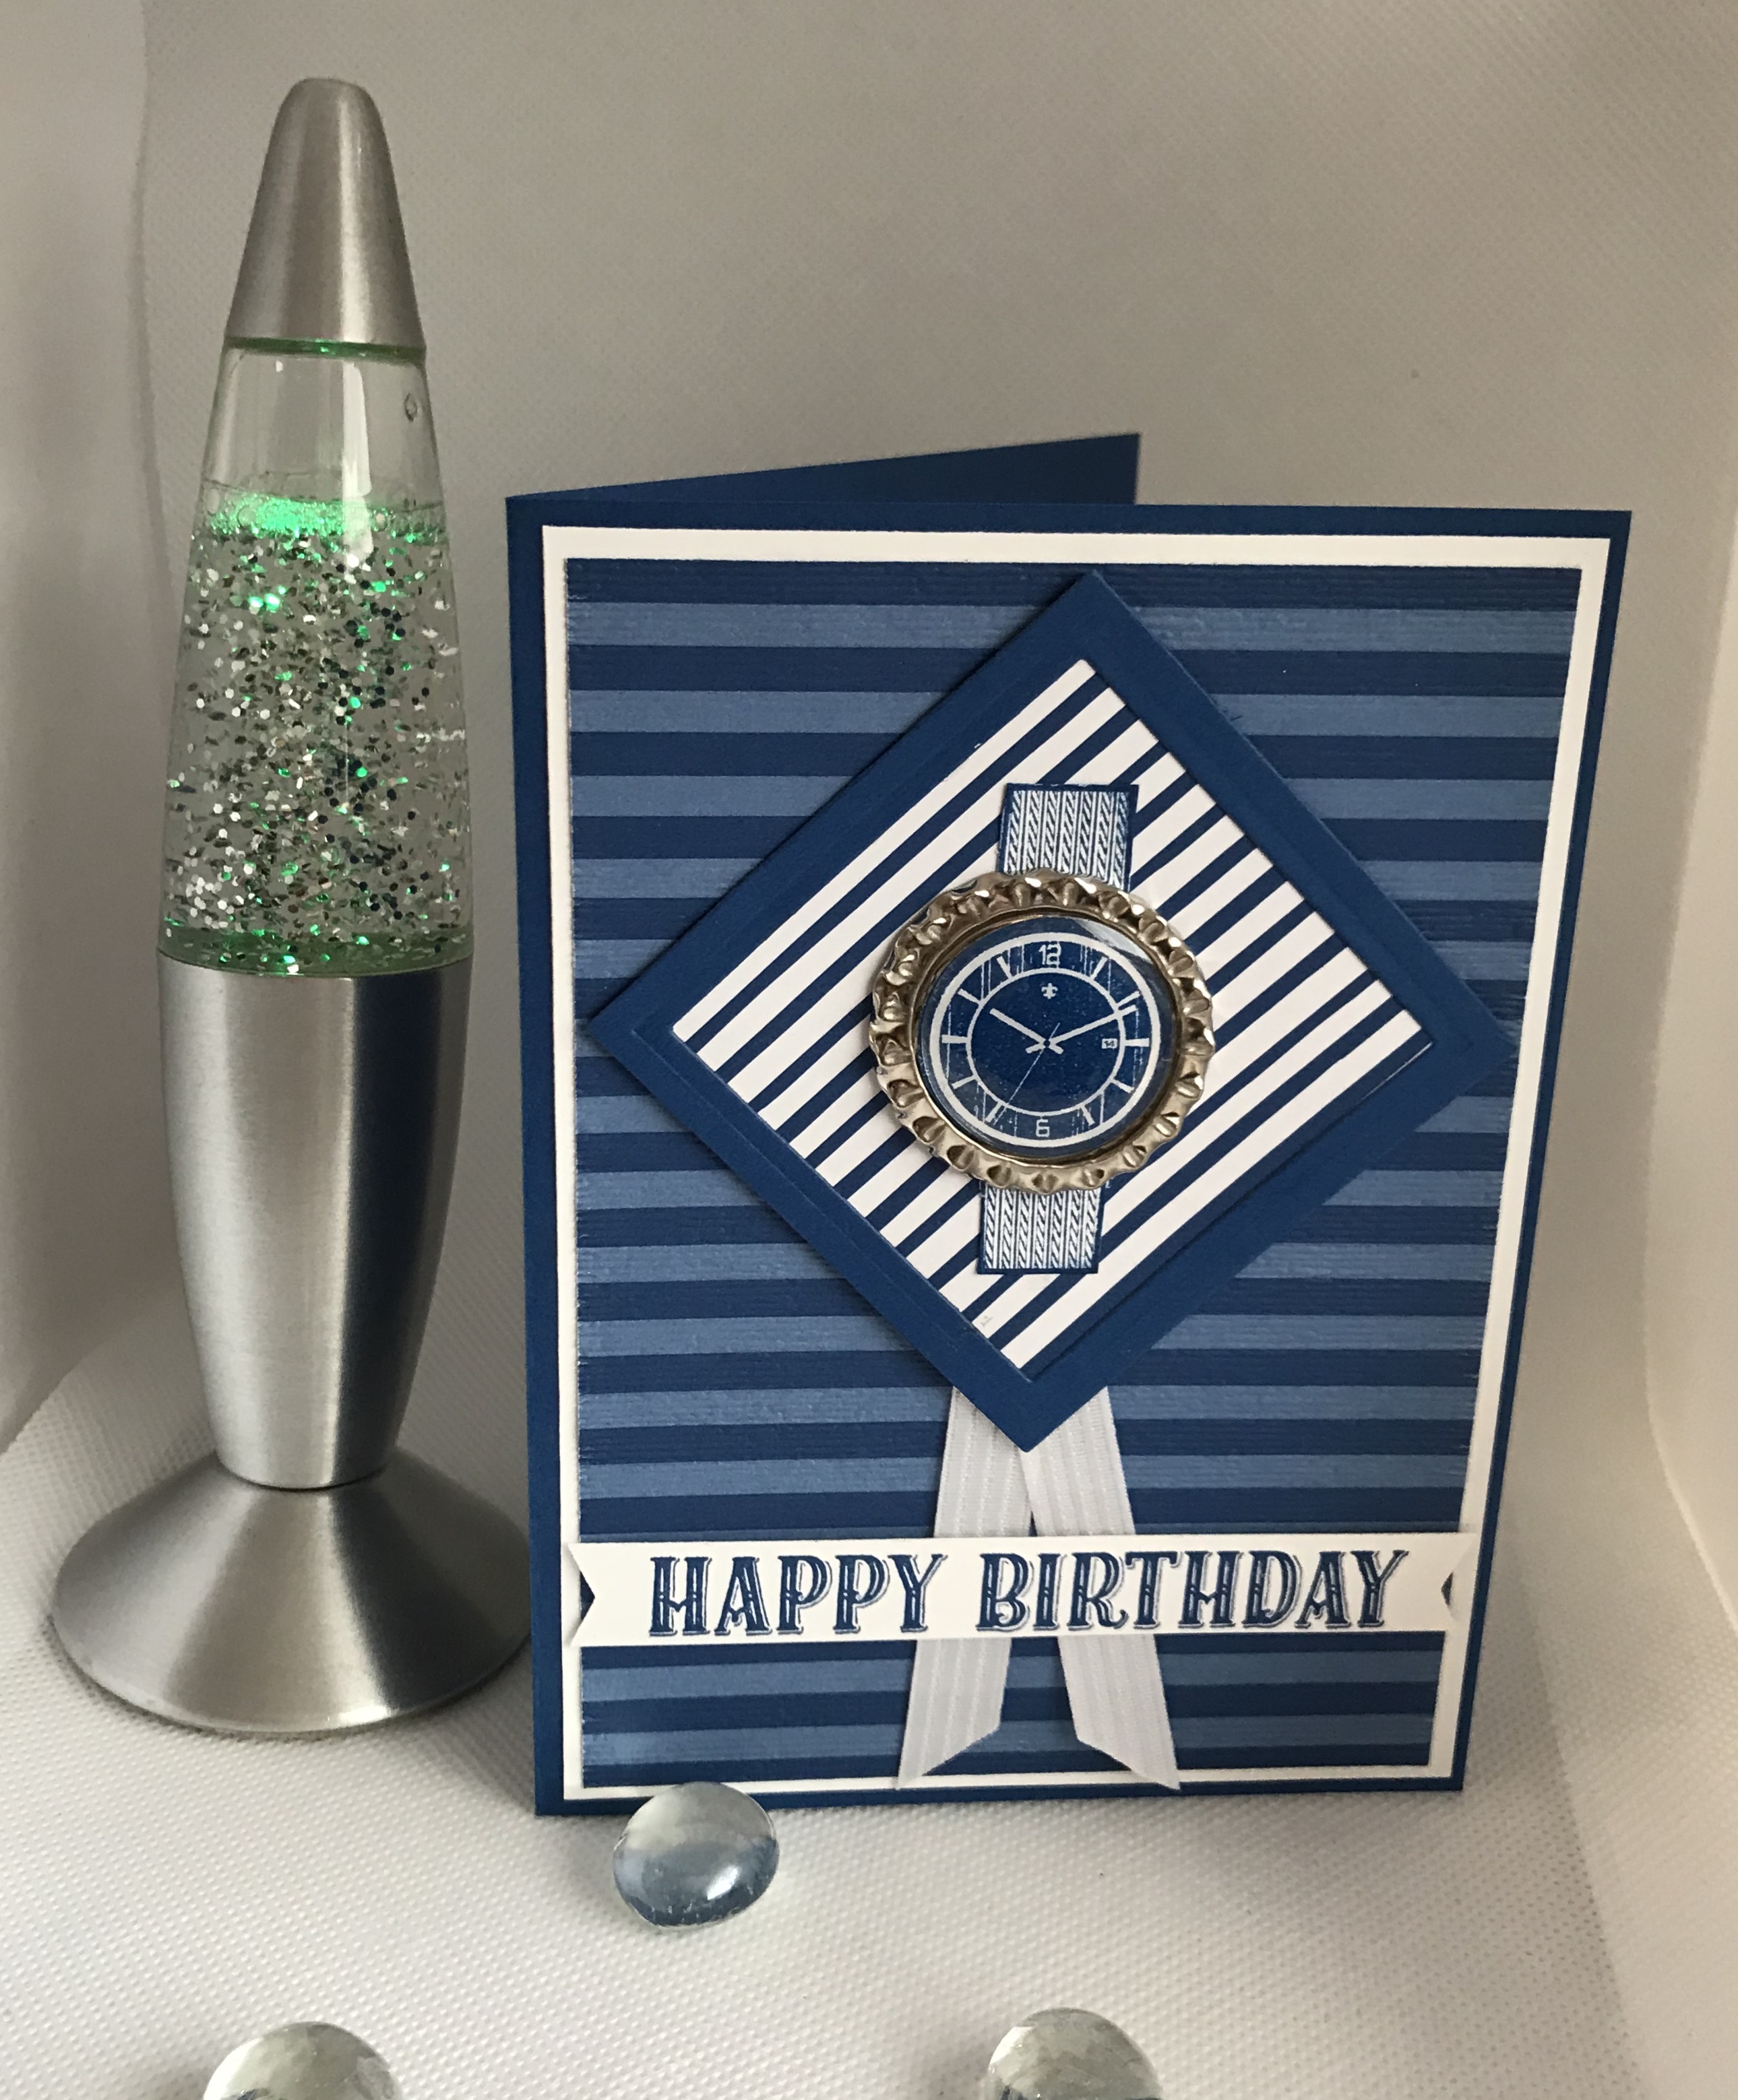
Birthday Jubilee meets Dapper Dad

Hello and welcome to my haven in a hectic world!

This is a mixed card, both new and old products being used.


Materials required for this card are:

Card stock: *blueberry bushel, whisper white
DSP: *in colors 18/20
Dies: layering squares (5&7)
Embossing folders: subtle
Ink: *blueberry bushel
Punches: triple banner
Ribbon: *stitched satin
Stamp sets: *birthday jubilee, *dapper dad
Accessories: (nsu) epoxy stickers, *silver soda pop tops

* = retired, (nsu) = non stampin' up!, when using layering dies (1) is the smallest

Hope you liked today's card. If you would like more information on how to make this card please don't hesitate to contact me, I'd love to hear from you.

If you wish to buy any of the items used, go to contacting me at the top of the page for details on how to order.

Will be back again soon with more cards, in the meantime have a great day.
Annette 😘

Wednesday, March 11, 2020

Feeling Sentimental (blast from the past)

Hello, and thank you for popping by today.

Blast from the past time. I was trying to have a bit of a sort out the other day and found this stamp set from years ago and thought I might just use it again and this is what I did!

Happy Birthday Sid


Measurements are in centimetres, (cs) = card stock, (dsp) = designer series paper, (r) = retired,
(ss) = stamp set, when using layering dies (1) is the smallest.

Card base is (r) Summer Starfruit 14.85 x 21 scored at 10.5, (r) Sycamore Street (dsp) 14.85 x 5, 2 pieces of (r) Midnight Muse (cs) 7.5 x 9.5 (layer 2) 7.5 x 3 (rough edges), Whisper White (cs) 7.5 x 9 (layer 3), Stitched Satin ribbon (banner).

Colours are, Midnight Muse, Summer Starfruit, Whisper White.
  1. Adhere the sycamore street dsp down the left hand side of the card base using liquid glue.
  2. Stamp the big wheel from the (r) feeling sentimental (ss) on to the whisper white (cs).
  3. Using the stitched rectangle dies and the wide (5) die cut the stamped whisper white (cs) omitting the top and bottom edges.
  4. Adhere the now completed whisper white layer to the larger piece of midnight muse (cs) using liquid glue.
  5. With the smaller piece of midnight muse (cs) rip in half down the longer edge to create rough edges and then adhere these two pieces to the whisper white layer at the top and bottom using liquid glue.
  6. Stamp the sentiment from the feeling sentimental (ss) at the bottom right hand side of the card base.
  7. Attach the stitched satin ribbon folded in half to form a banner at the top right hand side of the midnight muse layer using a staple.
  8. Lastly attach this layer to the card base using dimensional pads.
Will be back again soon with more cards
Annette X

Saturday, February 8, 2020

8 feb 20 richard

Artisan Label with Label Love

Hello and welcome to my blog, thanks for dropping by.

Happy Birthday Richard

This is a blast from the past!

I was tidying up a few of my craft draws today (you know what I mean 😊) I couldn't find my dimensionals and this is what i found in one of them!
The medallion and the striped/hexagon backing card, so I thought I'd come up with something, to be able to use it instead of throwing it away.

All measurements are in centimetres
(cc) = card stock, DSP = designer series paper, ⓡ = retired, (ss) = stamp set

To start with the colours are Midnight Muse (In Color for 2012 - 2014) and Whisper White. I loved this colour when it was about.
The Label Love (ss), Artisan Label punch and the Stitched Satin ribbon are all retired along with the Hexagon embossing folder.
Only the Well Written and Stitched Rectangle dies along with the Starburst punch are in the current catalogue.
This is a larger card then I usually make being 24. 4 x 16 scored at 12.2 with the layers being Midnight Muse (cc) (3 pieces 15.5 x 11.7 (first layer) 6 x 6 (starburst) 6.5 x 3 (friend), ⓡ In Color (2012 - 2014) DSP 11.4 x 15.2 and 2 pieces of Whisper White (cc) 5.1 x 15.2 (hexagon panel) 4 x 7.5 (stitched rectangle).
The Starburst and Whisper White panel are both embossed with the Hexagon embossing folder.
The rectangle is die cut using the Stitched Rectangle dies and friend is die cut using the Well Written dies.

Will be back again soon with more cards
Annette X

Delicate Whispers and more

Welcome to my blog and    t hank you for joining me today! Happy Anniversary to Sylvia & Bill Intermediate level - blending with a brush...