Showing posts with label in color 18/20 dsp. Show all posts

Saturday, May 7, 2022

Honeybee Home meets Calming camellia

  Welcome to my blog

and  thank you for joining me today!

Happy Birthday Idwin


Enjoyed making this card. Lots of layers, embossing, die cutting and stamping. Both the scalloped contours dies were embossed and the flowers were coloured using blends.

Materials required for this card are:

Card Stock: *blueberry bushel (the new in color blue would be great too),daffodil delight, very vanilla
Designer Series Paper: *in color s 18/20 (new in colors would be great too)
Dies: honey bee blooms, scalloped contours (4 & 5)                                            
Embossing Folders: hive 3D, *tasteful textile 3D
Ink: *blueberry bushel, soft suede
Stampin' Up Blends: daffodil delight, *just jade, smoky slate, so saffron
Stamp Sets: *calming camellia, honeybee home
Accessories: bakers twine essentials pack
 
* = no longer available, when using layering dies (1) is the smallest

Hope you liked today's card. If you would like more information on how to make it, please don't hesitate to contact me, I'd love to hear from you.

If you wish to buy any of the items used, go to contacting me at the top of the page for details on how to order.

Will be back again soon with more cards, in the meantime take care and have a great day.

Annette ๐Ÿ˜˜ 

Monday, March 7, 2022

Calming Camellia meets Honeybee Home

  Welcome to my blog

and  thank you for joining me today!

Happy Birthday Idwin


Enjoyed making this card. Lots of layers, embossing, die cutting and stamping. Both the scalloped contours dies were embossed and the flowers were coloured using blends.

Materials required for this card are:

Card Stock: *blueberry bushel (the new in color blue would be great too),daffodil delight, very vanilla
Designer Series Paper: *in color s 18/20 (new in colors would be great too)
Dies: honey bee blooms, scalloped contours (4 & 5)                                            
Embossing Folders: hive 3D, *tasteful textile 3D
Ink: *blueberry bushel, soft suede
Stampin' Up Blends: daffodil delight, *just jade, smoky slate, so saffron
Stamp Sets: *calming camellia, honeybee home
Accessories: bakers twine essentials pack
 
* = no longer available, when using layering dies (1) is the smallest

Hope you liked today's card. If you would like more information on how to make it, please don't hesitate to contact me, I'd love to hear from you.

If you wish to buy any of the items used, go to contacting me at the top of the page for details on how to order.

Will be back again soon with more cards, in the meantime take care and have a great day.
Annette ๐Ÿ˜˜

Tuesday, November 3, 2020

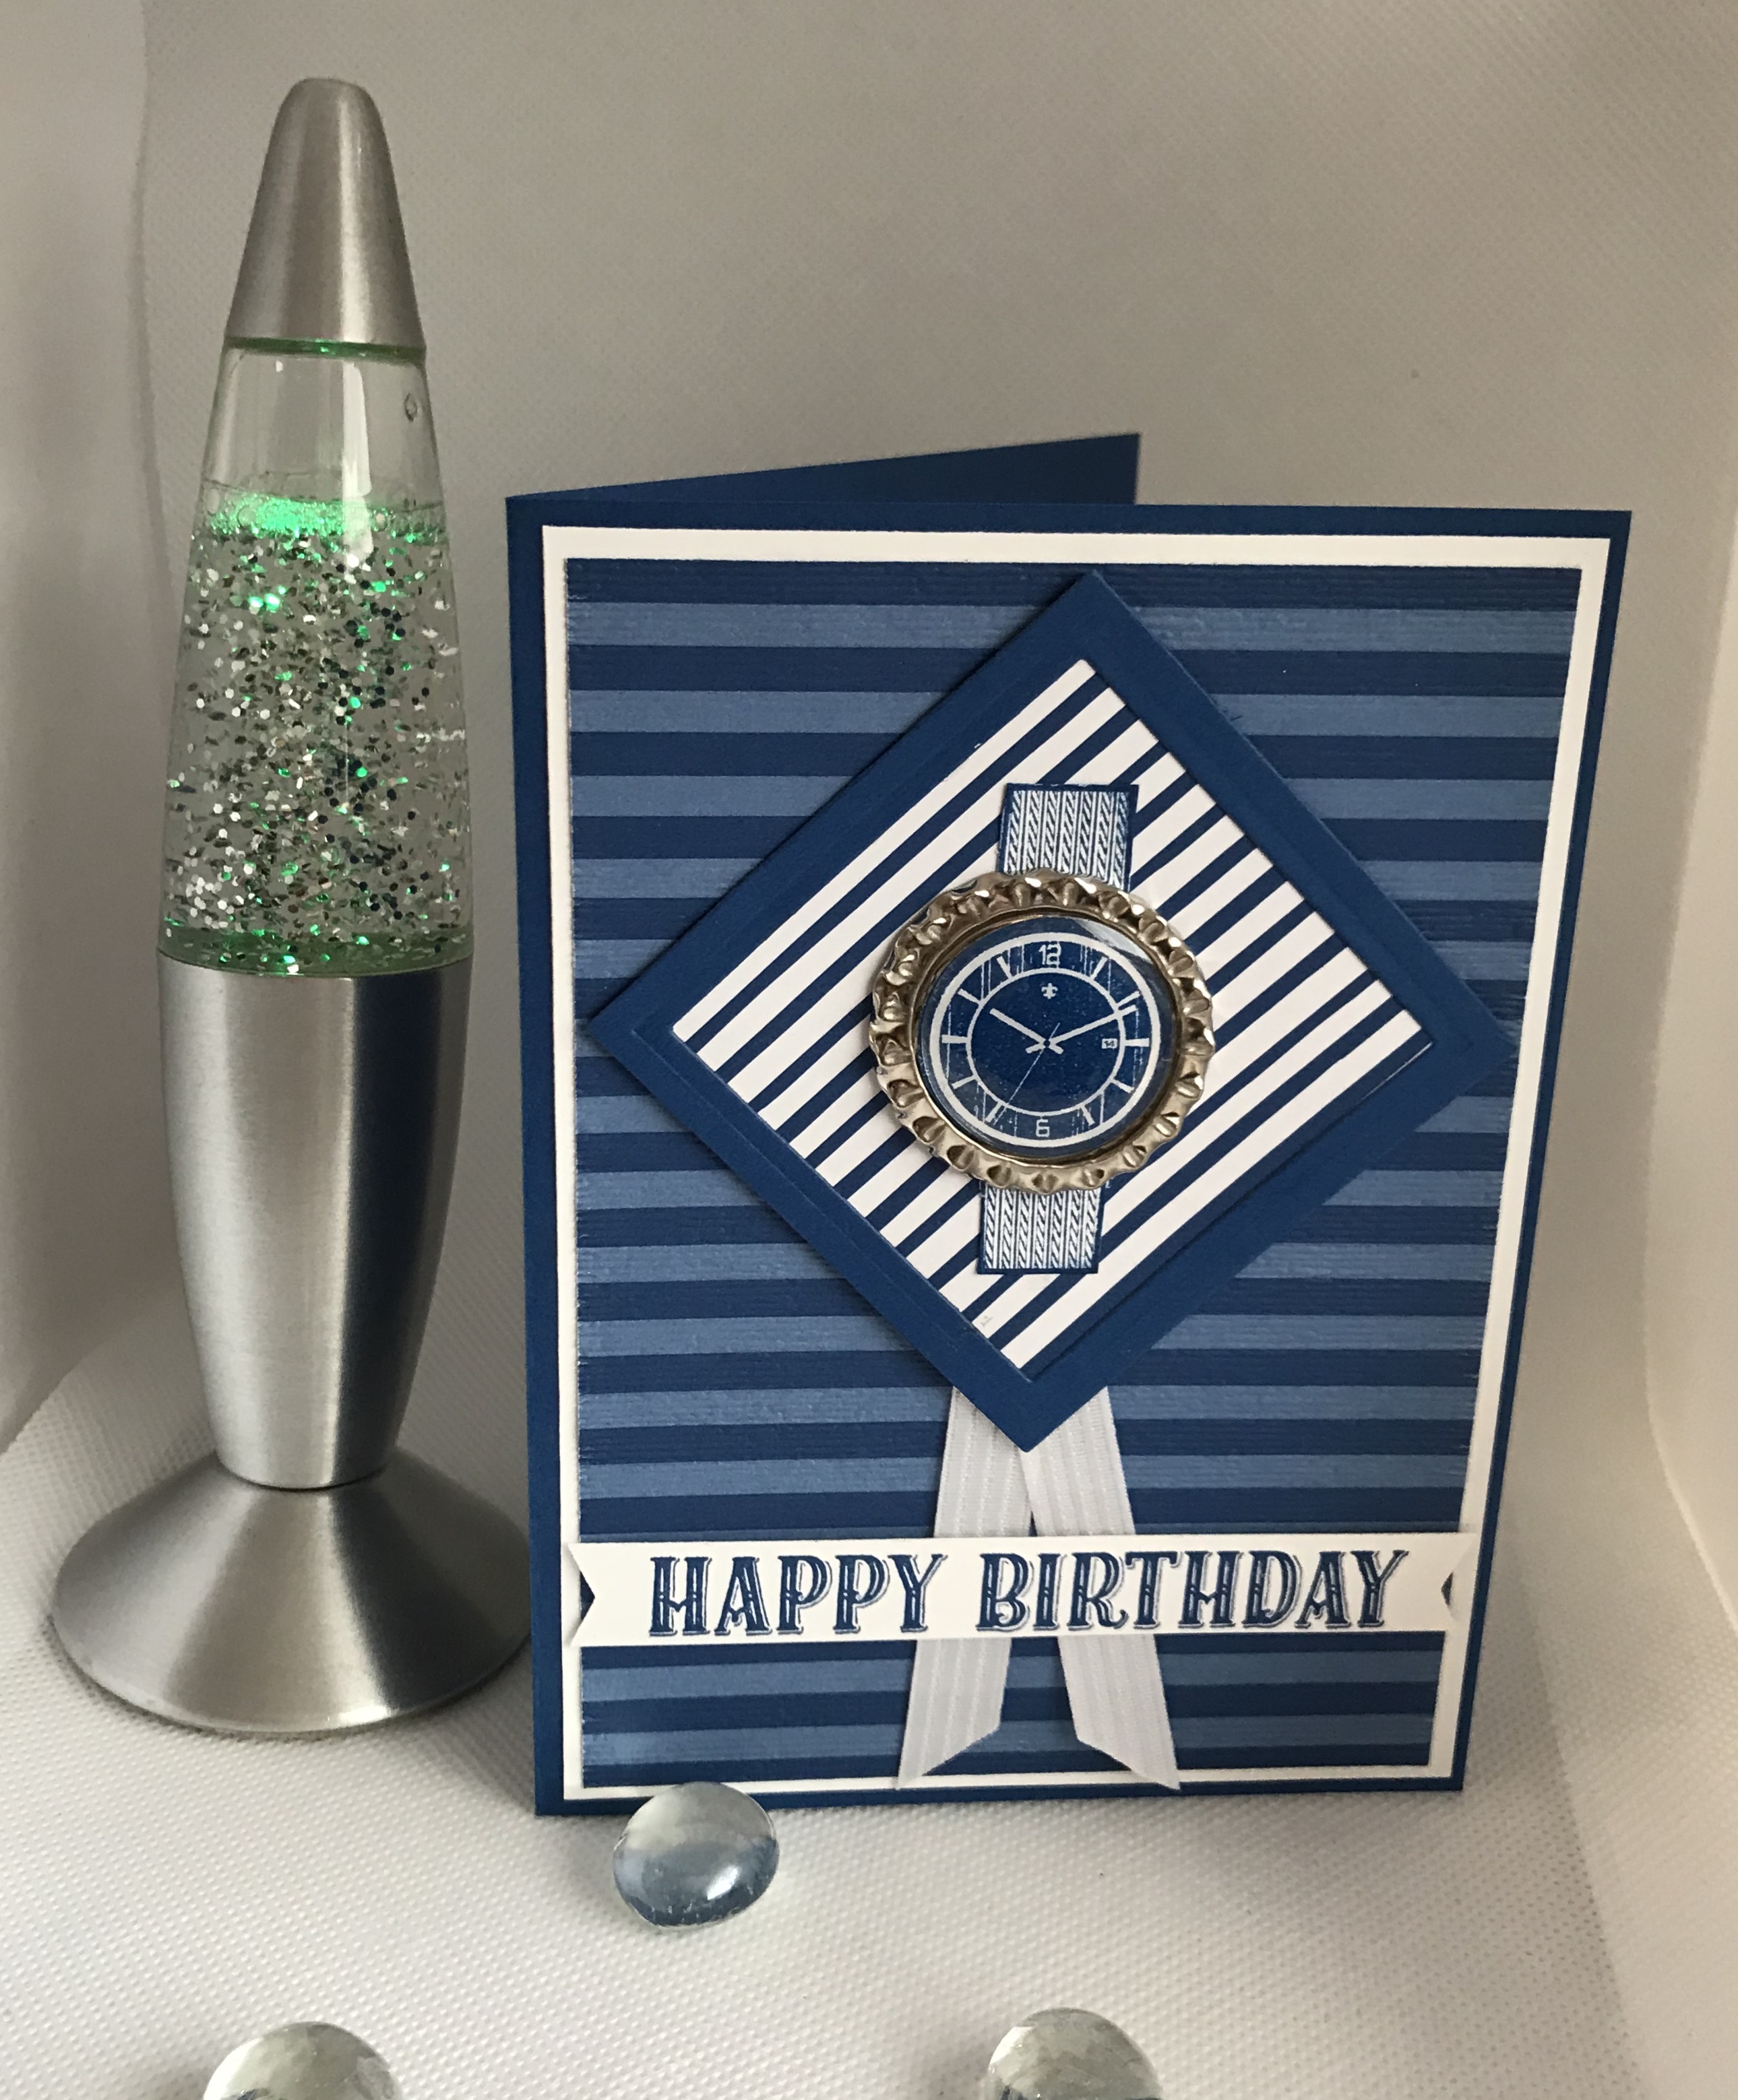
Birthday Jubilee meets Dapper Dad

Hello and welcome to my haven in a hectic world!

This is a mixed card, both new and old products being used.


Materials required for this card are:

Card stock: *blueberry bushel, whisper white
DSP: *in colors 18/20
Dies: layering squares (5&7)
Embossing folders: subtle
Ink: *blueberry bushel
Punches: triple banner
Ribbon: *stitched satin
Stamp sets: *birthday jubilee, *dapper dad
Accessories: (nsu) epoxy stickers, *silver soda pop tops

* = retired, (nsu) = non stampin' up!, when using layering dies (1) is the smallest

Hope you liked today's card. If you would like more information on how to make this card please don't hesitate to contact me, I'd love to hear from you.

If you wish to buy any of the items used, go to contacting me at the top of the page for details on how to order.

Will be back again soon with more cards, in the meantime have a great day.
Annette ๐Ÿ˜˜

Wednesday, March 4, 2020

Petals & More meets Stitched Lace

Hello and welcome to my haven in a hectic world.

My Niece had her big 40 last week and I forgot to post the blog! Oops....

When I'd completed the card I was quite pleased with it, then realised it was her 40th  this year so had to quickly add the little bit at the bottom. Just glad there was room.
All measurements are in centimetres and nested dies start with (1) being the smallest.
(cs) = card stock, (dsp) = designer series paper, (ep) = embossing powder, (nsu) = not stampin' up, (r) = retired, (ss) = stamp set,

Card Stock: Lovely Lipstick 2 pieces 14.85 x 21 scored at 10.5 (card base),  6 x 6 (scallop circle), Whisper White 3 pieces 10.5 x 14.8 (stitched lace), 6 x 6 (stitched circle), small scrap (today).
DSP: 18-20 In Color Pack 4.1 x 10.
Foil: (r) lovely lipstick 2 x 5
  • Using the birthday cheer stamp from the parcels & petals (ss) add first versamark and then lovely lipstick before stamping on the  6 x 6 whisper white (cs) then heat emboss using clear (ep).
  • With the Stitched lace dies and the 10.5 x 14.8 whisper white (cs) die cut the front panel (this may need to go through the die cutting machine more than once). Then use the edge piece to cut off the bottom piece.
  • Adhere the 18/20 in color (dsp) across the bottom of the card base using liquid glue.
  • Dye a piece of white metallic edge ribbon using the dark lovely lipstick blends approximately 21cms is needed
  • Cut a piece of the dyed ribbon to about 13cm and adhere to the card base using glue dots at the back of each edge. Then with the rest of the ribbon tie a loose knot at the front right side. (the tighter the knot the fatter the card).
  • Die cut the following
    • scallop circle 6 x 6 lovely lipstick (cs) layering circles dies scallop (4) 
    • birthday sentiment (cs) stitched shapes dies circle (2)
    • (nsu) numbers  in (r) lovely lipstick foil 2 x 5 
  • Using the well said (ss), stamp the today using the to, and the day from "mothers day", then trim down to make a small tag.
  • Adhere the birthday cheer to the scallop circle using liquid glue, then attach to the card base using dimensional pads.
  • Adhere the age using liquid glue and the today using dimensional pads.
  • Colour a basic rhinestone with the lovely lipstick stampin' blends and adhere to the greeting.
Thanks for popping by and have a great day!

Will be back again soon with more cards.
Annette X

Monday, December 9, 2019

Piece of Cake meets Swirly Frames

Hello and welcome, hope you're having a great day.

Happy Birthday Simon!

This is the last of the birthday cards for this year, so I hope you like it.
To recreate this card follow the guide below:
(dsp) = designer series paper, ⓡ = retired, (ss) = stamp set.

All measurements are in centimetres

Card Stock: Blueberry Bushel 29.7 x 10.5 scored at 14.8 (card base)
Whisper White 2 pieces  13.6 x 9.3 (layer 2), 4 x 5.5 (cake & stand)
DSP: In Colors 2018/20 14.2 x 9.9 (layer 1)
Embossing Folders: Brick & Mortar
Punches: Cake Builder
Stamp Sets: ⓡ Amazing Life, Piece of Cake, Swirly Frames

Adhere the in color (dsp) to the card base.
Working with layer 2, the swirly frames (ss) and stampin' pads, stamp some shapes using blueberry bushel, granny apple green and terracotta tile. 
With the ⓡ amazing life (ss) stamp the sentiment in blueberry bushel and use a terracotta tile marker to fill in the word Cake.
Emboss this layer with the brick & mortar folder and adhere to the card base.
Now with the small piece of whisper white (cake & stand) stamp the cake in terracotta tile and the stand in blueberry bushel, use a granny apple green marker to fill in the cream layers on the cake and the top, bottom and middle of the stand. then with a blender pen and balmy blue (slightly watered down) fill in the rest of the stand.
Punch these out using the cake builder punch and attach to the card using dimensional pads.

Hope you liked todays card!

Comments are welcome X

Back with more cards soon
Annette X


Delicate Whispers and more

Welcome to my blog and    t hank you for joining me today! Happy Anniversary to Sylvia & Bill Intermediate level - blending with a brush...