Thursday, April 30, 2020

A Wish for Everything meets Sailing Home

Hello and welcome to my haven in a hectic world, thanks for dropping by.

I'm back again! there were two birthdays for me today and I felt both cards needed to be shown.

Happy Birthday Nigel!
The second photo is a close up of the card insert.
Measurements are all centimetres.

Card Stock: Night of Navy 21 x 14.5 scored at 10.5 (card base) 7 x 13 (stitched nested label), 1 x 5 (happy & birthday sentiment), Whisper White 20 x 14 scored at 10 & 15 (insert), 7 x 7 (die cutting), Champagne Foil 4.5 x 4.5 (helm).
DSP: 7 x 13 (stitched nested label).

(cs) = card stock, (dsp) = designer series paper, (ef) = embossing folder, (ep) = embossing powder, (ss) = stamp set, when using layered dies (1) is the smallest.
  • Using the stitched nested labels dies and the night of navy stitched nested label (cs) die cut a (8).
  • Using the stitched nested labels dies and the come sail away (dsp) die cut a (8).
  • Now adhere these two labels together using liquid glue, (make sure they both have the right side facing out).
  • Using the  night of navy happy & birthday sentiments (cs)  stamp the happy & birthday from the a wish for everything (ss) using versamark and whisper white craft ink and then heat emboss using white (ep). Now trim these two sentiments down to have very narrow borders.
  • Using the sailing home (ss) and the whisper white die cutting (cs) stamp the larger boat in night of navy ink leaving room on the (cs) to die cut the stitched label from the all dressed up dies.
  • Using stampin' blends colour in the boat in light cherry cobbler, light crumb cake and light balmy blue.
  • Die cut stitched label from the all dressed up dies, the boat from the smooth sailing dies and the helm using the champagne foil (cs) and the smooth sailing dies.
  • Stamp the stitched label using the water stamp from the lilypad lake (ss) in night of navy.
  • With the night of navy card base (cs) die cut an opening in the middle using the (6) die from the stitched nested labels dies.
  • Once die cut, emboss the front of the card using the high seas 3D (ef).
  •  Now with the whisper white insert (cs) and working on the left panel, stamp the light house in gray granite along with the birds and sentiment in night of navy. (I used a night of navy wash for the sea at the bottom of the lighthouse).
  • Attach the helm using dimension pads.
  • Adhere the right side of nested stitched label to the 3rd panel of the insert making sure the points of the label are on the folded crease using liquid glue.
  • Adhere the boat to the small stitched label using liquid glue.
  • Now adhere the label at each side across the front of card using liquid glue.
  • On the front of the card adhere 3 (r) white perfect accents down the left side.
  • Position the happy & birthday sentiments so they are hidden behind the boat when the card is closed and attach using dimensional pads.
Will be back again soon with more cards. Enjoy the rest of your day!
Annette X

Beautiful Bouquet meets Thoughtful Blooms

Hello, and welcome to my haven in a hectic world.

The one stamp set was a sale-a-bration item and is no longer available but it would be easy enough to do the card with a similar type of stamp set.
I loved making this card and it was so easy to do.

Card Stock: Silver Foil 2.5 x 4 (butteflies), Smoky Slate 9.5 x 13.5 (1st layer), Whisper White 21 x 14.5 scored at 10.5 (card base), 9 x 13 (2nd layer), 5 x 3.5 (sentiment), 3 x 9 (flowers).

All measurements are in centimetres.
(cs) = card stock, (ef) = embossing folder, (ss) = stamp set, when using layering dies (1) is the smallest.
  • Using the thoughtful blooms (ss) stamp the leaves and small flowers on the whisper white (cs) layer in smoky slate and grapefruit grove.
  • Stamp the 3 larger flowers, again in grapefruit grove using the (flowers) whisper white (cs).
  • Punch these out using the small bloom punch.
  • With the (sentiment) whisper white (cs)  stamp the happy birthday from the beautiful bouquet (ss) in grapefruit grove.
  • Emboss the smoky slate (cs) layer using the subtles (ef).
  • Emboss the whisper white (cs) layer using the bricks n mortar (ef).
  • Die cut the happy birthday using the stitched so sweetly dies and the (2) rectangle, at the same time you can die cut one of the butterflies from the natures thoughts dies.
  • Die cut the 2nd butterfly.
  • Adhere the first layer to the base card using liquid glue.
  • Wrap some grapefruit grove grosgrain ribbon around the bottom of the second layer and adhere to the back (I use sellotape for this).
  • Make a faux bow and add this on the righthand side using a glue dot.
  • Adhere the butterflies and the punched blossoms to card using liquid glue.
  • Attach the sentiment using dimensional pads.
  • To  finish off I added faceted gems to each of the blossoms.
Will be back again soon with more cards, thanks for dropping by and have a great day.
Annette X

Tuesday, April 28, 2020

Enjoy Life meets Label Me Bold

Hello and welcome to my haven in a hectic world, hope you're having a great day!

Happy Birthday Ste!

I'm so pleased for him, as he's just started cycling again after breaking a hip back in January! Only shorter and slower rides just now but I'm sure he'll get back to his normal cycling soon.

For this card I've adapted a card layout from one of the blogs I follow, with a card I liked on Pinterest, thus making it my own creation.
All measurements are in centimetres.

Card Stock: Balmy Blue 9 x 9 (scallop circle), 1 x 4.5 (sentiment), Smoky Slate 12.5 x 12.5 (1st layer),  Whisper White 26 x 13 scored at 13 (card base), 8 x 8 (stitched circle) , when using layering dies (1) is the smallest.
DSP: Large piece 5 x 11.5, smaller piece 3 x 8

(cs) = card stock, (ef) = embossing folder, (ep) embossing powder, (ss) = stamp set, when using layered dies (1) is the smallest.

  • Dry emboss the smoky slate 1st layer (cs) using the hammered metal (ef).
  • Adhere a piece of the (r) black cord across the 1st layer just below the middle, I used narrow tear & tape for this, then adhere this layer to the card base using liquid glue.
  • Stamp the whisper white stitched circle (cs) using the enjoy life (ss), garden green for the grass,  versaMark & memento black for the biker, heat embossed with black (ep), memento black for the sentiment, then finally use the above the clouds (ss) and memento black for the birds. 
  • blend some colour lightly onto the white background using balmy blue and either a sponge or blending brush.
  • Now for the die cutting, this can all be completed in one crank through your machine laying out all the pieces on your cutting plate.
    • for the biker use the stitched shapes dies, circle (4).
    • for the scalloped circle use the layering circles dies, scallop (8).
    • for the Son I used (r) neutrals (dsp) and the hand lettered prose dies.
  • Stamp the happy birthday from the label me bold (ss) in garden green onto the smaller piece of balmy blue (cs). Once stamped trim down if required.
  • Adhere the larger piece of lily impressions (dsp) directly below the black cord using liquid glue.
  • Adhere the biker to the scalloped circle using liquid glue.
  • Attach the scalloped circle to the base card using dimensional pads.
  • Cut a 5cm piece of the scalloped linen ribbon and use a balmy blue stampin' blend to change the colour.
  • Adhere the happy birthday sentiment to the ribbon using narrow tear & tape, then attach to the card base using a combination of one dimension pad on the right side and a glue dot on the left side.
  • Adhere the Son letters at the top of the card using liquid glue.
  • Finally add 3 (r) black rhinestones below the happy birthday sentiment. Remember Stampin' Blends can be used to change basic rhinestones to any colour you want.
Will be back again soon with more cards, and thanks for joining me today.
Annette X

Sunday, April 26, 2020

Weather Together meets Varied Vases

Well hello again, and welcome to my haven in a hectic world, thanks for popping by, this is my second video for today and I just loved making this card.

It's week 6 for Sue, she brings our Sunday dinner every week while we're on lockdown, so I pop her payment into a card.
Measurements are in centimetres.

Card Stock: Balmy Blue 2.5 x 6 (2 flowers), Thick Whisper White 14.8 x 21 scored at 10.5 (card base), 2 x 7.5 (handle), 6.5 x 4 (umbrella), 2.5 x 14 (5 flowers)
.7 x 6 (leaves).
My card base is (nsu).
DSP: 10 x 14 (1st layer), 10 x 1.5 (bottom stripe)
(cs) = card stock, (dsp) = designer series paper, (ef) = embossing folder, (nsu) = non stampin' up, (r) = retired.
  • Stamp the sentiment from the (r) varied vases (ss) in night of navy ink toward the top right corner of the (r) tranquil tide (dsp) 1st layer 
  • Emboss the (r) tranquil tide (dsp) 1st layer using the coastal weave (ef).
  • Round off the 2 corners on the right of the 1st layer tranquil tide (dsp) using the detailed trio punch.
  • Adhere the stripe of (r) tranquil tide (dsp) across the bottom of the 1st layer using liquid glue.
  • Adhere the 1st layer ( r) tranquil tide (dsp) to the whisper white card base using liquid glue.
  • Using the (r) weather together (ss) and whisper white (cs) stamp the umbrella in night of navy ink, and the handle in mint macaron ink, die cut these 2 pieces using the (r) umbrella weather dies.
  • cut the top part off the handle and adhere to the top of the umbrella using liquid glue, now do the same with the bottom part of the handle.
  • Stamp the flowers from the (r) sweetly swirled (ss) using rich razzleberry and rococo rose ink, stamping off for 2 of the rich razzleberry flowers.
  • Punch out the flowers using the (r) bitty blooms punch (it's only the centres of the flowers you want).
  • Then using the balmy blue (cs) punch a couple more flowers.
  • Punch out at least 5 of the leaf shape from the bitty blooms punches. 
  • Adhere these flowers and leaves across the bottom of the umbrella using liquid glue.
  • Attach the finished umbrella to the card base using dimensional pads.
  • Add a small basic rhinestone to each of the flowers and (r) fancy frost sequins around the umbrella.
Will be back again soon with more cards, thanks for popping by.
Annette X

Well said meets Butterfly Gala

Hello and welcome to my haven in a hectic world.

Happy 70th Ita!

Today's my daughter-in-laws' Mums birthday and we should all have gone out for a meal last night, but due to the corona virus it didn't happen.
All measurements are in centimetres.
(cs) = card stock, (dsp) = designer series paper, (nsu) = non stampin' up, (r) = retired,

Purple Posy 21 x 14.5 scored at 10.5 (card base), 5 x 1.5 (birthday) 3 x 6 (happy), 2 x 7 (numbers), Gorgeous Grape 6.5 x 6.5 (starburst), Whisper White small scrap (butterfly).
Vellum 10 x 14.
  • Adhere the (r) botanical gardens (dsp) to the card base using liquid glue where you want the circle to be.
  • Die cut the happy from the well written dies and the (nsu) numbers. 
  • Stamp the birthday from the well said (ss) in gorgeous grape then trim down to a close fit with a tail on the right.
  • Stamp a small butterfly from the butterfly gala (ss) in purple posy onto the whisper white (cs), then use the butterfly duet punch to punch it out.
  • Add some wink of stella to the butterfly.
  • Punch the circle using the starburst punch, add some dimensional pads to the back, then wrap some silver thread at the back securing it to the pads. Attach to the card base.
  • Adhere the happy to the card base using liquid glue.
  • Position the numbers in the circle and adhere using liquid glue.
  • Using stampin' blends dark highland heather colour 2 small basic pearls and 1 medium. Attach these to the butterfly and birthday sentiment.
  • Adhere the butterfly to the circle using liquid glue
  • Attach the birthday sentiment using a combination of 1 dimensional pad on the right and liquid glue on the left. (balance's the layers out).
  • Dye some of the crinkled seam binding ribbon using the dark purple posy stampin' blend.
  • Make a bow and adhere to the card base using glue dots.
Will be back soon with more cards and thanks for popping by.
Annette X

Wednesday, April 22, 2020

New Wonder meets Dandelion Wishes and more!

Hi and welcome to my haven in a hectic world, thanks for popping by.

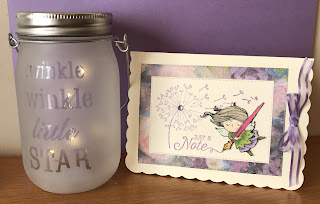
It's now week 5 of the lockdown and this is Sue's card for this week. I cased this card from one I saw on facebook and just added the ribbon on the right.
Measurements are in centimetres.

Card Stock: Very Vanilla 14.8 x 21 scored at 10.5 (card base), 10.5 x 7 (2nd layer) 5 x 6 (fairy).
DSP: 11.5 x 9 (1st layer).
 (cs) = card stock, (dsp) = designer series paper,  (ss) = stamp set), (nsu) = non stampin' up, (r) = retired, when using layering dies (1) is the smallest.
  • Die cut the very vanilla 1st layer (cs) with the Stitched rectangles dies - wide (5) rectangle.
  • Stamp the dandelion from the dandelion wishes (ss) and the just a note from the flourishing phrases (ss) on the left hand side using highland heather ink.  
  • Die cut the perennial essence 1st layer (dsp) with the Stitched rectangles dies - wide (7) rectangle.
  • Adhere the (dsp) rectangle to the very vanilla card base (cs) (mine is a (nsu) base) using liquid glue, leaving more room on the right than the left.
  • Now adhere the very vanilla rectangle using liquid glue.
  • Colour a basic rhinestone using the dark highland heather stampin' blends then adhere to the centre of the flower.
  • With the very vanilla fairy (cs), stamp the fairy from the new wonders (ss) in memento black ink.
  • Using crumb cake, granny apple green, highland heather, lovely lipstick, mango melody, old olive, petal pink and pool party stampin' blends colour in the fairy.
    • hair crumb cake light and dark
    • face & hand light petal pink
    • wings light pool party
    • top granny apple green light and dark
    • skirt highland heather light and dark
    • feet old olive
    • Nib mango melody light and dark
    • pen lovely lipstick light and dark
  • Fussy cut the fairy and add wink of stella to the wings.
  • Attach to the card base using dimensional pads.
  • Make a bow with long tails using (r) organdy combo ribbon and attach using glue dots.
Will be back again soon with more cards, until then keep well and safe.
Annette X

Tuesday, April 21, 2020

Lovely Lily Pad meets New Wonders

Hi, welcome to my haven in a hectic world, thanks for joining me today.

Happy Birthday Peg!

I'm always nervous doing Peg's card as she's my Stampin' Up upline and of course I want to impress. Hope she likes it.
All measurements are in centimetres.

(cs) = card stock, (ef) = embossing folder, (ss) = stamp set,

Petal Pink 21 x 14.5 scored at 10.5 (card base), 15 x 5 (wavy lines), 7.5 x 8 (swirls), Whisper White 14 x 10 (1st layer), 6 x6 (flower), 5 x 5 (circle).
  • Using the swirly scribbles dies and the petal pink (cs) die cut the waves and swirls.
  • With the 6 x 6 whisper white (cs) stamp the outline flower from the lovely lily pads (ss) using memento black ink, then flip the stamp on the block so the flat side up and stamp again using petal pink ink. As you can see it doesn't fit the outline stamp perfectly, but that's how its supposed to be.
  • With the smallest piece of whisper white (cs) stamp the happy birthday from the new wonders (ss) in petal pink ink.
  • Now die cut the flower using the lily pad dies, and the happy birthday using the stitched labels dies.
  • Lightly sponge down the left hand side of the 1st layer whisper white (cs) using petal pink ink. If I was doing this card again I'd take the sponging right to the edge.
  • Emboss this layer using the stone 3D (ef).
  • Adhere the waves to the 1st layer using liquid glue.
  • Wrap a piece of the petal pink metallic edged ribbon across the 1st layer at the bottom adhering to the back using glue dots, then tie a faux bow at the front.
  • Attach this layer to card base using dimensional pads.
  • Place the swirls where you want it to be and adhere down, again using liquid glue.
  • Attach the happy birthday sentiment using dimensional pads along with the lily.
  • Add some champagne rhinestones. 
Will be back again soon with more cards, enjoy the rest of your day!
Annette X

Wednesday, April 15, 2020

A Little Lace meets Daisy Lane

Hello and welcome to my haven in a hectic world,

We're now on week 4 of the lock down and here's my card for our lovely Sue!
All measurements are in centimetres.

Card Stock: Pear Pizzazz 21 x 14.5 scored at 10.5 (card base), 18 x 5 (leaves x2), Sahara Sand 10 x 14 (1st layer), Whisper White 9.5 x 4.5 (4 daisies), 1 x 10 (sentiment).

(cs) = card stock, (ef) = embossing folder,  (r) = retired,  (ss) = stamp set.
  • Emboss the sahara sand 1st layer (cs) using the scripty (ef).
  • Cut a 13cm piece of textured weave ribbon and wrap it around the bottom of the 1st layer attaching at the back with glue dots or tape.
  • Adhere the 1st layer to the pear pizzazz card base using dimensional pads.
  • Stamp 2 daisies from the daisy lane (ss) on the Whisper white daisies (cs) in smoky slate ink.
  • Punch out the 2 stamped daisies plus 2 plain ones (4 in all) using the medium daisy punch.
  • Coat the stamped daisies with wink of stella.
  • Die cut 2 of the leaves from the poppy moments dies using the pear pizzazz leaves (cs).
  • Adhere the leaves in only 2 or 3 places to the 1st layer, tucking it slightly behind the ribbon using liquid glue.
  •  Adhere each of the stamped daisies to the plain daisies using liquid glue.
  • Gently curl the petals and add a dimensional pad to the back of each daisy, and attach to the top of each of the leaves.
  • Add a (r) iced rhinestone to the centre of each of the flowers.
  • Using a fine tip glue pen adhere a few sequins (mine are (r) silver ones).
  • With the whisper white sentiment (cs) stamp the sentiment from the a little lace (ss).
  • Die cut the sentiment using the strap die from the all dressed up dies. Once die cut, trim down the right side, cutting at an angle leaving enough room to adhere a basic rhinestone.
  • Attach the sentiment to the ribbon using dimensional pads.
Hope you liked today's card!!

Will be back again soon with more cards, until then keep safe and well!
Annette X

Tuesday, April 14, 2020

Cross of Hope meets Brick & Mortar 3D

Hi folks, welcome to my haven in a hectic world!

Happy Easter Sheilah!

I normally only do one Easter card each year for my Aunt, but from this year there will be two.
Liked the look of this card even though I dropped a booboo!

All measurements are in centimetres.

(cs) = card stock, (ef) = embossing folder, (ep) embossing powder, (r) = retired, (ss) stamp set

Grapefruit Grove 2 pieces,  9.5 x 13. 5 (1st layer), 5.5 x 7.5 (cross),
Gold foil 2 pieces, 5.5 x 2 (sentiment backing), 5.5 x 7.5 (cross),
Whisper White 4 pieces, 13.8 x 21 scored at 10.5 (card base), 9 x 12.5 (2nd layer), pieces, 5.5 x 2 (sentiment). 5.5 x 16 (2 foliage)
When using layering dies (1) is the smallest.
Colours are Grapefruit Grove, Gold, Pear Pizzazz.
  • With the stitched rectangles dies, die cut the grapefruit grove (cs) using the (8) wide frame, and the whisper white (cs) using the (7) wide frame.
  • Adhere the grapefruit grove rectangle to the base card using liquid glue.
  • Next, emboss the whisper white rectangle using the brick& mortar (ef), (this is what I forgot to do, hence my frosted flower was squashed). Now attach this rectangle to the card base using dimensional pads.
  • With the larger strip of whisper white (cs) stamp the foliage from the hold on to hope (ss) twice and die cut both of these using the cross of hope dies.
  • On the small piece of whisper white (cs) stamp the happy easter from the (r) delightful dozen (ss) using versaMark, then heat emboss using gold (ep).
  • Using the washi label punch, punch out the sentiment, then punch out a second one using the gold foil. Cut this one in half and adhere behind the sentiment leaving a slight edge on either side using liquid glue.
  • Using the cross of hope dies, die cut the 2 crosses, lattice cross in gold foil and grapefruit grove cross solid.
  • Adhere the gold cross to the solid cross using liquid glue.
  • Wrap a piece of the (r) organza ribbon around the cross using a glue dot at the front to adhere it and also at the back on either side to hold the ribbon in place.
  • Add one of the frosted flower embellishments over the ribbon to finish off the front of the cross.
  • Adhere the very top and the very bottom of the foliage behind each side of the cross to make a wreath.
  • Attach to the card base, along with the sentiment using dimensional pads.
  • I felt it needed a little something extra after completing it and writing the blog, so added some random (r) gold sequins.
Will be back again soon with more cards.
Annette X

Monday, April 13, 2020

Welcome Easter meets Whacky Wishes

Hello and welcome to my haven in a hectic world.

Happy Easter to all!

This is a card I made for my Son, Daughter in law and Grandson, who live in Plymouth, I send our Grandson money instead of an Easter Egg (I feel chocolate eggs might not travel well).

I found this card on Pinterest made by Angie at chicknscratch, I adapted it slightly as I only have the German version of the Welcome Easter stamp set and wanted the words in English. Plus I've done it using centimetres instead of inches.

There are two pictures as I printed a greeting and added an embellishment on the inside, which I don't usually do.

Card Stock: Old Olive 4.5 x 4.5 (leaf), So saffron 10.5 x 14.5 (card base), 17 x 14 (1st layer) 6 x 6 (scalloped square), Whisper White 12 x 8 (overlay), 6 x 6 (chick), 2.5 x 9.5 (large sentiment), 3 x 3 (flower), 3 x 8 (small sentiment).
DSP: 7.5 x 10.5.

All measurements are in centimetres.
(cs) = card stock, (ef) = embossing folder, (ss) = stamp set, (r) = retired, when using layering dies  (1) is the smallest.
  • Start with the so saffron (cs) 1st layer and the 17cm across the top of the scoreboard, score down at 7cm and burnish.
  • Now with the whisper white (cs) overlay and the 12cm across the top of the scoreboard, score down at 1cm and burnish.
  • Stamp the chick from the welcome easter (ss) in memento black ink onto the whisper white (cs) square.
  • Colour in the chick using so saffron and pumpkin pie stampin' blends.
  • Stamp the happy easter sentiment on the whisper white (cs) larger sentiment in memento black ink from the welcome easter (ss) (I used the (r) wacky wishes (ss)).
  • Now stamp the second greeting for  the inside of the card on the whisper white (cs) small sentiment using the A wish for everything (ss).
  • All the following pieces can be die cut with one pass through the cutting machine of your choice.
    • Chick, stitched shapes dies, square (3)
    • Happy Easter, (r) cards & labels dies
    • the 2nd sentiment, stitched rectangles dies narrow (2)
    • Scallop square (cs) layering squares, scalloped square (7)
  • Stamp the flower from the thoughtful blooms (ss) and punch out using the small bloom punch
  • Punch the leaves using the old olive (cs) and the leaf punch.
  • Emboss the lefthand side of the 1st layer using the parisian flourish (ef).
  • Emboss the chick using the subtle (ef).
  • Adhere the best dressed (dsp) to the front of the whisper white layover (cs).
  • Adhere the layover to the back of 1st layer using liquid glue.
  • Adhere the 1st layer to the card base using liquid glue.
  • Adhere the chick to the scalloped square using liquid glue.
  • Attach the scalloped square to the layover using dimensional pads.
  • Attach the happy easter to the layover using dimensional pads.
  • Adhere the smaller sentiment to the inside of the card using liquid glue.
  • Add a (r) gingham gala sequin to the inside sentiment.
  • Colour a basic rhinestone with a daffodil delight stampin' blend then place in the centre of the sequin.
  • Adhere the flower to the leaves using liquid glue.
  • Attach the leaves and flower to the top sentiment using a glue dot.
  • Again colour a basic rhinestone with the daffodil delight stampin' blend and place in the centre of the flower.
Will be back again soon with more cards, thanks for stopping by.
Annette X

Sunday, April 12, 2020

Above the Clouds meets Waterfront

Hello and welcome to my haven in a hectic world, hope you're having a great day!

Happy Birthday Duncan!

I have a few of the "waterfront" type stamp sets now and feel I'm starting to get better with them.
I really enjoyed making this one.

All measurements are in centimetres.

(cs) = cardstock, (ep) = embossing powder, (ss) = stamp set.

Terracotta Tile 21 x 14.5 scored at 10.5 (card base), Seaside Spray 9.7 x 13.7 (1st layer), sWhisper White 13.3 x 9.3 (2nd layer), 7 x 4.5 Balloon.
  • Stamp the sentiment from the itty bitty greetings (ss) in memento black ink onto the seaside spray 1st layer and punch out using the classic label punch (this is called gutting, the hole that is left doesn't get seen).
  • Adhere the 1st layer to the card base using liquid glue.
  • Prime the top half of the whisper white 2nd layer with your embossing buddy and then stamp the clouds from the above the clouds (ss) in versaMark and heat emboss using clear (ep).
  • Stamp your scene making sure there's a top, middle and bottom area, using the waterfront (ss) and appropriate colours. I used balmy blue and pool party for the sky (sponge method), gray granite for the mountains, seaside spray for the water, mossy meadow for grass, shaded spruce & early espresso for the trees, then more sponging at the bottom using sahara sand and terracotta tile (very lightly). The birds are stamped in memento black.
  • With the small piece of whisper white (cs) stamp the full balloon in terracotta tile and then over stamp with one of the outline balloons in memento black and punch out using the hot air balloon punch. Stamp the outline of the basket in memento black and punch out too.
  • Colour the basket using a bronze stampin' blend.
  • Adhere the second layer to the card base using liquid glue.
  • Attach the balloon using dimensional pads.
  • Cut the sentiment straight on the left and diagonal on the right, then attach to the card base using dimensional pads.
Will be back again soon with more cards. Thanks for stopping by.
Annette X

Saturday, April 11, 2020

Artisan Texture and more!

Hello and welcome to my haven in a hectic world.

Happy Birthday Thomas from Grandad J!

This is my second card for today.
When I went to post Tom's card while out on my daily walk last Tuesday (postie is slower to deliver just now due to Corona, they can't work faster than they already do) I realised that there wasn't a card from his Grandad (88 & housebound just now), so I rushed home with an idea in my head, but once I started, something totally different came out, hope you like it!
All measurements are in centimetres.

Card Stock: Blueberry Bushel 21 x 14.5 scored at 10.5 (card base), 8.5 x 3 (birthday), Grapefruit Grove 4 x 1(wishing you a), Pineapple Punch 2 x 1 (happy), Whisper White 10 x 14 (1st layer), 3 x 1 (from me).

(cs) = card stock, (ef) = embossing folder, (ep) = embossing powder.

  • Using the whisper white 1st layer (cs) stamp the images from the artisan textures (ss) using all of the (18/20) in colours.
  • Emboss this layer using the coastal weave 3D (ef) then adhere to the blueberry bushel card base  using liquid glue.
  • Die cut the birthday sentiment from the well written dies using the blueberry bushel (cs), and adhere across the card using liquid glue.
  • Using the a wish for everything (ss) and whisper white craft ink stamp the 'wishing you a' on the grapefruit grove (cs) and the 'happy' on the pineapple punch (cs). Now heat emboss using white (ep).
  • Stamp 'from me' from the label me bold (ss) in call me cover ink then heat emboss using clear (ep).
  • Trim down the sentiments and attach to the 1st layer using dimensional pads.
  • Colour some basic rhinestones using blueberry bushel, call me clover, calypso coral and pineapple punch stampin' blends, and adhere to the card.
Will be back again soon with more cards and thanks for dropping by.
Have a nice day
Annette X

Stitched Nested Labels meets Stitched Stars & Piece of Cake

Hello and welcome to my haven in a hectic world!

I made this card quite some time ago, in fact it was last years but I lost it, just hope he likes it as much as the money inside!

Happy Birthday Tom x

The instructions for this wallet came from Terri Pocock, a fellow demonstrator with Stampin' Up!
Measurements are in centimetres, (cs) = card stock, (dsp) = designer series paper, (r) = retired, (ss) = stamp set, when using nesting dies (1) = the smallest.

Colours are: basic black 10.5 x 5 (stars), (r) summer starfruit 6 pieces 21 x 14.8 (wallet base), 14.5 x 8.5 (front layer), 14.5 x 2.8 (pocket layer), 21 x3.8 (belly band), 13 x 7 (larger label), 10.5 x 5 (stars), whisper white 11.5 x 6.5 (smaller label).

(r) sweet sorbet (dsp) 3 pieces 14.1 x 8.1 (front layer), 14.1 x 2.4 (pocket layer), 21 x 3.4 (belly band)
  • With the long edge across the top of your score board score at 3.3 & 12.3.
  • Using liquid glue along the shorter score line, adhere each side of the pocket down.
  • Round the bottom corners of both the (cs) and (dsp) for the front of the wallet using the detailed trio punch.
  • Adhere the 2 pocket layers together and then adhere to the pocket using liquid glue.
  • Adhere the 2 front layers together and then adhere to the front of the wallet using liquid glue.
  • Die cut the 2 labels using the stitched nested labels dies (7 & 8).
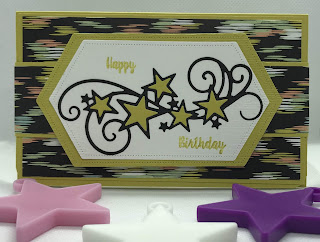
  • Die cut the swirls and stars twice, once in basic black and once in summer starfruit using the stitched stars dies.
  • Adhere the black swirls across the whisper white label using liquid glue.
  • Then stamp the happy birthday from the piece of cake (ss) above and below the swirls.
  • Emboss both labels using the subtle folder and adhere together using liquid glue.
  • Now insert the summer starfruit stars inside the empty stars, using liquid glue.
  • Adhere the belly band layers together using liquid glue.
  • Wrap the belly band around the wallet and attach to either side of the labels using tear and tape.
Thanks for dropping by.

Will be back again soon with more cards, thanks for dropping by
Annette X

Friday, April 10, 2020

Peaceful Moments meets Inspiring Iris

Hello and welcome to my haven in a hectic world, it's nice of you to drop by!

There will be a card every week from now until the lockdown is over, as my way of appreciating the lovely lady who sends out our Sunday dinner each week.

Sue's 3rd  card
All measurements are in centimetres.

Card Stock: Terracotta Tile 5 x 7 (scalloped oval), Whisper White 21 x 14.8 scored at 10.5 (card base), 7 x 10 (scalloped rectangle), 4 x 6 (plain oval)
DSP: 10.5 x 5

(cs) = card stock, (r) = retired, (ss) = stamp set, when using layering dies (1) is the smallest.
  • Start by lightly sponging the whisper white (cs) card base with terracotta tile ink. 
  • Adhere the 2019/21 in color (dsp) across the middle of the card base using liquid glue.
  • Stamp the thank you from the peaceful moments (ss) in early espresso ink on the whisper white plain oval (cs).
  • Now carry out the die cutting placing all pieces on the plate at once.
    • Scalloped oval (3) from the layering ovals dies
    • Plain oval (2) form the layering ovals dies
    • Scalloped rectangle (5) from the stitched so sweetly dies.
  • Using the inspiring iris (ss) stamp the flowers using pear pizzazz and terracotta tile ink and using 2nd, 3rd and 4th generation stamping. (I found 1st generation stamping was too dark for me).
  • Stamp the "so much" using the, a big thank you (ss) in early espresso ink.
  • Lightly sponge the bottom part of flowers in pear pizzazz ink and the top part in balmy blue ink.
  • Attach this piece to the card base using dimensional pads.
  • Adhere the thank you oval to the scalloped oval using liquid glue, then attach to the card base using dimensional pads.
  • Using some ribbon (I used (r) dotted lace trim) make a bow and adhere to the bottom of the flowers.
Will be back again soon with more cards, thanks for stopping by.
Annette X

Thoughtful Expressions meets Cheerful Daisies & more

  Welcome to my blog and    t hank you for joining me today! Happy Birthday Jim mixture of old and new - colour with blends, die cutting, la...