Showing posts with label sailing home. Show all posts

Wednesday, February 22, 2023

Ocean Front meets an oldie Sailing Home

  Welcome to my blog

and  thank you for joining me today!

Happy Birthday Dave


Still find cards for men cause me stress, I wanted a watery theme then remembered about the small sailing boat from an old stamp set and I was on my way. There's some stamping off and spritzing going on for the sky and water. When complete I was happy with the result.

Materials required for this card are:

Card Stock: balmy blue, night of navy, shimmery white
Dies: deckled rectangles (6,7), *smooth sailing
Ink: balmy blue, basic gray, pear pizzazz, sahara sand, *seaside spray
Stamp Sets: oceanfront, paradise palms, *sailing home
Accessories: milky dots, *playing with patterns ribbon, spritzers, water painters
 * = no longer available, when using layering dies (1) is the smallest
  1. card base is 14.8 x 21 scored at 10.5
  2. die cut 2 rectangles 
  3. stamp the background for the boat  (for the sky and water, stamp off once, then spritz with water before stamping) for the sand stamp off but don't spritz. For the birds, sentiment, sand texture and fauna stamp full strength.
  4. stamp the boat on a piece of shimmery white in night of navy,  add colour to the sails using a fine water painter.
  5. die cut the boat.
  6. adhere a strip of the ribbon across the bottom of the base card (l used tear & tape) then position the dots
  7. adhere the rectangles to the card base using wet glue.
  8. adhere the boat using dimensionals.
Hope you liked today's card. If you would like more information on how to make it, please don't hesitate to contact me, I'd love to hear from you.

If you wish to buy any of the items used, go to contacting me at the top of the page for details on how to order.

Will be back again soon with more cards, in the meantime take care and have a great day.
Annette ๐Ÿ˜˜

Wednesday, November 3, 2021

Sailing Home meets lots of Dies

 Thank you for joining me today!

A bit of a blast from  the past for Paul this week


A mixture of old and current products for this card! A 
little bit of a mistake with the embossing but just went with it. I swiped the embossing folder with some night of navy ink before putting it through the stampin' cut & emboss machine, but realised it  would have been better to swipe the other side. Will try to remember this for next time.

Materials required for this card are:

Card Stock: balmy blue, basic white, night of navy
Designer Series Paper: *come sale away
Dies: ornate frames, smooth sailing, stitched rectangles (5) wide
Embossing Folders: *old world paper 3D (one from my forever box)
Ink: night of navy, smoky slate
Ribbon: *boho frayed grosgain
Stampin' Blends: balmy blue, crumb cake, smoky slate
Stampin' Markers: smoky slate
Stamp Sets: sailing home
* = no longer available, when using layering dies (1) is the smallest

Hope you liked today's card. If you would like more information on how to make it, please don't hesitate to contact me, I'd love to hear from you.

If you wish to buy any of the items used, go to contacting me at the top of the page for details on how to order.

Will be back again soon with more cards, in the meantime take care and have a great day.
Annette ๐Ÿ˜˜

Friday, April 30, 2021

Sailing Home meets Posted For YouI

 Thank you for joining me today!

Still trying to use up some of my old designer series paper.
Happy Birthday Nigel


I tend to hoard my DSP even though I know I shouldn't. 
It's coming into spring now but I'm still cold a lot of the time so thought I'd do a nice summery themed card to see if it warmed me up! No luck there.

Materials required for this card are:

Card Stock: basic white, night of navy
Designer Series Paper: *come sail away
Dies: all dressed up, layering circles (s8), stitched shapes (c4)
Embossing Folders: painted texture 3D
Ink: night of navy, real red
Ribbon: boho frayed grosgrain
Stamp Sets:  posted for you, sailing home 
Accessories: blending brushes
* = retired, when using layering dies (1) is the smallest

Hope you liked today's card. If you would like more information on how to make it, please don't hesitate to contact me, I'd love to hear from you.

If you wish to buy any of the items used, go to contacting me at the top of the page for details on how to order.

Will be back again soon with more cards, in the meantime take care and have a great day.
Annette ๐Ÿ˜˜

Wednesday, June 3, 2020

Sailing Home meets High Tide and more

Hello and welcome to my haven in a hectic world, thank you for dropping by.

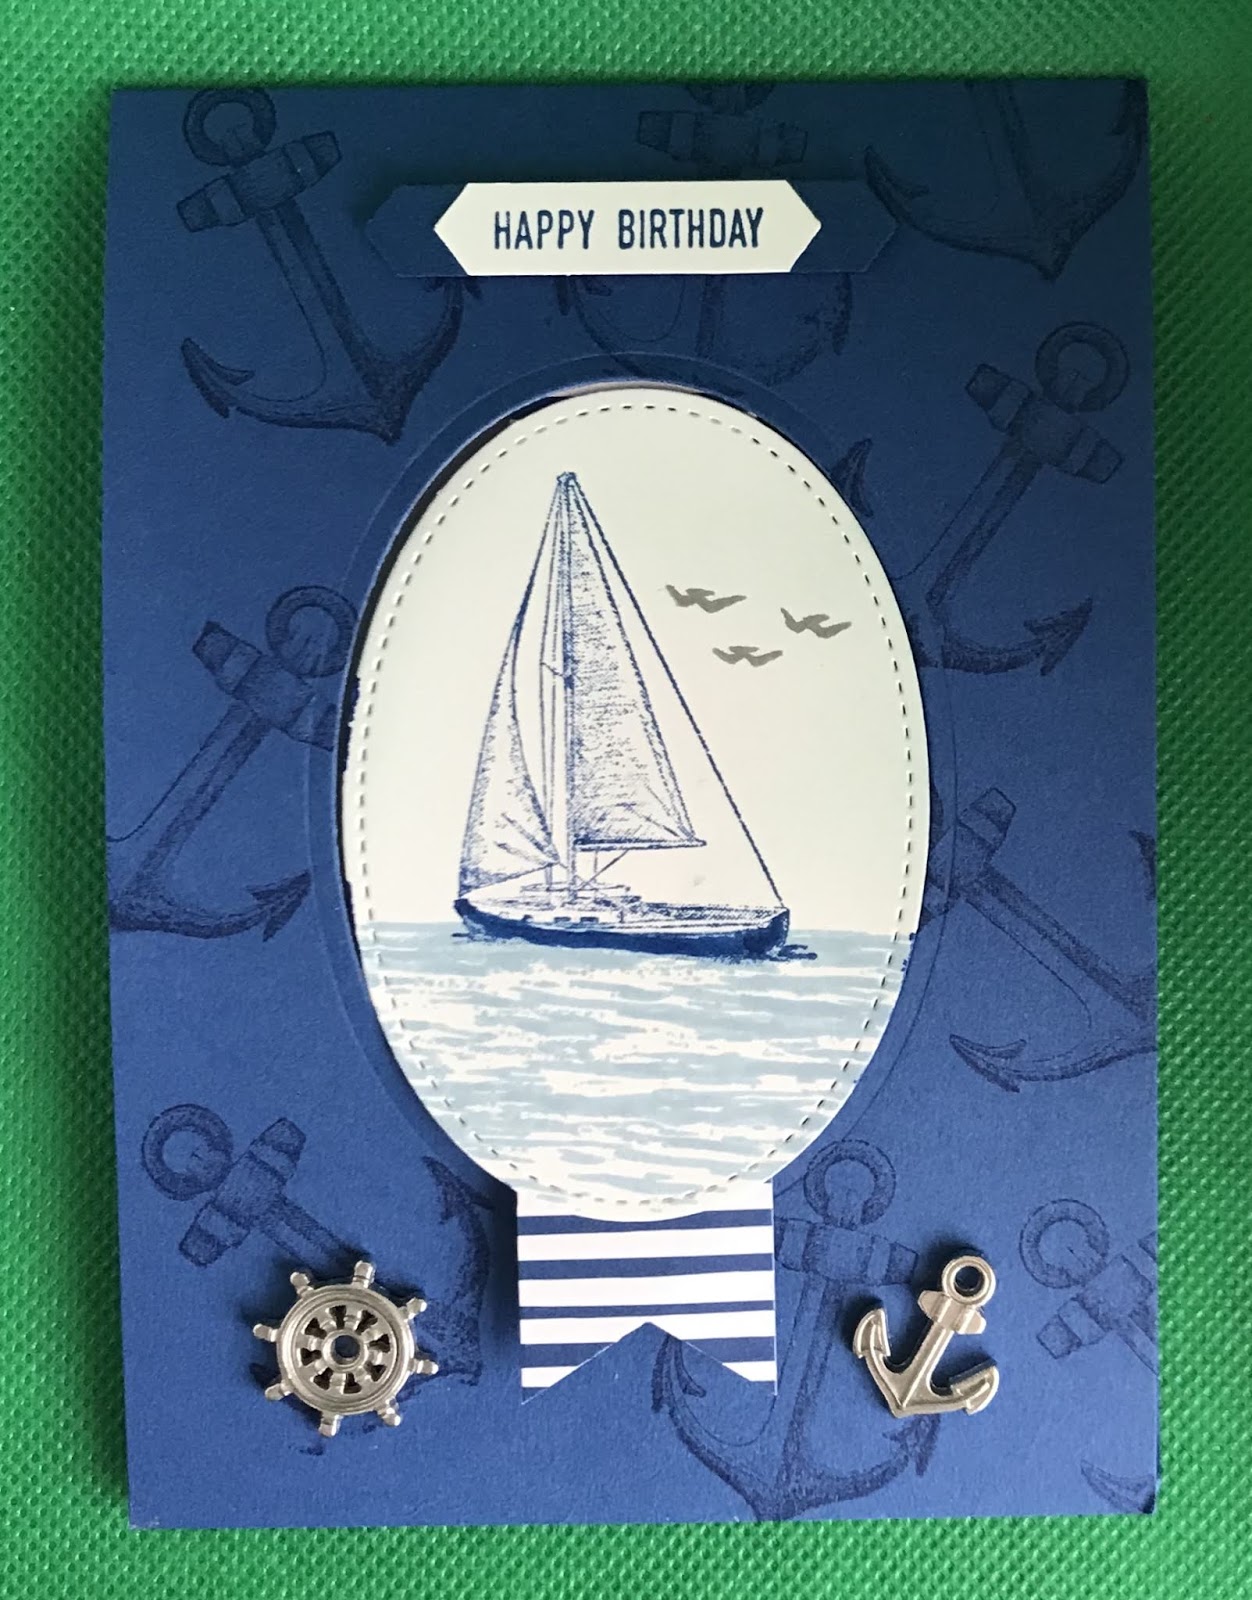
Happy Birthday Mike!

This is my take, on card from Kelly Acheson's blog "a stamp above"  on 5 May 2020, I changed the orientation and turned it into  swing card.
closed
open

Measurements are in centimetres.

(cs) = card stock, (dsp) = designer series paper, (ss) = stamp set, when using layering dies (1) is the smallest.
Colours: Basic Gray, Blueberry Bushel, Pool Party, Seaside Spray.
  • Card base is blueberry bushel (cs) 10.5 x 29.7 scored at 14.8.
  • Die cut the opening for the front using the layering ovals dies  (7), then randomly stamp the anchor from the sailing home (ss) in blueberry bushel.
  • On a piece of whisper white (cs) 7 x 9.5 stamp the scene, water is from the high tide (ss) in seaside spray, boat is from the sailing home (ss) in blueberry bushel and the birds are from the my meadow (ss) in basic gray. Lightly sponge above the water in pool party to form a sky line.
  • Die cut the scene using the stitched shape dies oval (4), now die cut another oval the same size in blueberry bushel.
  • Cut a piece of whisper white (cs) 10 x 14.3 (card insert), do a dry placement, and through the aperture stamp the greeting from the sailing home (ss) using blueberry bushel in the middle.
  • Cut a 2.5 stripe from the 6" x 6"  18/20 in color (dsp) stack, then use the triple banner punch to make the tail at one end and a 1cm score mark at the other.
  • Adhere the dsp to the back of the card insert making sure it's in the middle.  Then using 2 pieces of bakers twine measuring 14cm each create a reef knot and attach both ends to the back of the card insert towards the bottom using sellotape, making sure the knot on the front is roughly in the middle.
  • Attach the card insert to the card base using dimensional pads.
  • Close the card, add some liquid glue down the centre of the dsp showing through the oval aperture then place the scene oval over the top, making sure it's in the right place and adhere down.
  • Open the card and adhere the blueberry bushel oval over the top of the white one.
  • On a scrap piece of whisper white (cs) stamp the happy birthday from the itty bitty greetings (ss) in blueberry bushel and punch out using the classic label punch. I re-inserted the ends to make the label smaller then punched a second label in blueberry bushel and adhered the two together and attached to the front of the card using dimensional pads.
  • Lastly I added a couple of the (r) sail away trinkets.
Will be back again soon with more cards, enjoy the rest of your day.
Annette X

Thursday, April 30, 2020

A Wish for Everything meets Sailing Home

Hello and welcome to my haven in a hectic world, thanks for dropping by.

I'm back again! there were two birthdays for me today and I felt both cards needed to be shown.

Happy Birthday Nigel!
The second photo is a close up of the card insert.
Measurements are all centimetres.

Card Stock: Night of Navy 21 x 14.5 scored at 10.5 (card base) 7 x 13 (stitched nested label), 1 x 5 (happy & birthday sentiment), Whisper White 20 x 14 scored at 10 & 15 (insert), 7 x 7 (die cutting), Champagne Foil 4.5 x 4.5 (helm).
DSP: 7 x 13 (stitched nested label).

(cs) = card stock, (dsp) = designer series paper, (ef) = embossing folder, (ep) = embossing powder, (ss) = stamp set, when using layered dies (1) is the smallest.
  • Using the stitched nested labels dies and the night of navy stitched nested label (cs) die cut a (8).
  • Using the stitched nested labels dies and the come sail away (dsp) die cut a (8).
  • Now adhere these two labels together using liquid glue, (make sure they both have the right side facing out).
  • Using the  night of navy happy & birthday sentiments (cs)  stamp the happy & birthday from the a wish for everything (ss) using versamark and whisper white craft ink and then heat emboss using white (ep). Now trim these two sentiments down to have very narrow borders.
  • Using the sailing home (ss) and the whisper white die cutting (cs) stamp the larger boat in night of navy ink leaving room on the (cs) to die cut the stitched label from the all dressed up dies.
  • Using stampin' blends colour in the boat in light cherry cobbler, light crumb cake and light balmy blue.
  • Die cut stitched label from the all dressed up dies, the boat from the smooth sailing dies and the helm using the champagne foil (cs) and the smooth sailing dies.
  • Stamp the stitched label using the water stamp from the lilypad lake (ss) in night of navy.
  • With the night of navy card base (cs) die cut an opening in the middle using the (6) die from the stitched nested labels dies.
  • Once die cut, emboss the front of the card using the high seas 3D (ef).
  •  Now with the whisper white insert (cs) and working on the left panel, stamp the light house in gray granite along with the birds and sentiment in night of navy. (I used a night of navy wash for the sea at the bottom of the lighthouse).
  • Attach the helm using dimension pads.
  • Adhere the right side of nested stitched label to the 3rd panel of the insert making sure the points of the label are on the folded crease using liquid glue.
  • Adhere the boat to the small stitched label using liquid glue.
  • Now adhere the label at each side across the front of card using liquid glue.
  • On the front of the card adhere 3 (r) white perfect accents down the left side.
  • Position the happy & birthday sentiments so they are hidden behind the boat when the card is closed and attach using dimensional pads.
Will be back again soon with more cards. Enjoy the rest of your day!
Annette X

Tuesday, September 3, 2019

Smooth Sailing meets Itty Bitty Birthdays

Hi folks, thanks for dropping by, hope you like the card.

Happy Birthday Stuart!

You've joined me on a day where I'm using one of my favourite stamp sets. There are quite a few cards being made with this set just now.

I know it's his birthday today and his card says belated birthday, but he won't get his card until the middle of October, as he's away at sea just now. Hope the boys give him a good day!
I've case'd this one from Dena Rekow's web site thecreativitycave.com she does some fantastic video's (thanks Dena).

To recreate this card follow the guide below:
(cs) = Card Stock, (ss) = Stamp Set, DSP = Designer Series Paper,

All measurements are in Centimetres.

Card Stock: Pretty Peacock 2 pieces 4 x 9 (seaweed), 1.5 x 10.5 (trim)
Soft Sea Foam 4 x 9 (seaweed)
Soft Suede 2 pieces 21 x 14.8 (card base), 4 x 4 (helm)
Vellum  4 x 9 (seaweed)
Very Vanilla 2 pieces 10.5 x 5 (waves), 6 x 5 (sentiment)
DSP: Come Sail Away 10 x 14.3 (1st layer)
Stampin' Pads: Crumb Cake, Pretty Peacock
Accessories: Basic Rhinestones, Sail Away Trinkets


Start with the soft suede (cs) measuring 21 x 14.8, score and fold at 10.5, this is the card base.

Adhere the first layer sail away DSP using liquid glue.

Next you will need the bigger piece of very vanilla (cs)  and the narrow piece of pretty peacock (cs).  With the very vanilla piece tear a thin strip off along the 10.5 edge and then adhere the other edge to the pretty peacock strip.

Emboss this piece with the high sea's 3D folder (having the 3D embossing plate gives a lovely finish).

Sponge the top edge of the embossed piece with crumb cake ink.

Tie some of the braided linen thread around this where the two colours meet using a knot, then fray the ends, and adhere to the base card using dimensional pads.

Using the other piece of  very vanilla (cs)  stamp the sentiment using the itty bitty birthdays (ss) in pretty peacock.

It's now time to do the die cutting and all elements come from the smooth sailing die set.

You will need to run the foliage die through your machine 3 times, once for each of the colours: soft sea foam (cs), pretty peacock (cs) and vellum (cs), while doing one of them die cut the other 2 elements at the same time, the ship's wheel (helm) in soft suede (cs) and the Sentiment stamped earlier with the label.

Edge the sentiment label in pretty peacock ink.

Staggering the foliage adhere to the base card using little dabs of liquid glue, add the helm using a single glue dot then do the same for the sail away trinket.

I also placed a small basic rhinestone in the middle of the trinket.

Trim the braided linen thread if needed and jobs done!

Will be back again soon with more cards
Annette X

Friday, August 16, 2019

Perennial Birthday meets Sailing Home & Waterfront

Hello, so happy you've popped by.

Happy Birthday Gareth

I've used a nautical theme for this card,  because I'm really enjoying these new dies and cling stamps. They are so much better than our older one's.
To recreate this card follow the guide below:
® = retired, (sab) = Sale-A-Bration, (H) = Hostess, (nsu) = not stampin’ up, (ss) = Stamp set, (DSP) = designer series paper, (CS) = Card Stock

All measurements are in centimetres

Card Stock: Night of Navy: 21 x 14.5scored at 10.5 (card base)
Soft Suede: 3 pieces 10 x 14 (first layer), 12.5 x 1 (rope), 4 x 3 (Knot)
Whisper White: 8.5 x 6 9 (lighthouse)
Whisper White Thick: 9.5 x 12 (second layer)
Very Vanilla: 7 x 3 (sentiment)
DSP: Come Sail Away  9.5 x 5.5 (top), 9.5 x 8.5 (bottom)
Embossing Folders: Subtle
Dies: Smooth Sailing
Stamp Sets: Perennial Birthday, Sailing Home, Waterfront
Clear Blocks: E
Accessories: ® Candy Dots, Clear block E, Wink of Stella Clear

Ink up the Clear block with Balmy Blue ink, lightly spray with water and then stamp down onto the larger piece of Whisper White Thick (cs) and leave to dry (for quicker drying use a Heat Tool).
Stamp the Lighthouse on the smaller piece of Whisper White (cs) in Night of Navy.
Die cut the Lighthouse, along with the Rope and Knot using the two smaller pieces of  Soft Suede (cs).
Adhere the larger piece of DSP to the bottom of the first layer (soft suede) leaving an equal space on all three sides using liquid glue
Rotate round and do the same with the smaller piece of DSP (overlapping the bottom piece slightly).
Adhere the Rope across the join between the two pieces of DSP and trim down. (I used narrow tear & tape).
Adhere this layer to the base card using liquid glue.
Go back to the stamped Whisper White Thick (cs) and add some Birds across the top. then stamp the Sand in Crumb Cake towards the bottom.
Again tear all the sides off to give it a distressed look.
Add some Clear Wink of Stella to the sand.
Adhere the Lighthouse and Rope to this layer using dimensional pads.
Now attach to the base card using dimensional pads.
Stamp the Sentiment on the Very Vanilla (cs) using Night of Navy.
Now tear all the sides off to give it a distressed look, then lightly sponge all over using Crumb Cake.
Slightly bend the sentiment and add a Candy Dot to the top left corner.
Adhere to the card using dimensional pads.

Thanks for dropping by, will be back again soon with more cards!

Annette X

Thursday, August 8, 2019

Sailing Home meets Perennial Birthday

Hello folks and welcome to my blog,

Happy Birthday Charles

I just love this new stamp set and dies, along with the Designer Series Papers.  It makes life much easier to make cards for men.
To recreate this card follow the guide below:
® = retired, (sab) = Sale-A-Bration, (H) = Hostess, (nsu) = not stampin’ up, (ss) = Stamp set, (DSP) = designer series paper, (CS) = Card Stock

All measurements are in centimetres

Card Stock: Soft Suede: 3 pieces,  27 x 13.5 scored at 13.5 (card base), 13.5 x 1 (long rope) and 4 x 3 (knotted rope)
Whisper White: 13.5 x 6.8
Very Vanilla: 7 x 3
DSP: Come Sail Away 13.5 x 6.8
Embossing Folders: Subtle
Dies: Smooth Sailing
Stamp Sets: Perennial Birthday, Sailing Home
Embellishments: ® Candy Dots 

Start with the panel of Whisper White (cs) and stamp the image of the yacht towards the bottom and the birds towards the top in Night of Navy.
Now emboss this panel using the Subtle folder and adhere down on the righthand side of the base card using liquid glue.
Now adhere the DSP panel down the lefthand side of the base card also using liquid glue.
Die cut the Rope and Knot using the two smaller pieces of  Soft Suede 
Adhere the Rope down the middle of the card (I used narrow tear & tape).
Add the Knot of Rope using mini dimensional.
Stamp the Sentiment on the Very Vanilla (cs) using Night of Navy.
Now tear all the sides off to give it a distressed look, then lightly sponge all over using Crumb cake.
Slightly bend the sentiment and then adhere to the base card using dimensional pads.
Add a Candy Dot to the sentiment.


Will be back again soon with more cards!
Annette X

Delicate Whispers and more

Welcome to my blog and    t hank you for joining me today! Happy Anniversary to Sylvia & Bill Intermediate level - blending with a brush...