Showing posts with label waterfront. Show all posts

Saturday, January 23, 2021

Pretty Perennials meets Swirly Frames and more

 Hello and welcome to my haven in a hectic world!

Thanks for joining me today!

Another card for Sue, using my new favourite stamp set created by Dena, Rekow


Really liked this card once it was made, I used the pretty perennials stamp set created by one of my favourite demonstrator's, her blog is amazing!

Materials required for this card are:

Card Stock: basic white, misty moonlight
Designer Series Paper: *perfectly artistic
Dies: nature's thoughts, perennial petals, stitched shapes circle (4)
Embossing Folders: *stone
Embossing Powder: white
Ink: calypso coral, coastal cabana, flirty flamingo, gorgeous grape, mango melody, versamark
Ribbon: *stitch satin
Stamp Sets: pretty perennials, swirly frames, waterfront 
Accessories: basic rhinestones
* = retired, when using layering dies (1) is the smallest

Hope you liked today's card. If you would like more information on how to make it, please don't hesitate to contact me, I'd love to hear from you.

If you wish to buy any of the items used, go to contacting me at the top of the page for details on how to order.

Will be back again soon with more cards, in the meantime take care and have a great day.
Annette 😘

Sunday, September 27, 2020

Butterfly Gala meets Waterfront

 Hello and welcome to my haven in a hectic world!

Thanks for joining me today!

Hello Sue, can't believe it's over six months since we started doing this.


This is the second card for today!
Feeling the need to use some dsp just now and thought this looked quite nice.

Materials required for this card are:

Card stock: whisper white
Designer Series Paper: flowers for every season
Dies: layering ovals (5), stitched shapes oval (3)
Embossing folders: tasteful textile 3D
Ink: bumble bee, just jade
Punches: butterfly duet
Ribbon: in colors twill
Stamp sets: butterfly gala, waterfront
Accessories: note cards, shimmer paint, stampin' spritzers
* = retired, when using layering dies (1) is the smallest

Hope you liked today's card. If you would like more information on how to make it, please don't hesitate to contact me, I'd love to hear from you.

If you wish to buy any of the items used, go to contacting me at the top of the page for details on how to order.

Will be back again soon with more cards, in the meantime take care and have a great day.
Annette 😘
Sunday, April 12, 2020

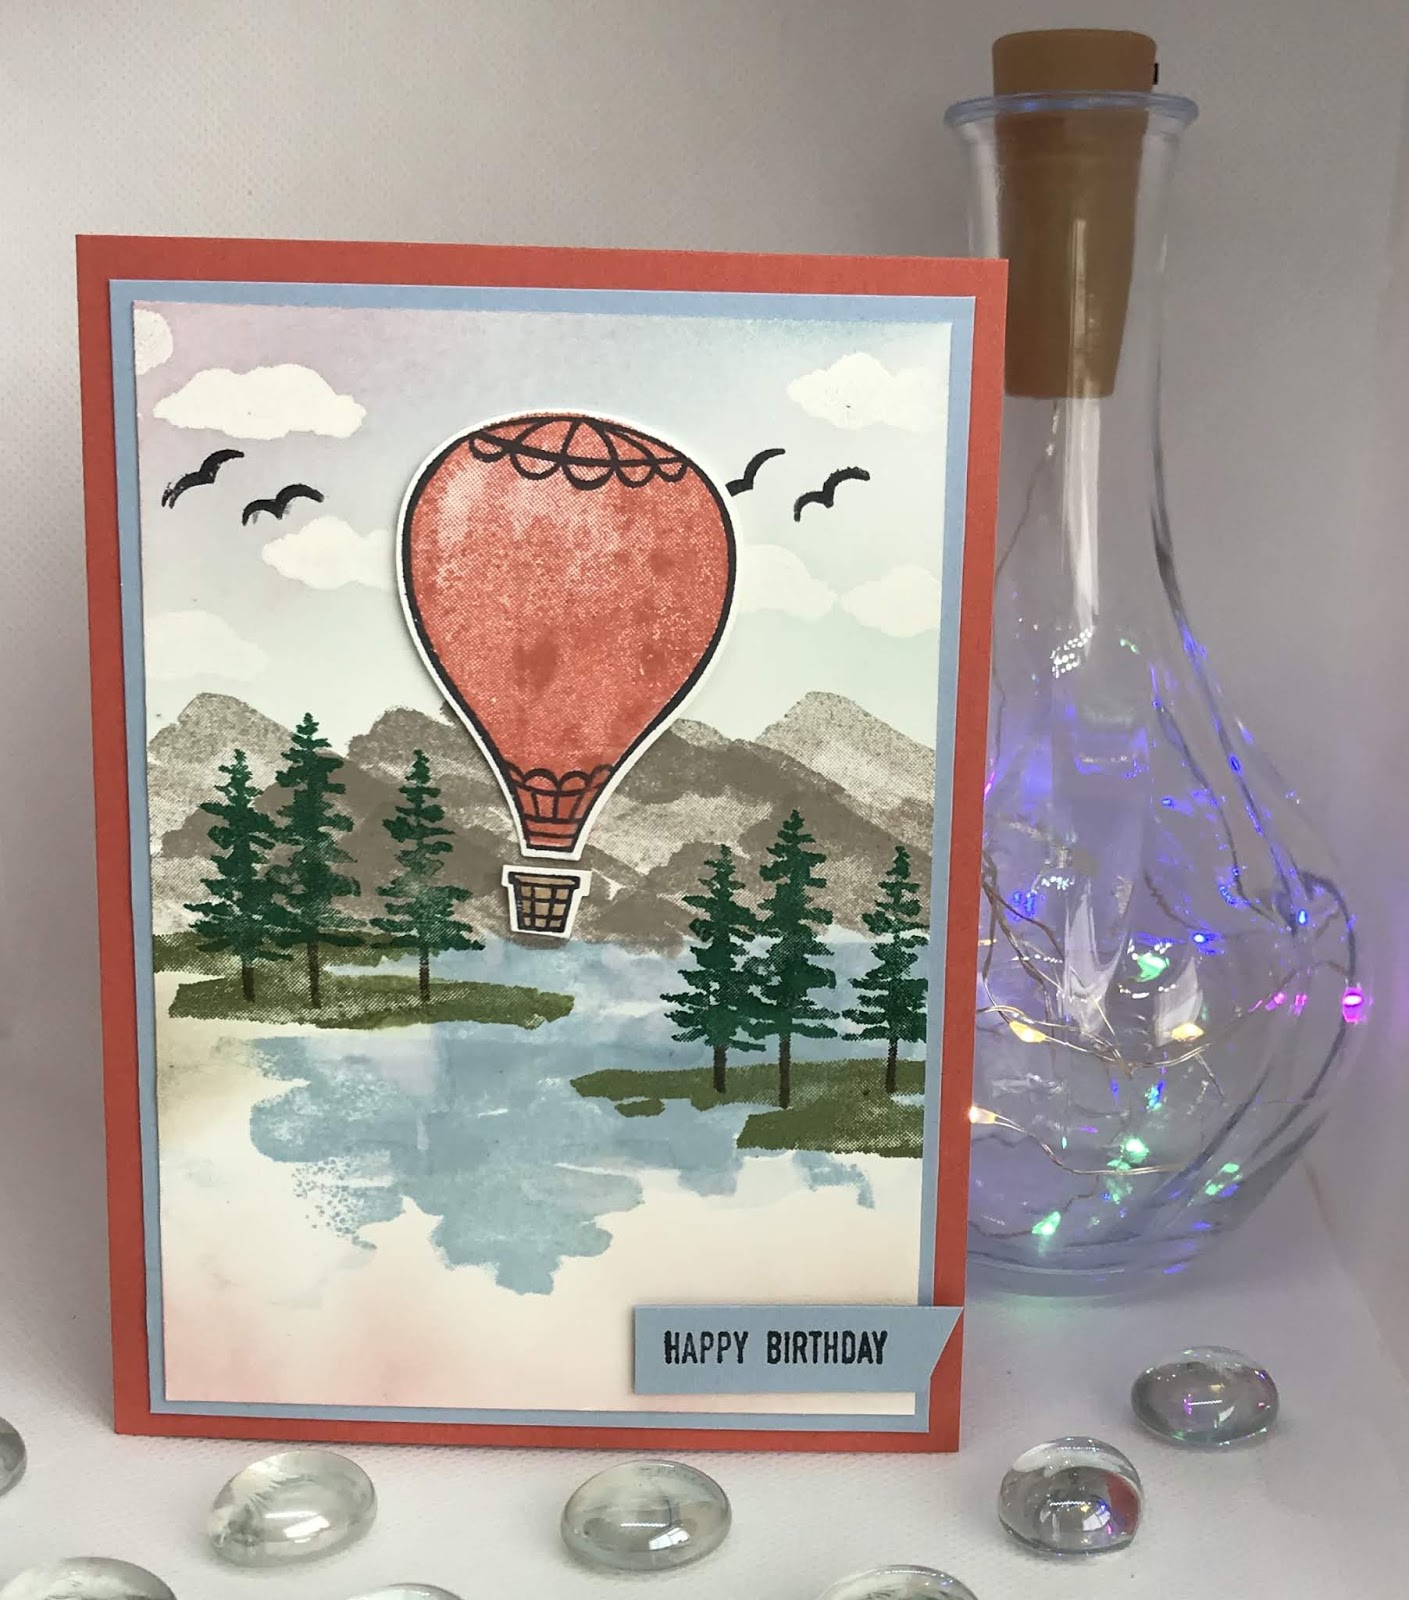
Above the Clouds meets Waterfront

Hello and welcome to my haven in a hectic world, hope you're having a great day!

Happy Birthday Duncan!

I have a few of the "waterfront" type stamp sets now and feel I'm starting to get better with them.
I really enjoyed making this one.

All measurements are in centimetres.

(cs) = cardstock, (ep) = embossing powder, (ss) = stamp set.

Terracotta Tile 21 x 14.5 scored at 10.5 (card base), Seaside Spray 9.7 x 13.7 (1st layer), sWhisper White 13.3 x 9.3 (2nd layer), 7 x 4.5 Balloon.
  • Stamp the sentiment from the itty bitty greetings (ss) in memento black ink onto the seaside spray 1st layer and punch out using the classic label punch (this is called gutting, the hole that is left doesn't get seen).
  • Adhere the 1st layer to the card base using liquid glue.
  • Prime the top half of the whisper white 2nd layer with your embossing buddy and then stamp the clouds from the above the clouds (ss) in versaMark and heat emboss using clear (ep).
  • Stamp your scene making sure there's a top, middle and bottom area, using the waterfront (ss) and appropriate colours. I used balmy blue and pool party for the sky (sponge method), gray granite for the mountains, seaside spray for the water, mossy meadow for grass, shaded spruce & early espresso for the trees, then more sponging at the bottom using sahara sand and terracotta tile (very lightly). The birds are stamped in memento black.
  • With the small piece of whisper white (cs) stamp the full balloon in terracotta tile and then over stamp with one of the outline balloons in memento black and punch out using the hot air balloon punch. Stamp the outline of the basket in memento black and punch out too.
  • Colour the basket using a bronze stampin' blend.
  • Adhere the second layer to the card base using liquid glue.
  • Attach the balloon using dimensional pads.
  • Cut the sentiment straight on the left and diagonal on the right, then attach to the card base using dimensional pads.
Will be back again soon with more cards. Thanks for stopping by.
Annette X

Friday, August 16, 2019

Perennial Birthday meets Sailing Home & Waterfront

Hello, so happy you've popped by.

Happy Birthday Gareth

I've used a nautical theme for this card,  because I'm really enjoying these new dies and cling stamps. They are so much better than our older one's.
To recreate this card follow the guide below:
® = retired, (sab) = Sale-A-Bration, (H) = Hostess, (nsu) = not stampin’ up, (ss) = Stamp set, (DSP) = designer series paper, (CS) = Card Stock

All measurements are in centimetres

Card Stock: Night of Navy: 21 x 14.5scored at 10.5 (card base)
Soft Suede: 3 pieces 10 x 14 (first layer), 12.5 x 1 (rope), 4 x 3 (Knot)
Whisper White: 8.5 x 6 9 (lighthouse)
Whisper White Thick: 9.5 x 12 (second layer)
Very Vanilla: 7 x 3 (sentiment)
DSP: Come Sail Away  9.5 x 5.5 (top), 9.5 x 8.5 (bottom)
Embossing Folders: Subtle
Dies: Smooth Sailing
Stamp Sets: Perennial Birthday, Sailing Home, Waterfront
Clear Blocks: E
Accessories: ® Candy Dots, Clear block E, Wink of Stella Clear

Ink up the Clear block with Balmy Blue ink, lightly spray with water and then stamp down onto the larger piece of Whisper White Thick (cs) and leave to dry (for quicker drying use a Heat Tool).
Stamp the Lighthouse on the smaller piece of Whisper White (cs) in Night of Navy.
Die cut the Lighthouse, along with the Rope and Knot using the two smaller pieces of  Soft Suede (cs).
Adhere the larger piece of DSP to the bottom of the first layer (soft suede) leaving an equal space on all three sides using liquid glue
Rotate round and do the same with the smaller piece of DSP (overlapping the bottom piece slightly).
Adhere the Rope across the join between the two pieces of DSP and trim down. (I used narrow tear & tape).
Adhere this layer to the base card using liquid glue.
Go back to the stamped Whisper White Thick (cs) and add some Birds across the top. then stamp the Sand in Crumb Cake towards the bottom.
Again tear all the sides off to give it a distressed look.
Add some Clear Wink of Stella to the sand.
Adhere the Lighthouse and Rope to this layer using dimensional pads.
Now attach to the base card using dimensional pads.
Stamp the Sentiment on the Very Vanilla (cs) using Night of Navy.
Now tear all the sides off to give it a distressed look, then lightly sponge all over using Crumb Cake.
Slightly bend the sentiment and add a Candy Dot to the top left corner.
Adhere to the card using dimensional pads.

Thanks for dropping by, will be back again soon with more cards!

Annette X

Delicate Whispers and more

Welcome to my blog and    t hank you for joining me today! Happy Anniversary to Sylvia & Bill Intermediate level - blending with a brush...