Showing posts with label something fancy dies. Show all posts

Wednesday, May 21, 2025

Adventurous Sky meets oldie Badges & Banners

Welcome to my blog

and  thank you for joining me today!

Happy Birthday Leigh


I'm on a mission to use some of my old stash at the moment and coming up with some decent cards I think!

Easy level - die cutting, layering, punching out, stamping

Materials required for this card are:

Card Stock: very vanilla 
Designer Series Paper: *true gentleman
Dies: something fancy 
Ink: night of navy
Punches: *best badge 
Stamps: adventurous sky, *badges & banners
Accessories: *faux suede trim
 * = no longer available

Start with a craft note card base, background layer 3⅜ x 4⅞, dsp (2 pieces) 3⅜ x 2½ 
  1. stamp both the sentiments on the background layer
  2. die cut the one and punch out the other sentiments
  3. adhere the 2 pieces of dsp to the background layer over lapping at the middle using liquid glue
  4. adhere the trim across the middle using liquid glue or tear & tape
  5. attach the sentiments using dimensional pads 
Hope you liked today's card. If you would like more information on how to make it, please don't hesitate to contact me, I'd love to hear from you.

If you wish to buy any of the items used, go to contacting me at the top of the page for details of how to order.
 
Will be back again soon with more cards, in the meantime take care and have a great day.

Annette 😊 

Wednesday, May 7, 2025

Full of Life meets Wanted to Say

 Welcome to my blog

and  thank you for joining me today!

Happy Birthday Alasdiar


Easy - die cutting, layering, stamping

Materials required for this card are:

Card Stock: basic white, shy shamrock
Designer Series Paper: full of life
Dies: something fancy, wanted to say
Ink: shy shamrock
Stamps: round we go
Accessories: adhesive sheets, note cards, tinsel gems 3 pack

All measurements are imperial not centimetres

Start with a SU note card blank, 5 by 3½, dsp 4¾ x 3¼, white and shy shamrock layers 3¼ x 2, white sentiment 2¾ x ¾
  1. add some adhesive sheet to the back of the shy shamrock
  2. die cut both he happy birthday shapes, then remove the adhesive sheeting and stick the two shapes together
  3. stamp the other sentiment and die cut using the label die
  4. attach both sentiments to the base card using dimensional pads
  5. add the  tinsel gems
Hope you liked today's card. If you would like more information on how to make it, please don't hesitate to contact me, I'd love to hear from you.

If you wish to buy any of the items used, go to contacting me at the top of the page for details of how to order.
 
Will be back again soon with more cards, in the meantime take care and have a great day.
Annette 😊

Monday, April 21, 2025

Dainty Flowers meets Day To Celebrate

 Welcome to my blog

and  thank you for joining me today!

Happy Birthday Peg


Thanks to Rose Applegate a quick and easy make today - die cutting, heat embossing, layering. I slipped when die cutting the sentiment so trimmed round it and added a plain background 

Materials required for this card are:

Card Stock: basic white, blackberry bliss
Designer Series Paper: *dainty flowers
Dies: something fancy
Embossing Powder: clear
Ink: blackberry bliss, versaMark 
Stamps: *day to celebrate
Accessories: *glittered bakers twine, *woven threads sequins
 
* = no longer available, when using layering dies (1) is the smallest
  1. Start with a base card 14.5 x 21 scored at 10.5, layer one 10.2 x 14.2, dsp layer 10 x 14, scrap pieces of blackberry bliss & basic white
  2. adhere the dsp to layer one using liquid glue then attach to the base card using dimensional pads
  3. ink up the sentiment with versaMark and then blackberry blisss before stamping, add the embossing powder and heat set
  4. die cutting the label
  5. trim round the sentiment and adhere to the label using liquid glue
  6. wind the bakers twine and attach to the back of the label using sticky tape (seal +)
  7. attach to the base card using dimensional pads
  8. add the sequins using mini glue dots
Seem to have lost my mojo at the moment and need to get a few cards done quickly so casing at the moment.

Hope you liked today's card. If you would like more information on how to make it, please don't hesitate to contact me, I'd love to hear from you.

If you wish to buy any of the items used, go to contacting me at the top of the page for details of how to order.
 
Will be back again soon with more cards, in the meantime take care and have a great day.
Annette 😊

Friday, October 6, 2023

Earthen Textures meets Go To Greetings

   Welcome to my blog

and  thank you for joining me today!

Happy Birthday Alison


die cutting, embossing and stamping

Materials required for this card are:

Card Stock: pecan pie, parakeet party, very vanilla
Bundles: earthen textures
Dies: something fancy
Embossing Folders: stripes & spalatters
Ink: crumb cake, bubble bath
Stamp Sets: go to greetings
Accessories: sheer ribbon, *sequins & gems

 * = no longer available
  1. Start with a base card 13.5 x 27 scored at 13.5
  2. first layer 12.9 x12.9, stamp down the left side using crumb cake stamped off once. Then emboss down the right side using the folder
  3. add a strip of ribbon down the middle attached at the back with tear & tape
  4. stamp the flowers, vase & sentiment in bubble bath 
  5. die cut all 4 pieces
  6. adhere the grass using liquid glue to the base card
  7. attach the rest of the pieces using dimensional pads (you will need to cut down the sentiment banner on both sides)
  8. add the sequins 
Hope you liked today's card. If you would like more information on how to make it, please don't hesitate to contact me, I'd love to hear from you.

If you wish to buy any of the items used, go to contacting me at the top of the page for details on how to order.

Will be back again soon with more cards, in the meantime take care and have a great day.
Annette 😘

Monday, August 14, 2023

brewed for You meets Something Fancy dies

   Welcome to my blog

and  thank you for joining me today!

Happy Birthday Jack


Quick and easy, layering, die cutting, 2 step stamping and embossing

Materials required for this card are:

Card Stock: basic white, pecan pie
Designer Series Paper: *all together
Dies: brewed, something fancy
Embossing Folders: timber3D
Ink: cherry cobbler, crushed curry, memento black, pecan pie
Stamp Sets: brewed for you
Accessories: *black cord, blending brushes
 * = no longer available
  1. Start with a base card 25 x 12.5 scored at 12.5, pecan pie 8 x 2, dsp 12 x 12, basic white scraps for die cutting
  2. adherer the dsp to the base card using liquid glue
  3. adhere the black cord using tear & tape about 3 5 up from the bottom of the base card
  4. stamp the sentiment, glasses and froth using memento black, then complete the stamping with the colours for the wine and beer
  5. emboss the pecan pie stripe using the folder
  6. then gently use the blending brush to give it some dimension
  7. attach the pecan pie stipe to the base card using small dimensional pads
  8. die cut the glasses, froth and sentiment
  9. adhere the froth to the top of the beer glass using liquid glue
  10. attach the glasses to the card using dimensional pads at the top and liquid glue at the bottom 
Hope you liked today's card. If you would like more information on how to make it, please don't hesitate to contact me, I'd love to hear from you.

If you wish to buy any of the items used, go to contacting me at the top of the page for details on how to order.

Will be back again soon with more cards, in the meantime take care and have a great day.
Annette 😘

Sunday, July 23, 2023

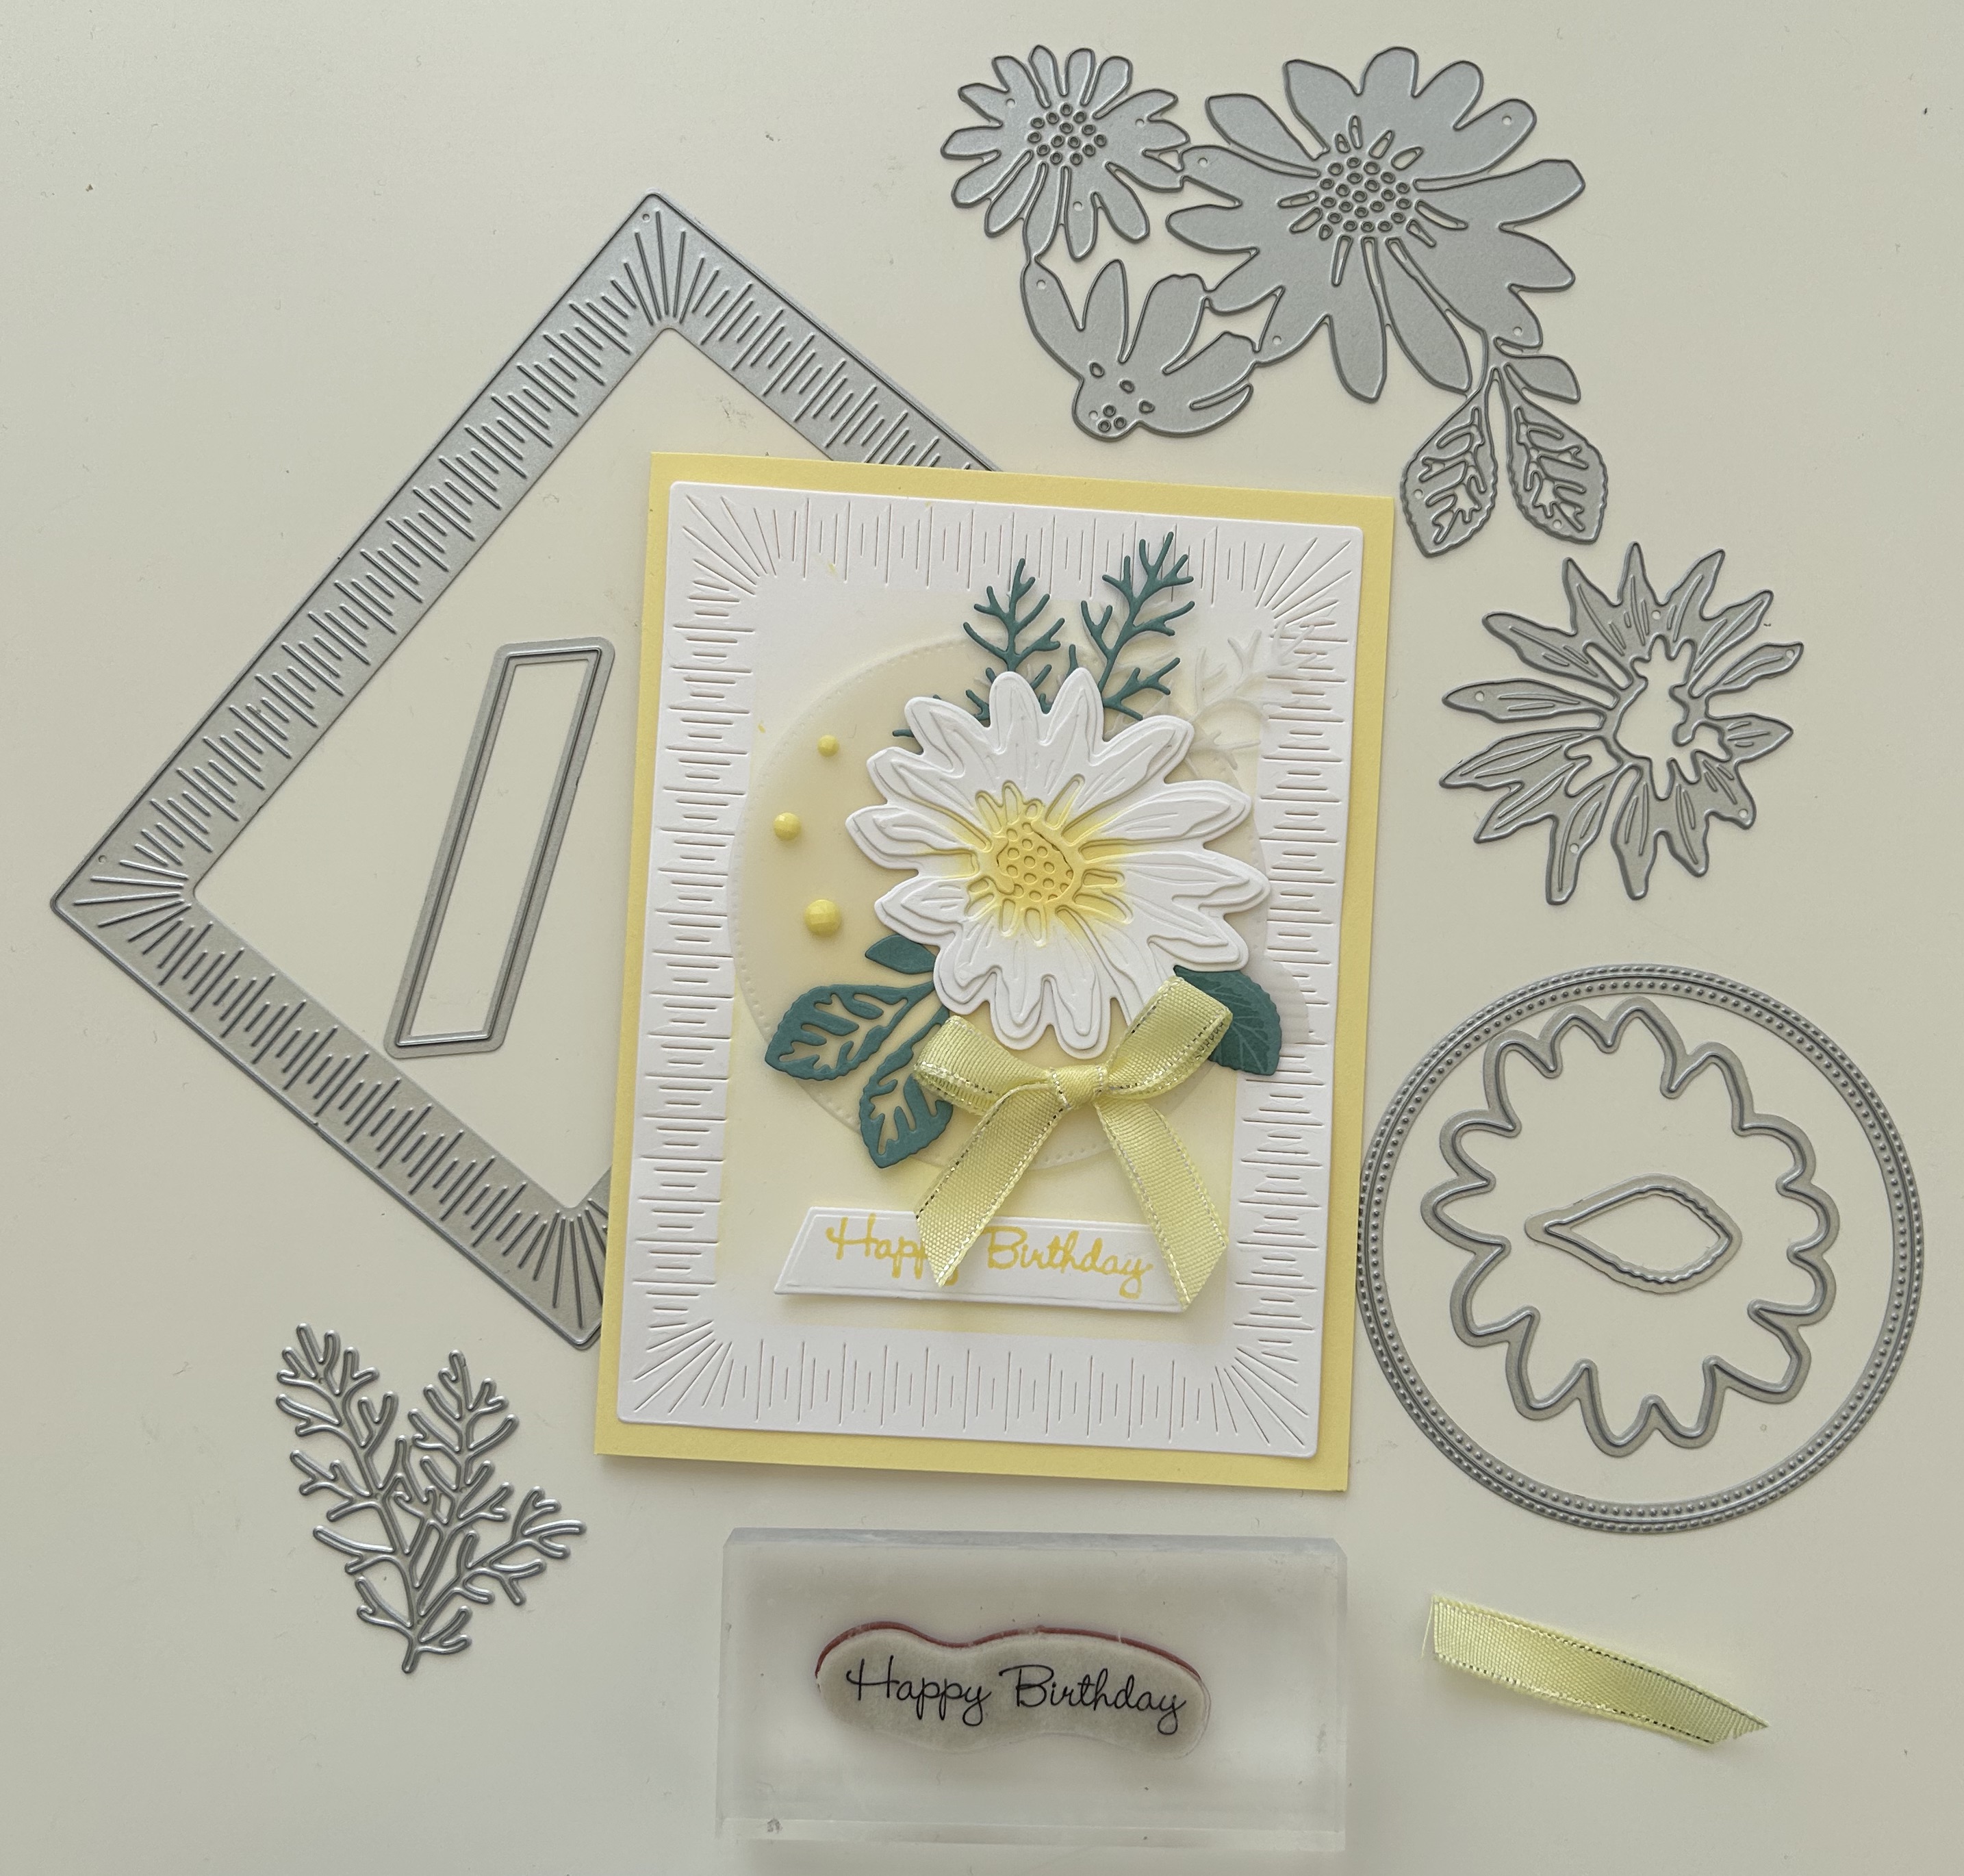
Cheerful Daisies meets Go to Greetings

   Welcome to my blog

and  thank you for joining me today!

Happy Birthday Anne


easy decoupage, layering, die cutting and stamping

Materials required for this card are:

Card Stock: basic white, lemon lolly, lost lagoon 
Dies: cheerful daisies, radiating stitches, something fancy, stylish shapes
Ink: lemon lolly, lost lagoon, versamark
Stamp Sets: cheerful daisies, go to greetings
Accessories: adhesive-backed solid gems, clear embossing powder, sheer ribbon
  1. Start with a base card 14 x 21 scored at 10.5, white layer 14 x 11, lost lagoon, vellum, basic white for leaves and flower and sentiment
  2. die cut the background layer and use a blending brush to colour the centre
  3. adhere this layer to the base card using liquid glue
  4. stamp the sentiment using versamark & lemon lolly ink, add the clear embossing powder and heat emboss.
  5. stamp the single leaf 
  6. die cut all the pieces - flower layers (3), leaves (2) one green and one vellum, sentiment label, large vellum circle 
  7. using a blending brush, colour the centre of the flower pieces and then build the layers using glue dot
  8. adhere the circle to the base card using liquid glue
  9. adhere the leaves around the vellum circle using liquid glue
  10. add the flower to the top using glue dots
  11. make a bow and attach using a glue dot
  12. attach the sentiment using dimensional pads
  13. add the gems
Hope you liked today's card. If you would like more information on how to make it, please don't hesitate to contact me, I'd love to hear from you.

If you wish to buy any of the items used, go to contacting me at the top of the page for details on how to order.

Will be back again soon with more cards, in the meantime take care and have a great day.
Annette 😘

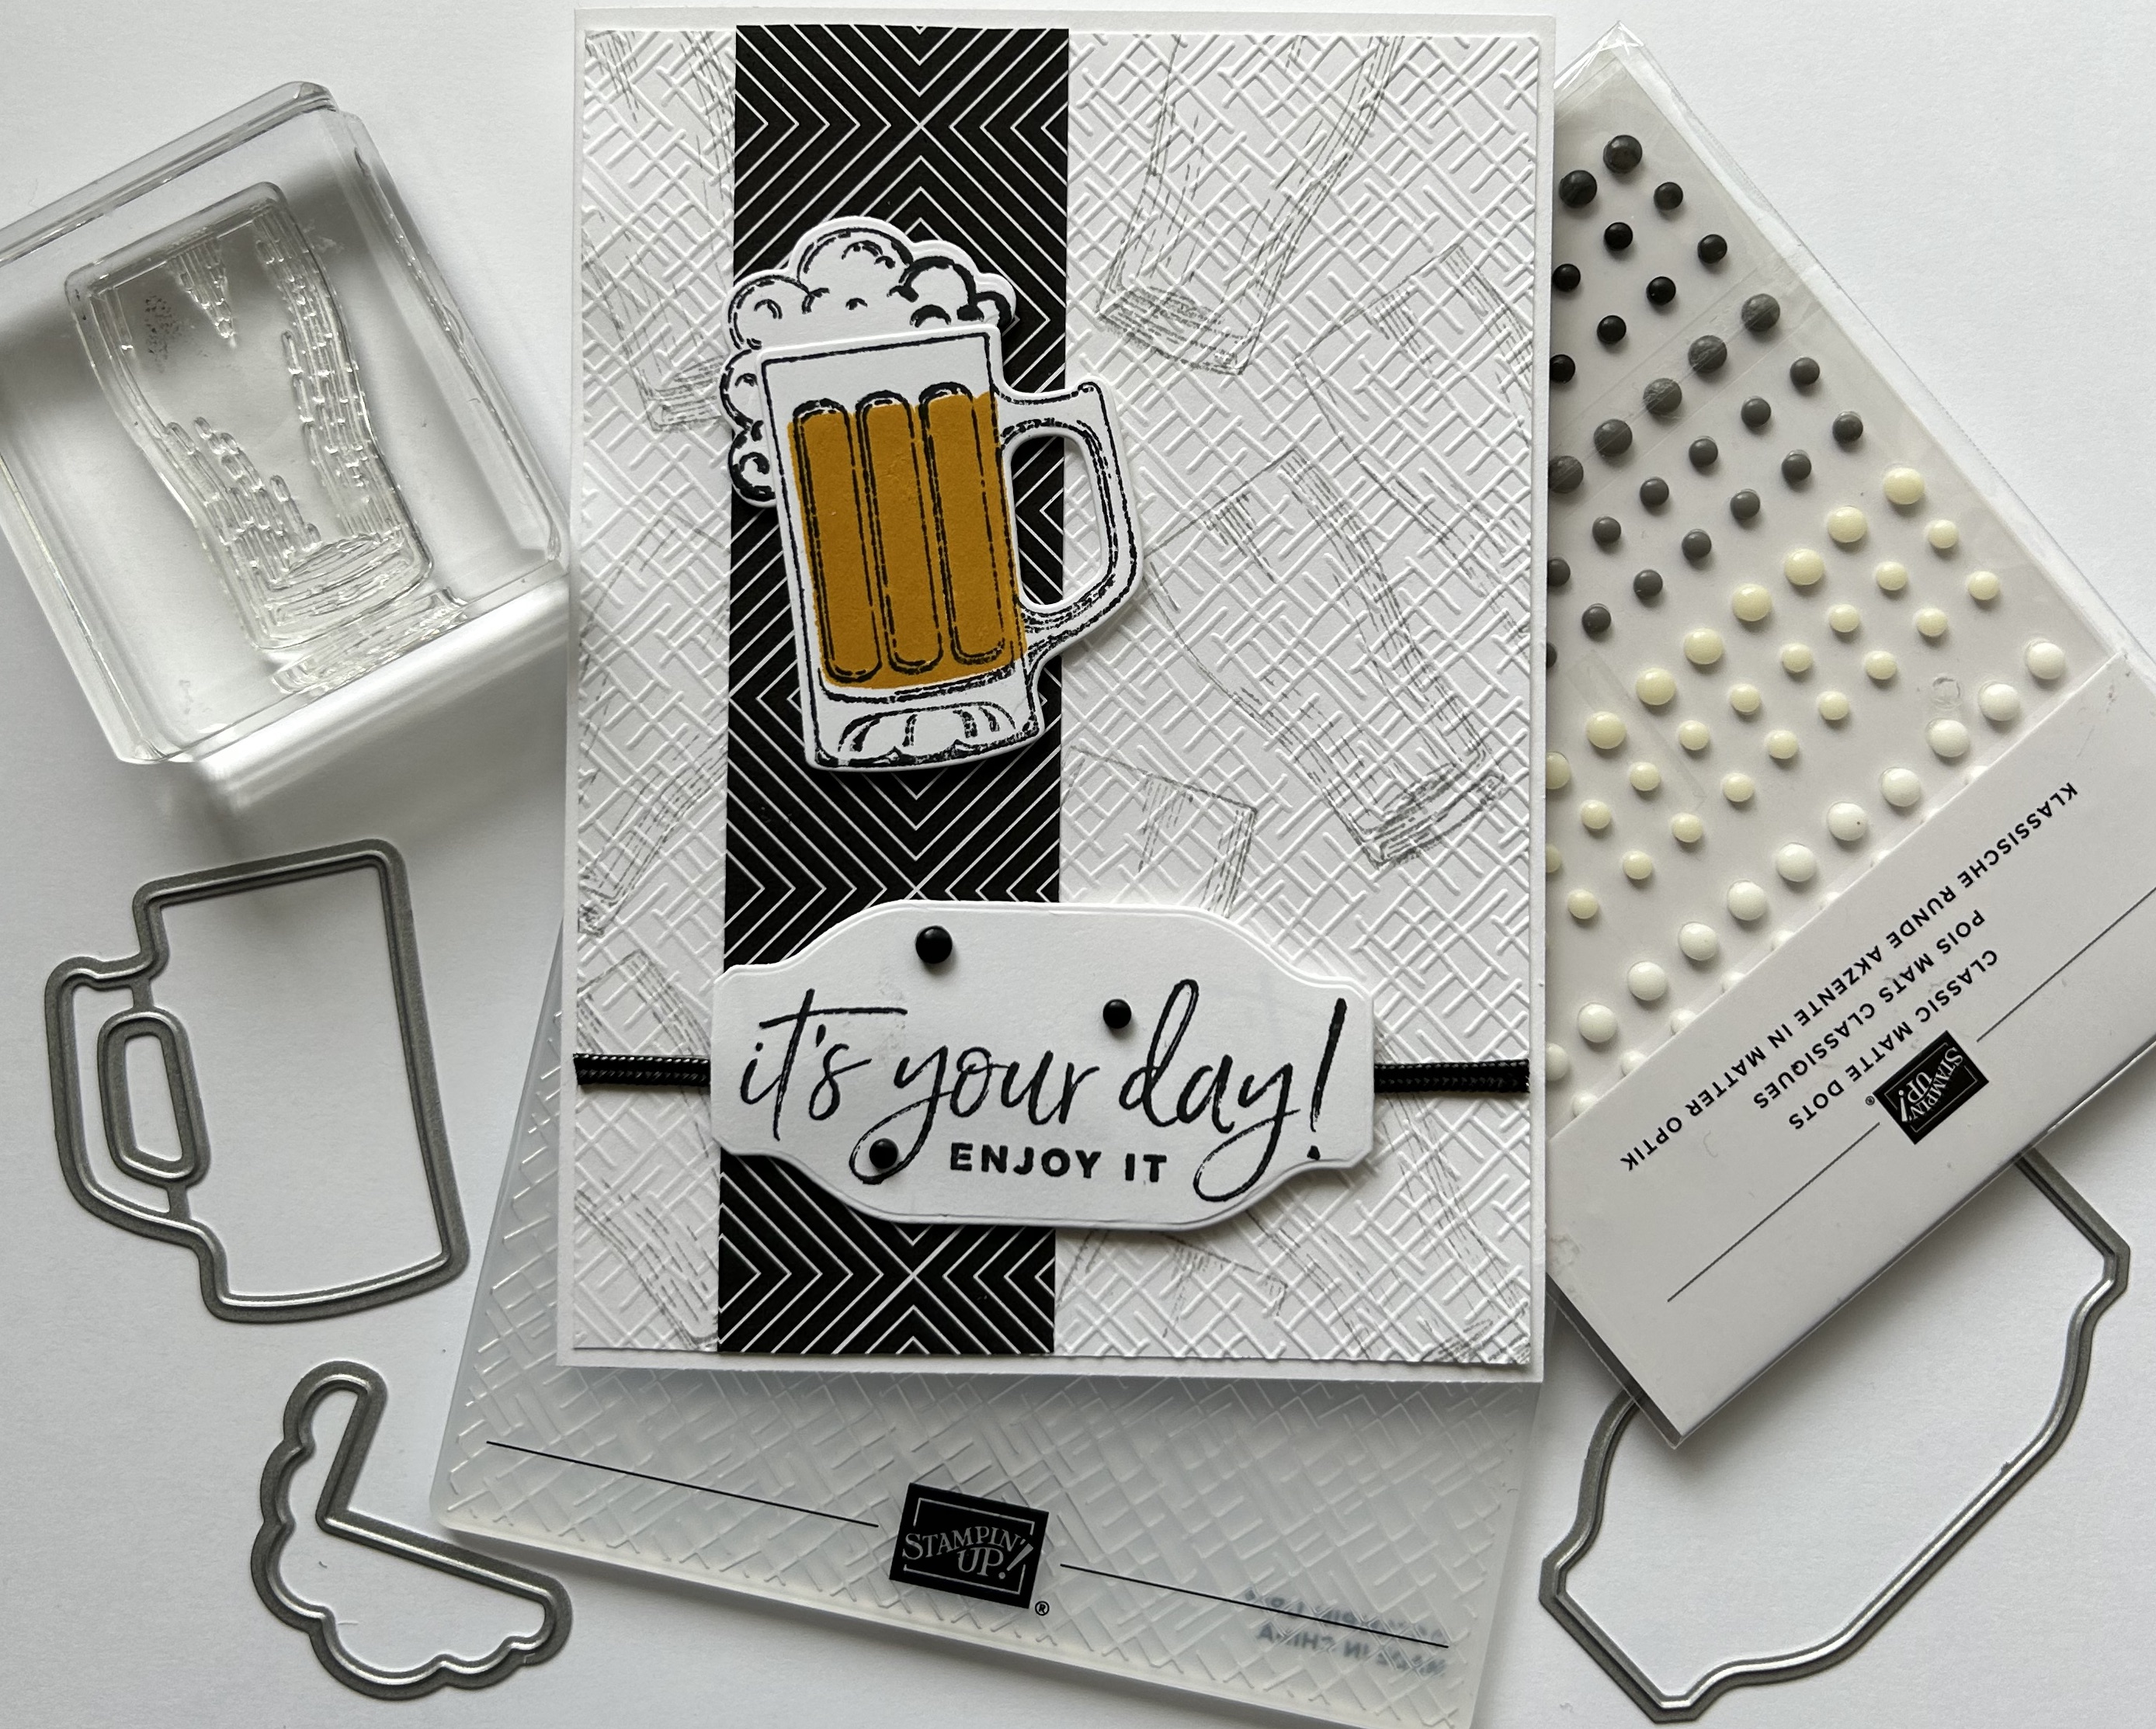
Friday, July 21, 2023

Brewed for You meets Happiest of Birthdays

   Welcome to my blog

and  thank you for joining me today!

Happy Birthday Bill


Mostly monochrome with a touch of Crushed Curry & smoky slate

Materials required for this card are:

Card Stock: basic white
Designer Series Paper: *all together
Dies: brewed, something fancy
Embossing Folders: basics 3D
Ink: crushed curry, memento black, smoky slate
Stamp Sets: brewed for you, *happiest of birthdays
Accessories: *black cord, classic matte dots
 * = no longer available
  1. Start with a base card 14.5 x 21 scored at 10.5, white layer 10 x 14, cut offs for stamping
  2. stamp the beer glass randomly over the white layer using smoky slate stamped off once
  3. emboss this layer using the folder
  4. adhere a strip of the dsp down the left hand side 3.5 x 14 using liquid glue
  5. attach the black cord using tear & tape to the same layer then adhere to the base card using liquid glue
  6. stamp the sentiment and beer jug pieces (stamp the crushed curry at least 3 times) to get a good beer colour
  7. die cut all these pieces and attach to the card using dimensional pads
  8. add the matt dots
Hope you liked today's card. If you would like more information on how to make it, please don't hesitate to contact me, I'd love to hear from you.

If you wish to buy any of the items used, go to contacting me at the top of the page for details on how to order.

Will be back again soon with more cards, in the meantime take care and have a great day.
Annette 😘

Delicate Whispers and more

Welcome to my blog and    t hank you for joining me today! Happy Anniversary to Sylvia & Bill Intermediate level - blending with a brush...