Showing posts with label rushed ribbon. Show all posts

Sunday, March 21, 2021

Simply Succulents meets Brick & Mortar

 Thank you for joining me today!


Weekly card for Sue


I found this stamp set challenging to use, but liked the results. 

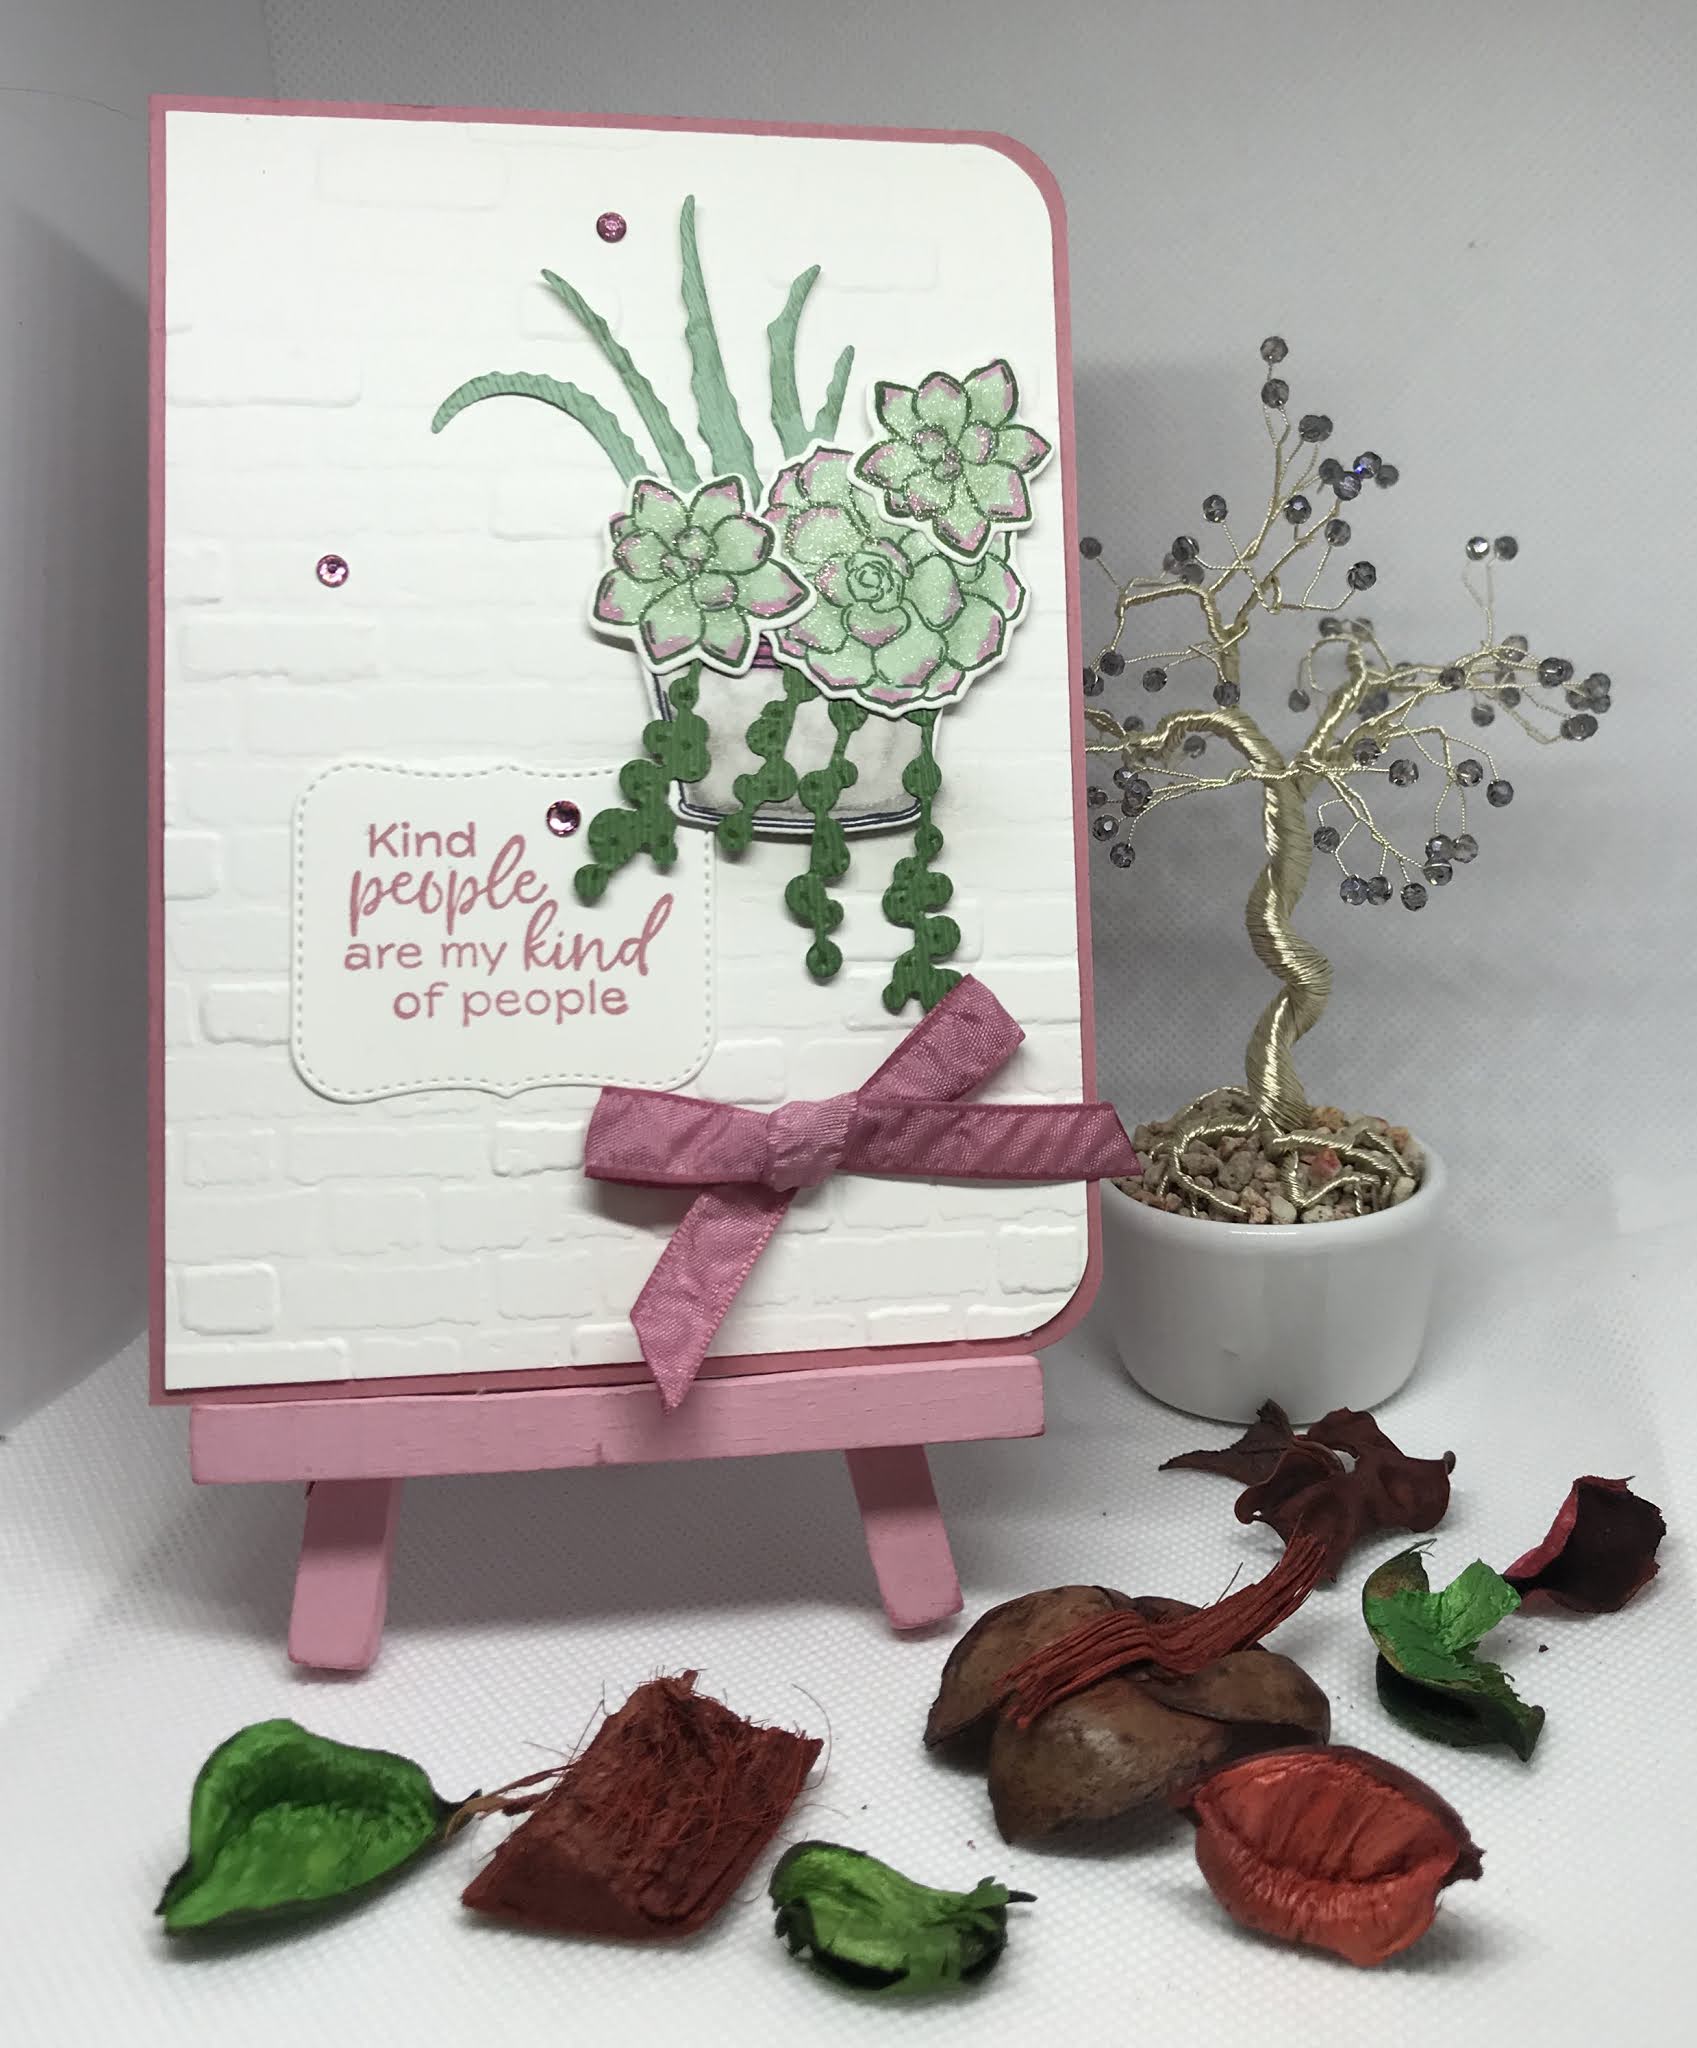
Materials required for this card are:

Card Stock: basic white, rococo rose
Dies: potted succulents
Embossing Folders: brick & mortar, subtle 3D
Ink: garden green, rococo rose, smoky slate
Ribbon: *rushed
Stampin' Blends: color lifter, gray granite, mint macaron, mossy meadow, rococo rose
Stamp Sets: simply succulents   
Accessories: *noble peacock rhinestones, *rushed ribbon, wink of stella
* = retired

Hope you liked today's card. If you would like more information on how to make it, please don't hesitate to contact me, I'd love to hear from you.

If you wish to buy any of the items used, go to contacting me at the top of the page for details on how to order.

Will be back again soon with more cards, in the meantime take care and have a great day.
Annette 😘

Monday, March 30, 2020

Lots of Love meets Country Floral

Hello and welcome to my haven in a hectic world.

Happy Birthday Carole!

Well I made this card on the 29th of January, and the sun was shining here in Walsall but it was only 4 degrees.

It came together quite well, as I had no idea of what I was going to do, and just took bits and bobs from everywhere.
Cardstock: Rococo Rose 21 x 14.5 scored and folded at 10.5 (card base), Shimmery White 3 pieces 14.5 x 7.5 (embossed panel), 6 x 4.5 ("here's to the happiest birthday yet"), 4.5 x 1.5 (happiest). Vellum old olive 3.5 x 4.5 (1 sprig),  Vellum plain 3.5 x 9 (2 sprigs).

(cs) = card stock, (ef) = embossing folder, (r) = retired, (ss) = stamp set
  • Emboss the front of the rococo rose (cs) card base using the subtle (ef).
  • Emboss the shimmery white panel (cs) using the country floral (ef).
  • Lightly sponge this panel using old olive and rococo rose stampin' pads.
  • I edged each side of the panel using (r) old olive grosgrain ribbon (you can use old olive (cs) if you don't have suitable ribbon.
  • Adhere the panel to the card base using liquid glue.
  • Using the larger of the 2 piece's of shimmery white (cs) stamp the full sentiment from the lots of happy (ss) in old olive ink.
  • With the smaller piece of shimmery white (cs), stamp just the "happiest" in rococo rose, then trim down this piece to just fit across the other one.
  • Die cut the full sentiment using the stitched so sweetly dies and attach the rococo rose "happiest" using dimensional pads.
  • Adhere the (r) rushed ribbon (this is sweet sugarplum, but it's almost a perfect match) across the front panel using snail. 
  • Attach the (r) silver sequins at the back of the sentiment (l used sellotape).
  • Attach the sentiment in front of the ribbon using dimensional pads.
  • Using the Sprig punch, punch out 2 plain sprigs and 1 perennial essence green sprig. 
  • Arrange the sprigs where you want them and adhere using glue dots behind the ribbon.
  • Add 3 basic rhinestones down the left hand side of the base card.
Will be back again soon with more cards, hope you have a great day!
Annette X

Daisies meets Nature's Symphony

  Welcome to my blog and    t hank you for joining me today! Happy birthday Serenia Intermediate level - die cutting, dry embossing, layerin...