Showing posts with label sail away trinkets. Show all posts

Wednesday, June 3, 2020

Sailing Home meets High Tide and more

Hello and welcome to my haven in a hectic world, thank you for dropping by.

Happy Birthday Mike!

This is my take, on card from Kelly Acheson's blog "a stamp above"  on 5 May 2020, I changed the orientation and turned it into  swing card.
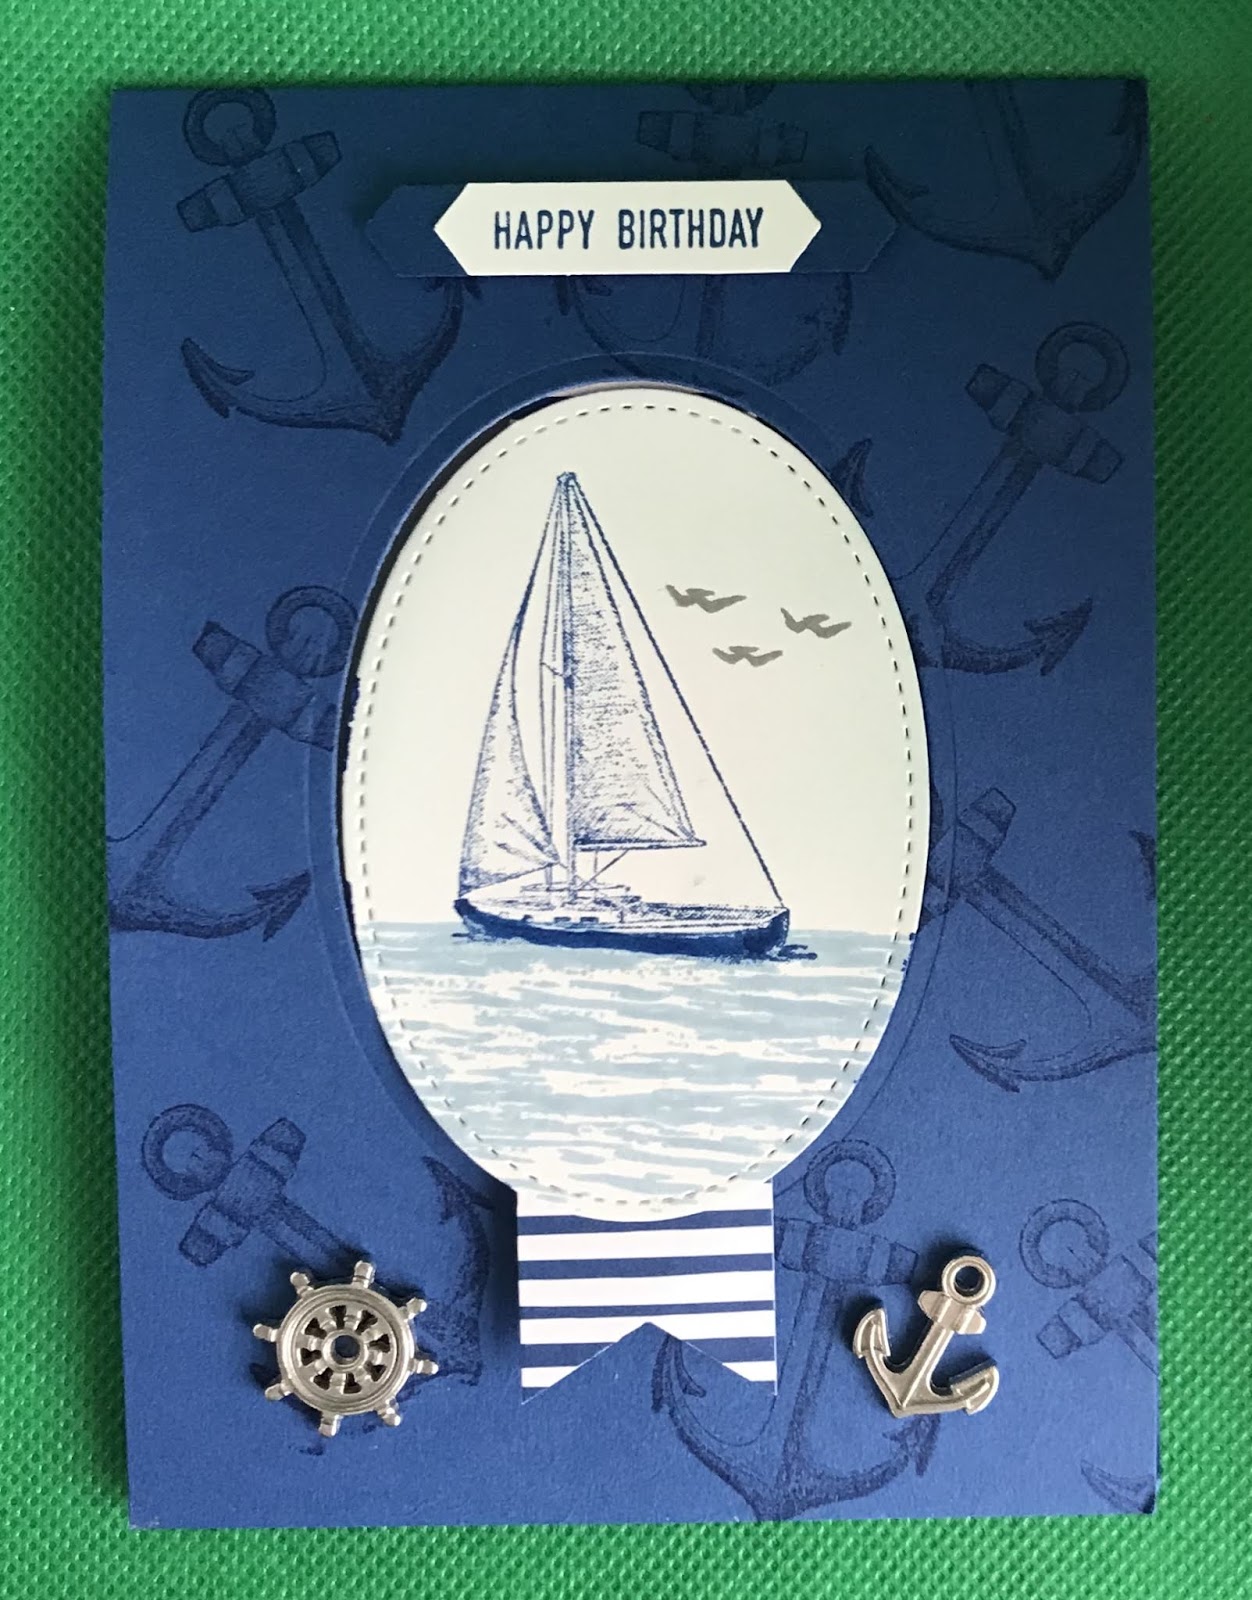
closed
open

Measurements are in centimetres.

(cs) = card stock, (dsp) = designer series paper, (ss) = stamp set, when using layering dies (1) is the smallest.
Colours: Basic Gray, Blueberry Bushel, Pool Party, Seaside Spray.
  • Card base is blueberry bushel (cs) 10.5 x 29.7 scored at 14.8.
  • Die cut the opening for the front using the layering ovals dies  (7), then randomly stamp the anchor from the sailing home (ss) in blueberry bushel.
  • On a piece of whisper white (cs) 7 x 9.5 stamp the scene, water is from the high tide (ss) in seaside spray, boat is from the sailing home (ss) in blueberry bushel and the birds are from the my meadow (ss) in basic gray. Lightly sponge above the water in pool party to form a sky line.
  • Die cut the scene using the stitched shape dies oval (4), now die cut another oval the same size in blueberry bushel.
  • Cut a piece of whisper white (cs) 10 x 14.3 (card insert), do a dry placement, and through the aperture stamp the greeting from the sailing home (ss) using blueberry bushel in the middle.
  • Cut a 2.5 stripe from the 6" x 6"  18/20 in color (dsp) stack, then use the triple banner punch to make the tail at one end and a 1cm score mark at the other.
  • Adhere the dsp to the back of the card insert making sure it's in the middle.  Then using 2 pieces of bakers twine measuring 14cm each create a reef knot and attach both ends to the back of the card insert towards the bottom using sellotape, making sure the knot on the front is roughly in the middle.
  • Attach the card insert to the card base using dimensional pads.
  • Close the card, add some liquid glue down the centre of the dsp showing through the oval aperture then place the scene oval over the top, making sure it's in the right place and adhere down.
  • Open the card and adhere the blueberry bushel oval over the top of the white one.
  • On a scrap piece of whisper white (cs) stamp the happy birthday from the itty bitty greetings (ss) in blueberry bushel and punch out using the classic label punch. I re-inserted the ends to make the label smaller then punched a second label in blueberry bushel and adhered the two together and attached to the front of the card using dimensional pads.
  • Lastly I added a couple of the (r) sail away trinkets.
Will be back again soon with more cards, enjoy the rest of your day.
Annette X

Tuesday, September 3, 2019

Smooth Sailing meets Itty Bitty Birthdays

Hi folks, thanks for dropping by, hope you like the card.

Happy Birthday Stuart!

You've joined me on a day where I'm using one of my favourite stamp sets. There are quite a few cards being made with this set just now.

I know it's his birthday today and his card says belated birthday, but he won't get his card until the middle of October, as he's away at sea just now. Hope the boys give him a good day!
I've case'd this one from Dena Rekow's web site thecreativitycave.com she does some fantastic video's (thanks Dena).

To recreate this card follow the guide below:
(cs) = Card Stock, (ss) = Stamp Set, DSP = Designer Series Paper,

All measurements are in Centimetres.

Card Stock: Pretty Peacock 2 pieces 4 x 9 (seaweed), 1.5 x 10.5 (trim)
Soft Sea Foam 4 x 9 (seaweed)
Soft Suede 2 pieces 21 x 14.8 (card base), 4 x 4 (helm)
Vellum  4 x 9 (seaweed)
Very Vanilla 2 pieces 10.5 x 5 (waves), 6 x 5 (sentiment)
DSP: Come Sail Away 10 x 14.3 (1st layer)
Stampin' Pads: Crumb Cake, Pretty Peacock
Accessories: Basic Rhinestones, Sail Away Trinkets


Start with the soft suede (cs) measuring 21 x 14.8, score and fold at 10.5, this is the card base.

Adhere the first layer sail away DSP using liquid glue.

Next you will need the bigger piece of very vanilla (cs)  and the narrow piece of pretty peacock (cs).  With the very vanilla piece tear a thin strip off along the 10.5 edge and then adhere the other edge to the pretty peacock strip.

Emboss this piece with the high sea's 3D folder (having the 3D embossing plate gives a lovely finish).

Sponge the top edge of the embossed piece with crumb cake ink.

Tie some of the braided linen thread around this where the two colours meet using a knot, then fray the ends, and adhere to the base card using dimensional pads.

Using the other piece of  very vanilla (cs)  stamp the sentiment using the itty bitty birthdays (ss) in pretty peacock.

It's now time to do the die cutting and all elements come from the smooth sailing die set.

You will need to run the foliage die through your machine 3 times, once for each of the colours: soft sea foam (cs), pretty peacock (cs) and vellum (cs), while doing one of them die cut the other 2 elements at the same time, the ship's wheel (helm) in soft suede (cs) and the Sentiment stamped earlier with the label.

Edge the sentiment label in pretty peacock ink.

Staggering the foliage adhere to the base card using little dabs of liquid glue, add the helm using a single glue dot then do the same for the sail away trinket.

I also placed a small basic rhinestone in the middle of the trinket.

Trim the braided linen thread if needed and jobs done!

Will be back again soon with more cards
Annette X

Delicate Whispers and more

Welcome to my blog and    t hank you for joining me today! Happy Anniversary to Sylvia & Bill Intermediate level - blending with a brush...