Showing posts with label happiest of birthdays. Show all posts

Tuesday, April 28, 2026

Happiest of Birthdays meets Christmas Trimmings

Welcome to my blog

and  thank you for joining me today!

Happy Birthday Ste


Intermediate level - die cutting, layering, stamping

Materials required for this card are:
 
Card Stock: basic white, blackberry bliss, *brass foil
Designer Series Paper: *pattern party
Dies: *christmas trimmings (2)
Ink: blackberry bliss
Punches: banner triple
Stamps: *best family ever,*happiest of birthdays
Accessories: *gold trim, *rustic metallic dots
 * = no longer available, when using layering dies (1) is the smallest

Start with a basic card base 14.5 x 21 scored at 10.5, white 12.5 x 8.5, 7.5 x 3, blackberry bliss 8.5 x 12.5, 2.5 x 8.5, 10.5 x 5, foil 8 x 8, dsp 12 x 8, .5 x 9 (need 2)
  1. adhere the large piece of dsp to the the large blackberry bliss using liquid glue
  2. adhere these to the base card using liquid glue
  3. taking the small piece of blackberry bliss adhere the 2 narrow pieces of dsp using liquid glue
  4. adhere this to the base card using liquid glue
  5. with the last piece of blackberry bliss and the punch, make the banner and adhere to the base card using liquid glue
  6. die cut the star, add the trim behind it using tear & tape to secure it
  7. attach the star using dimensional pads
  8. stamp the sentiment and trim down to size, then attach to the card using dimensional pads
  9. stamp the 'son' below the banner
  10. add the dots
Hope you liked today's card. If you would like more information on how to make it, please don't hesitate to contact me. I'd love to hear form you.

If you wish to buy any of the items used, go to contacting me at the top of the page for details of how to order.
 
Will be back again soon with more cards, in the meantime take care and have a great day.

Annette 😊 

Saturday, December 9, 2023

Countryside Corners meets *Happiest Of Birthdays

   Welcome to my blog

and  thank you for joining me today!

Happy Birthday Simon


Cased from Susan at mypassionforcards. die cutting, layering, stamping
With a mixture of old and new products. Not quite as easy as it looks

Materials required for this card are:

Card Stock: basic black & white
Bundles: countryside corners (3, 4)
Designer Series Paper: *plaid tidings
Embossing Folders: metal plate 3D
Ink: memento tuxedo black
Stampin' Markers: black (to ink up the rectangle dots)
Stamp Sets: *Happiest of birthdays
Accessories: *matte black dots
 * = no longer available, when using layering dies (1) is the smallest
  1. Start with a base card 14.5 x 21 scored at 10.5, white layer 10 x 14, dsp layer 9.5 x 13.5, scrap black & white pieces for labels
  2. adhere the white layer to the base card using liquid glue, then do the same with the dsp layer.
  3. stamp the dotted rectangle and then stamp the greeting in the middle (I used a  stamp-a-ma-jig) to line up the sentiment
  4. die cut the 2 rectangles
  5. emboss the black rectangle 
  6. adhere the two rectangles together using seal+ tape
  7. attach the rectangles to the base card using dimensional tabs
  8. add the black dots
Hope you liked today's card. If you would like more information on how to make it, please don't hesitate to contact me, I'd love to hear from you.

If you wish to buy any of the items used, go to contacting me at the top of the page for details on how to order.

Will be back again soon with more cards, in the meantime take care and have a great day.
Annette 😘

Friday, July 21, 2023

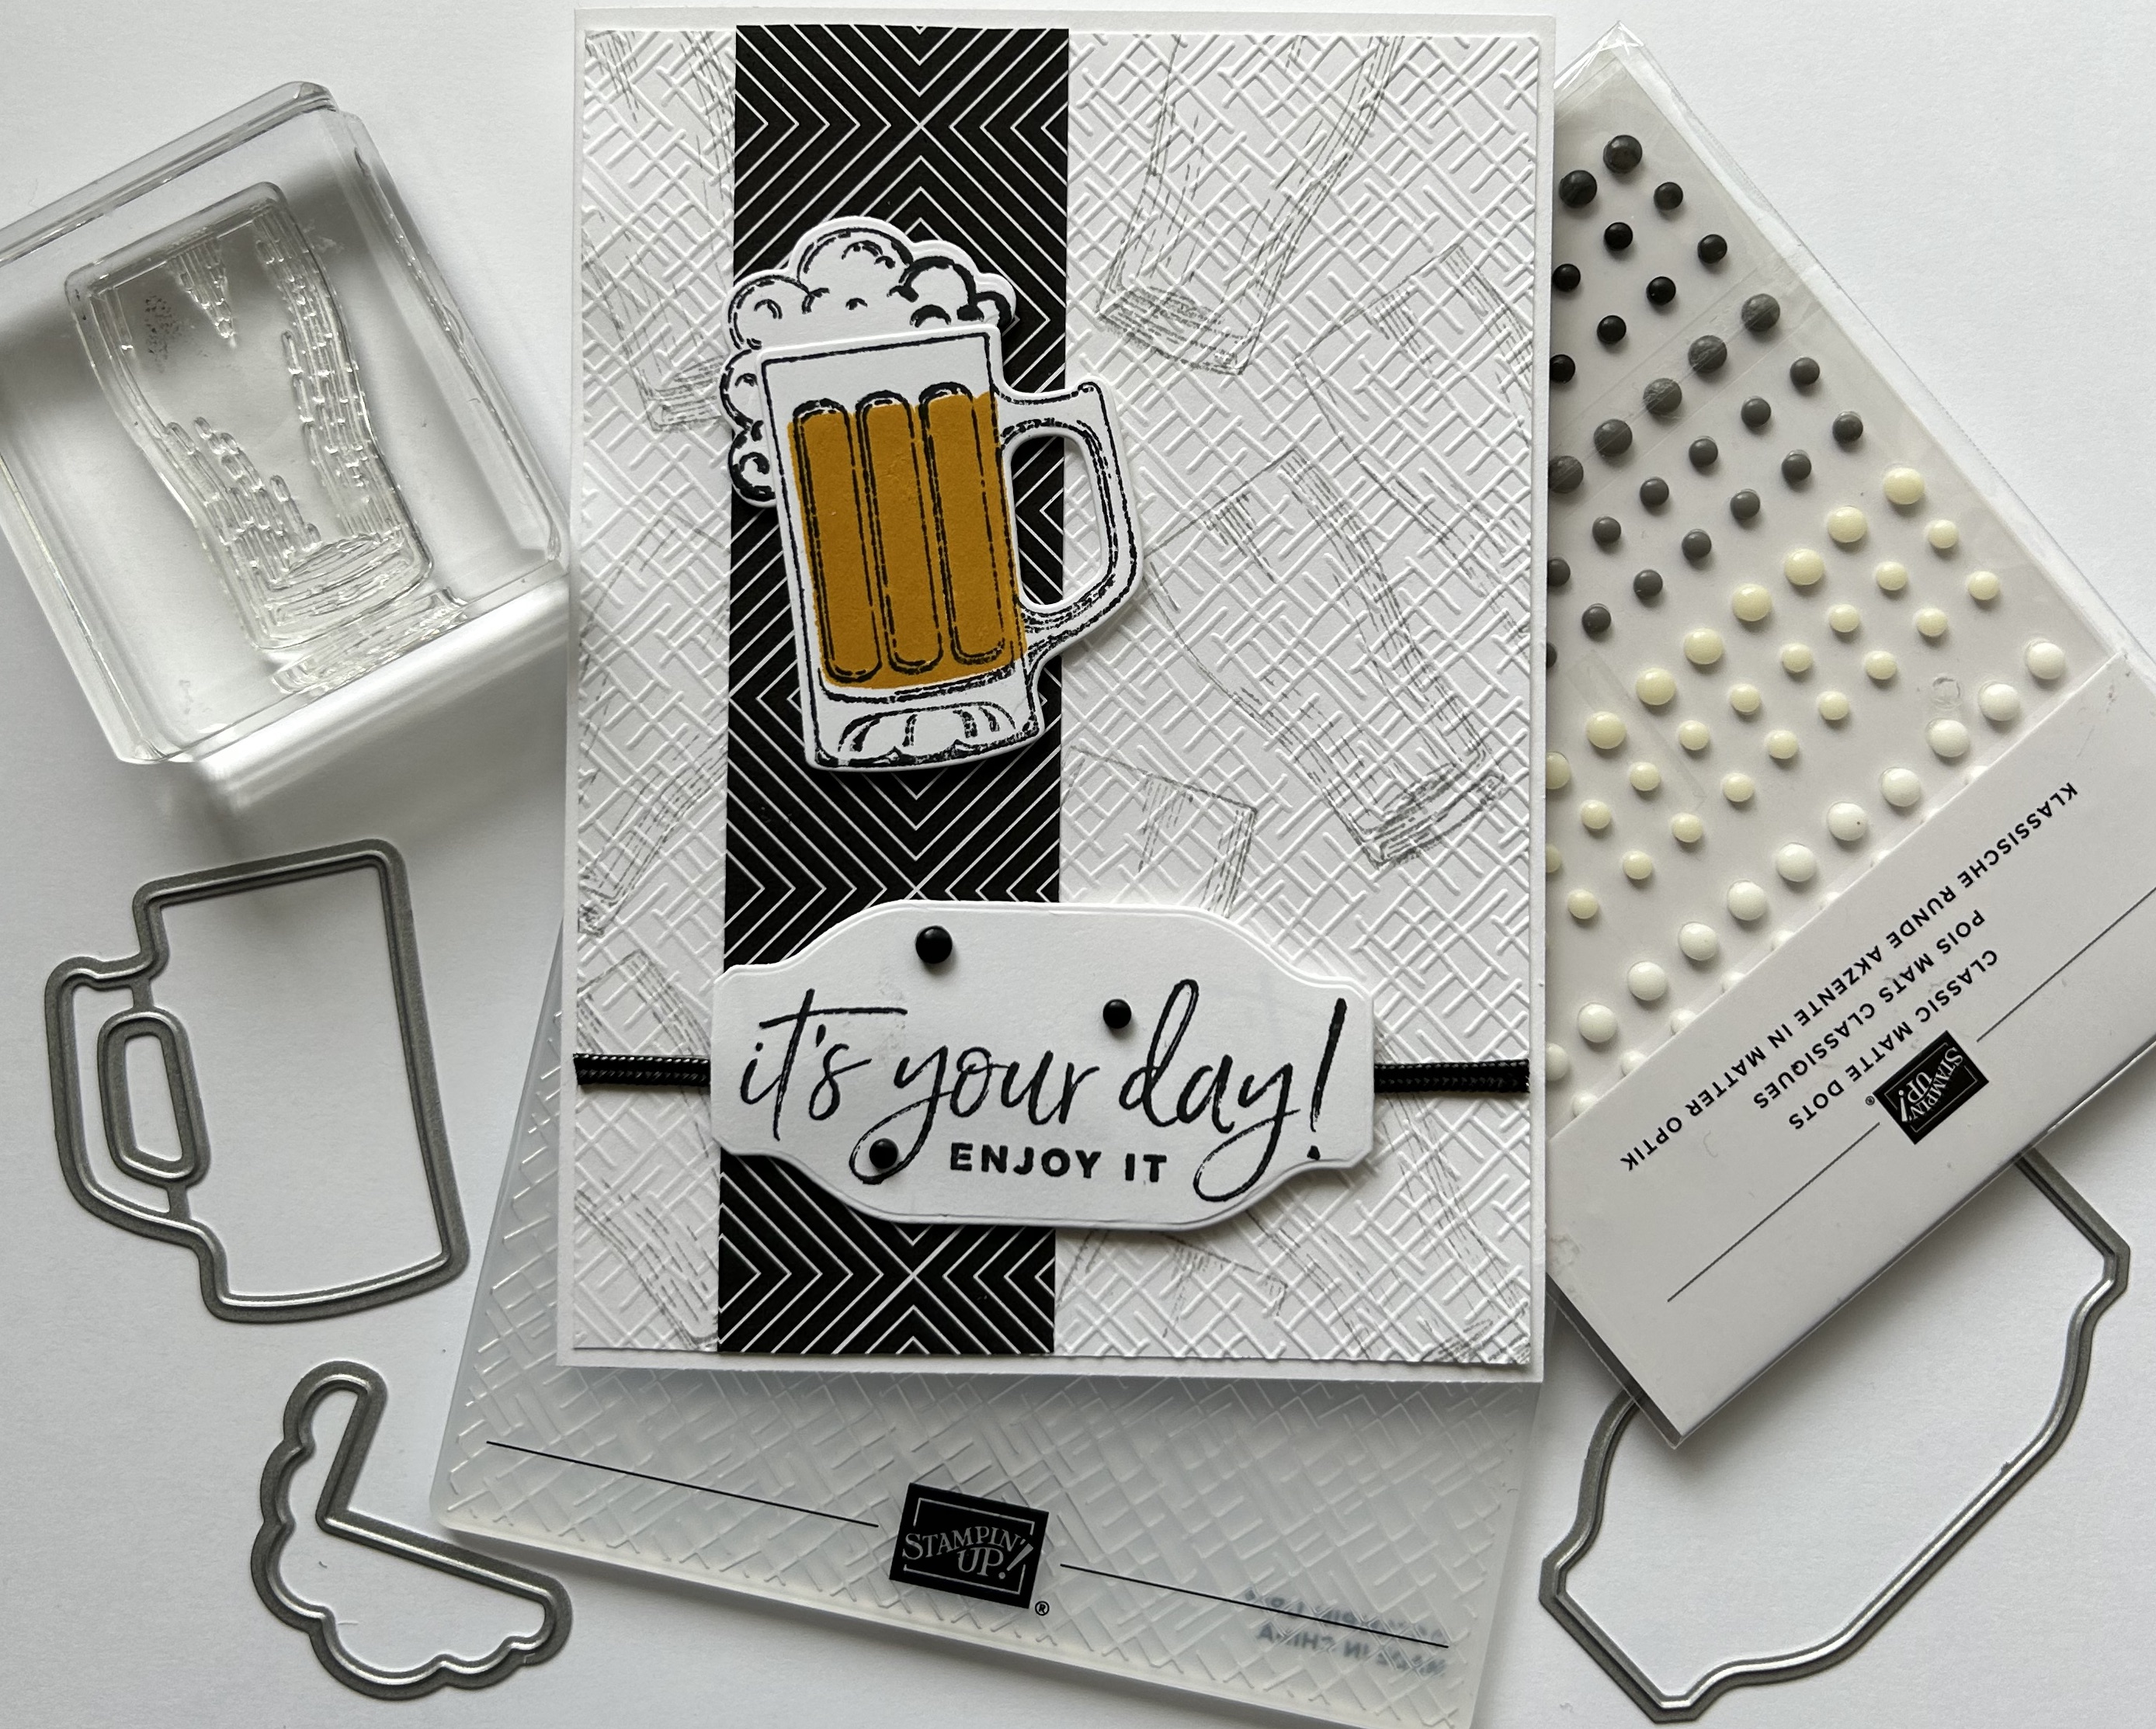
Brewed for You meets Happiest of Birthdays

   Welcome to my blog

and  thank you for joining me today!

Happy Birthday Bill


Mostly monochrome with a touch of Crushed Curry & smoky slate

Materials required for this card are:

Card Stock: basic white
Designer Series Paper: *all together
Dies: brewed, something fancy
Embossing Folders: basics 3D
Ink: crushed curry, memento black, smoky slate
Stamp Sets: brewed for you, *happiest of birthdays
Accessories: *black cord, classic matte dots
 * = no longer available
  1. Start with a base card 14.5 x 21 scored at 10.5, white layer 10 x 14, cut offs for stamping
  2. stamp the beer glass randomly over the white layer using smoky slate stamped off once
  3. emboss this layer using the folder
  4. adhere a strip of the dsp down the left hand side 3.5 x 14 using liquid glue
  5. attach the black cord using tear & tape to the same layer then adhere to the base card using liquid glue
  6. stamp the sentiment and beer jug pieces (stamp the crushed curry at least 3 times) to get a good beer colour
  7. die cut all these pieces and attach to the card using dimensional pads
  8. add the matt dots
Hope you liked today's card. If you would like more information on how to make it, please don't hesitate to contact me, I'd love to hear from you.

If you wish to buy any of the items used, go to contacting me at the top of the page for details on how to order.

Will be back again soon with more cards, in the meantime take care and have a great day.
Annette 😘

Saturday, July 17, 2021

Happiest of Birthdays and more!

 Thank you for joining me today!

This is the first of 2 posts today, some day's are busier than others, don't you think! 

Happy 8th birthday Kayden, love you loads!!
 

I didn't know what to do for Kayden this year, so did my usual and looked on Pinterest.  I found one by Debbie Reemtsen I liked, so this is my version using almost all the same products, but getting a different look. So thank you Debbie.

Materials required for this card are:

Card Stock: basic white, *galvanised metallic, granny apple green, pacific point, pumpkin pie, real red 
Dies: *beautiful brushstrokes, stitched stars
Embossing Folders: painted texture 3D
Ink: pacific point
Punches: banner pick a punch
Ribbon: *black cord
Stampin' Markers: granny apple green, pumpkin pie
Stamp Sets: Happiest of Birthdays

The eighth was computer generated, and the black cord was used to hide the line running through the middle as the card needed to be run through the embossing machine twice as it was bigger than the folder.
* = no longer available

Hope you liked today's card. If you would like more information on how to make it, please don't hesitate to contact me, I'd love to hear from you.

If you wish to buy any of the items used, go to contacting me at the top of the page for details on how to order.

Will be back again soon with more cards, in the meantime take care and have a great day.
Annette 😘

Tuesday, June 8, 2021

Happiest of Birthdays

 Thank you for joining me today!

Happy birthday Kevin

This is one of the best birthday stamp sets I've had, I love this big stamp.


I've created a monochromatic card, I just love black and white cards, don't you?
It's a quick and simple card to put together and is aimed at a beginner who want's to try the next level of card making as heat embossing is used.

Materials required for this card are:

Card Stock: basic black, basic white
Designer Series Paper: *true love
Dies: stitched with whimsy (rectangle 1)
Embossing Powder: black
Ink: versamark
Punches: detailed trio
Ribbon: glittered organdy
Stamp Sets: happiest of birthdays
Accessories: *black rhinestones
when using layering dies (1) is the smallest

Hope you liked today's card. If you would like more information on how to make it, please don't hesitate to contact me, I'd love to hear from you.

If you wish to buy any of the items used, go to contacting me at the top of the page for details on how to order.

Will be back again soon with more cards, in the meantime take care and have a great day.
Annette 😘

Sunday, January 17, 2021

Happiest of Birthday's meets Twinkle Twinkle

 Hello and welcome to my haven in a hectic world!

Thanks for joining me today!

This is the 1st of 3 cards for today 😊

Happy Birthday Heather

Trying a Sunday Sketches layout from the stamps to die for blog!


It's a quick and easy card to make, I created the background using blending brushes, i just love using these.

Materials required for this card are:

Card Stock: pool party, whisper white
Designer Series Paper: *twinkle twinkle
Dies: Stitched so sweetly
Ink: misty moonlight, pool party
Punches: banner pick a punch
Ribbon: *glitter (pool party)
Stampin' Blends: pool party (for rhinestones)
Stamp Sets: happiest of birthdays
Accessories: basic rhinestones, blending brushes 
* = retired, 

Hope you liked today's card. If you would like more information on how to make this card, please don't hesitate to contact me, I'd love to hear from you.

If you wish to buy any of the items used, go to contacting me at the top of the page for details on how to order.

Will be back again soon with more cards, in the meantime take care and have a great day.
Annette 😘

Delicate Whispers and more

Welcome to my blog and    t hank you for joining me today! Happy Anniversary to Sylvia & Bill Intermediate level - blending with a brush...