Welcome to my blog
and thank you for joining me today!
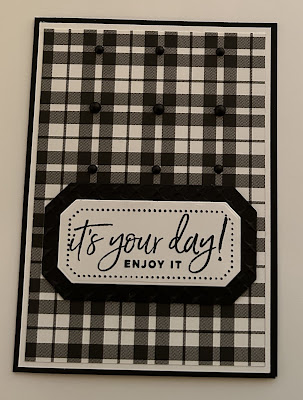
Happy Birthday Simon
Cased from Susan at mypassionforcards. die cutting, layering, stamping
With a mixture of old and new products. Not quite as easy as it looks
Materials required for this card are:
Card Stock: basic black & white
Bundles: countryside corners (3, 4)
Designer Series Paper: *plaid tidings
Embossing Folders: metal plate 3D
Ink: memento tuxedo black
Stampin' Markers: black (to ink up the rectangle dots)
Stamp Sets: *Happiest of birthdays
Accessories: *matte black dots
* = no longer available, when using layering dies (1) is the smallest
- Start with a base card 14.5 x 21 scored at 10.5, white layer 10 x 14, dsp layer 9.5 x 13.5, scrap black & white pieces for labels
- adhere the white layer to the base card using liquid glue, then do the same with the dsp layer.
- stamp the dotted rectangle and then stamp the greeting in the middle (I used a stamp-a-ma-jig) to line up the sentiment
- die cut the 2 rectangles
- emboss the black rectangle
- adhere the two rectangles together using seal+ tape
- attach the rectangles to the base card using dimensional tabs
- add the black dots
Hope you liked today's card. If you would like more information on how to make it, please don't hesitate to contact me, I'd love to hear from you.
If you wish to buy any of the items used, go to contacting me at the top of the page for details on how to order.
Will be back again soon with more cards, in the meantime take care and have a great day.
Annette 😘


No comments:
Post a Comment